To configure Claims Settings:
Custom Field
Custom fields capture data for you that is important to your Claims process but not already available by default. You can create any number of fields to suit your needs, and every field you add can be selected to appear in your Claim Types.
- On the left sidebar menu, click “Claim”.
- Click "Claim Settings".
- Use the toggle switch to view deleted Custom Fields. Click on the
 icon to restore deleted Custom Field if required.
 - Click "Custom Field".
- Click on the
 icon to create a new Custom Field.
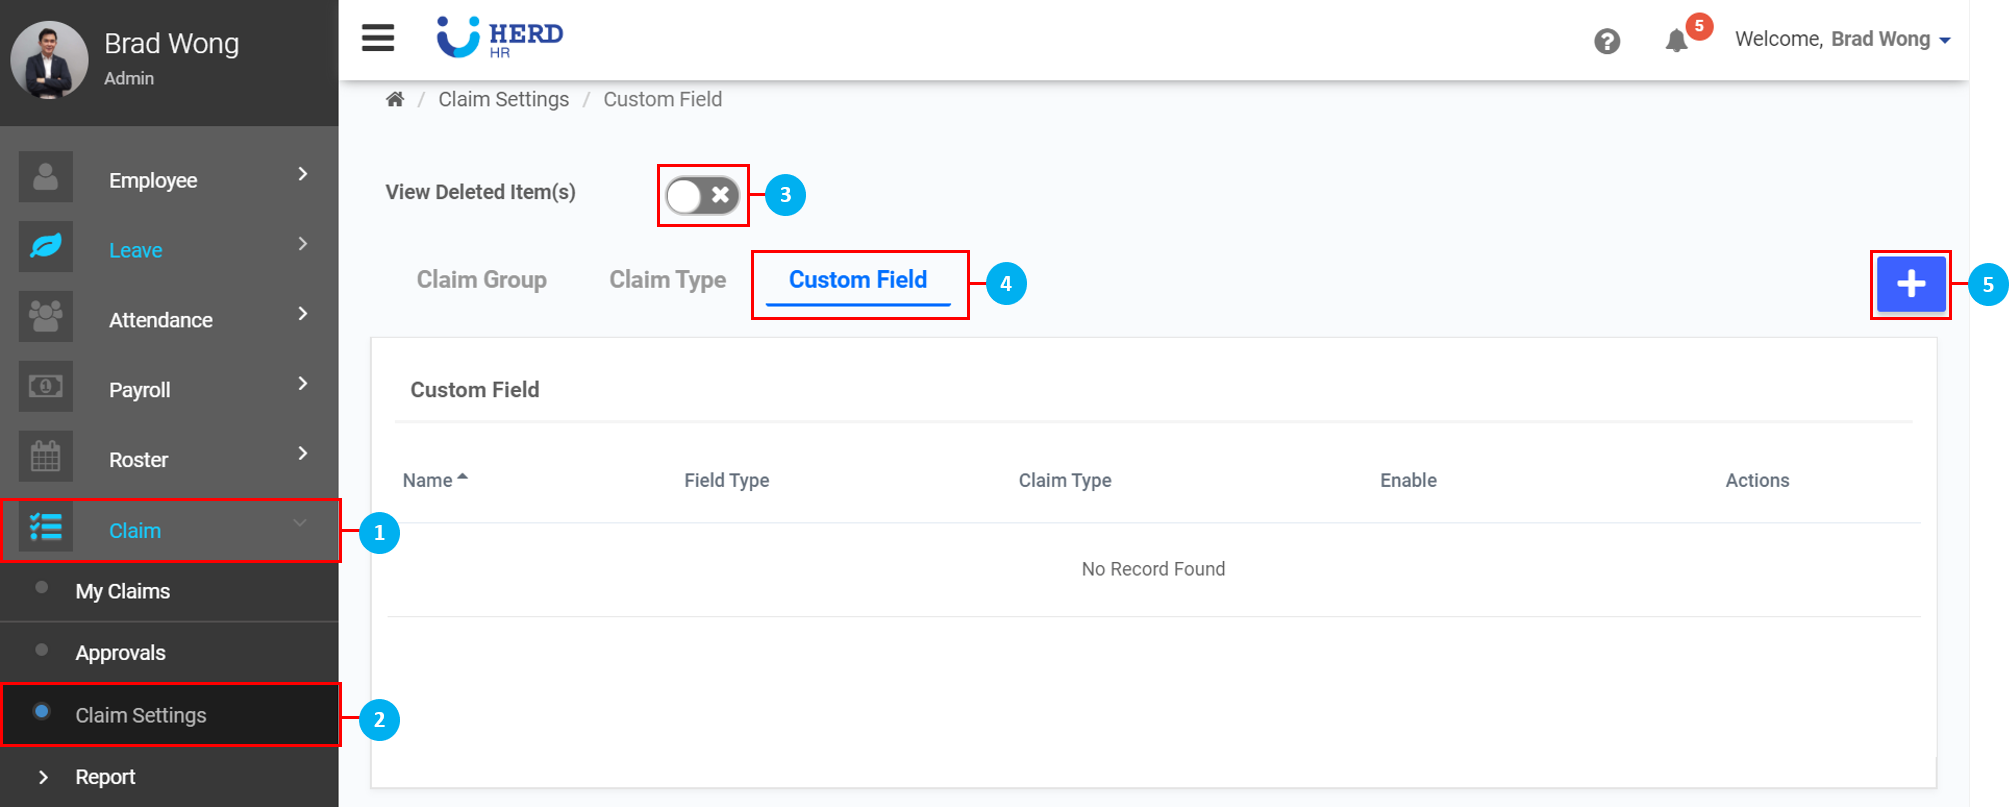
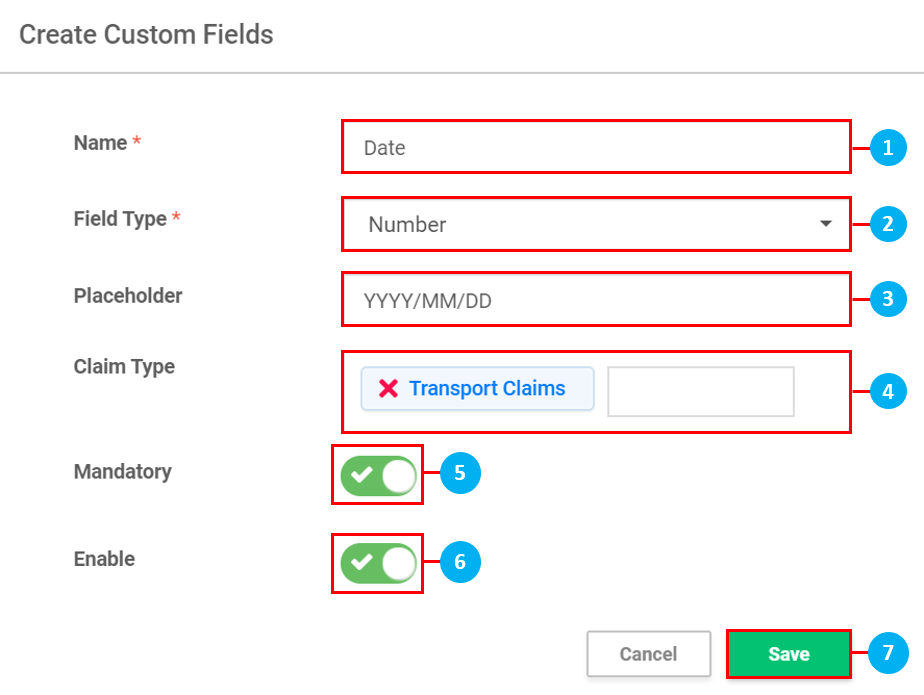
Create Custom Fields
- Type in the Name of the Custom Field you are creating.
- Select the Field Type (Textbox / Dropdown List / Number / Checkbox) from the drop down list. When Dropdown List is selected, the option to create multiple options will appear as below.
- When Textbox / Number are selected, an option to enter a Placeholder will appear. (*Note: A placeholder is a temporary string of text to prompt a user to enter either text or numbers in it's place, as seen within a Google search bar)
- Select a preexisting Claim Type to attach this Custom Claim Field to.
- Use the toggle switch to determine if this Custom Claim Field will be a Mandatory field for the claim type in Point 4.
- Use the toggle switch to Enable Custom Claim Field in the preexisting claim type it is tagged to in Point 4.
- Once done, click Save.
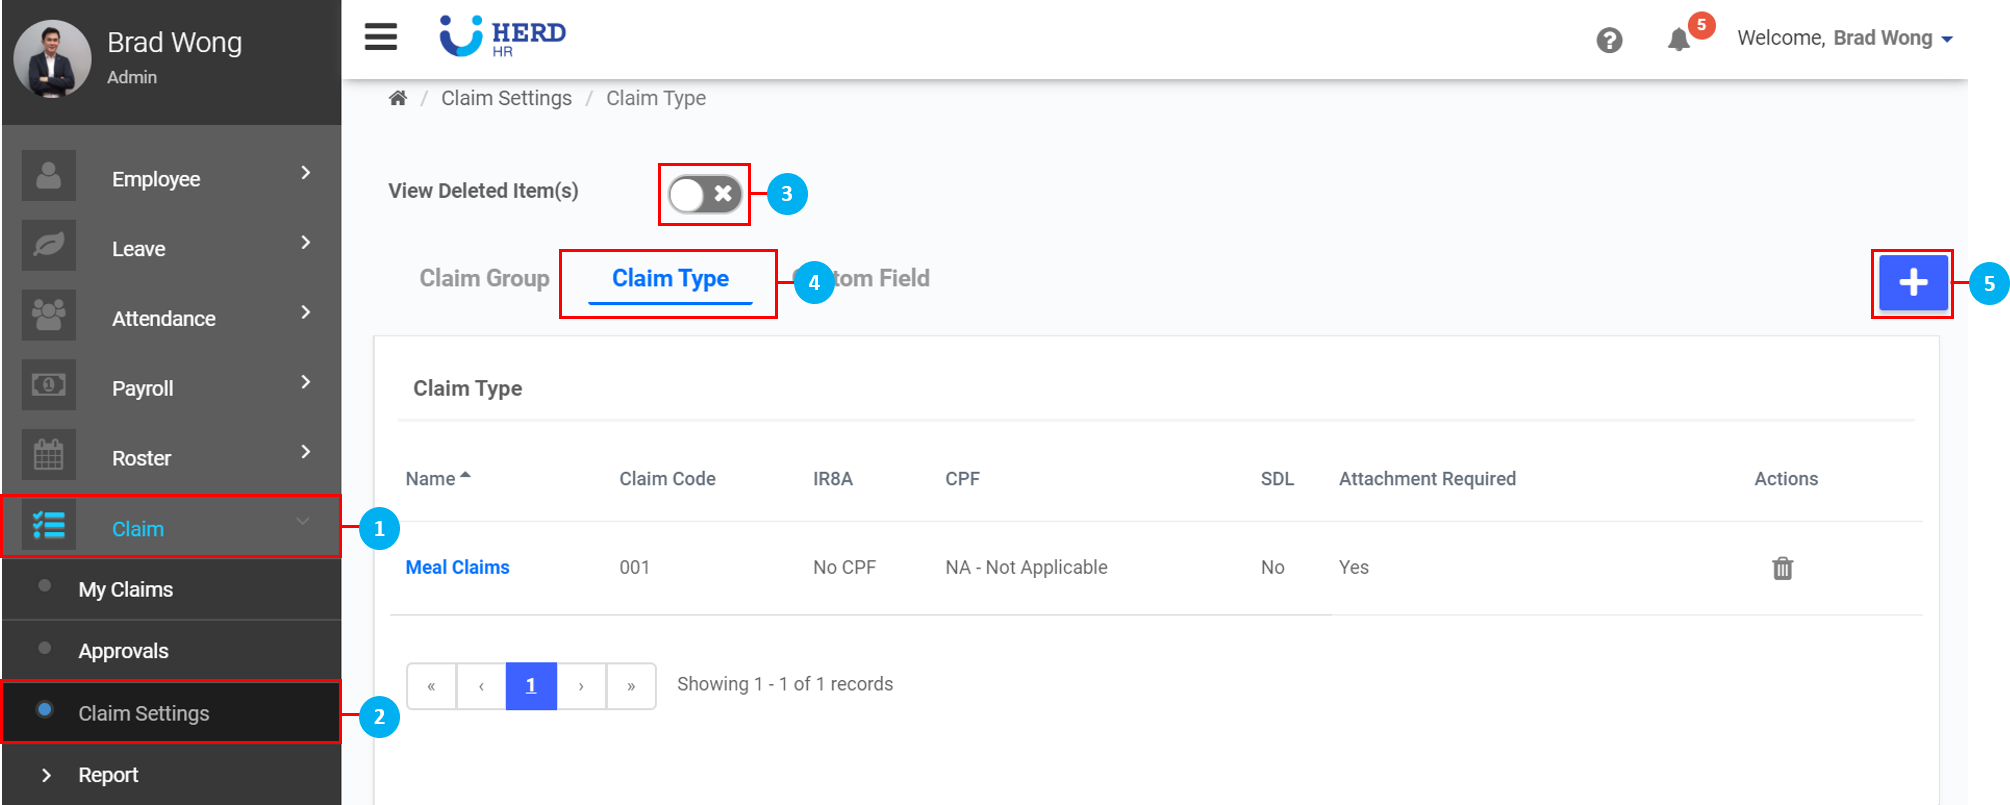
Claim Type
- On the left sidebar menu, click “Claim”.
- Click "Claim Settings".
- Use the toggle switch to view deleted Claim Types. Click on the icon to restore deleted Claim Type if required.
- Click "Claim Type".
- Click on the icon to create a new Custom Type.
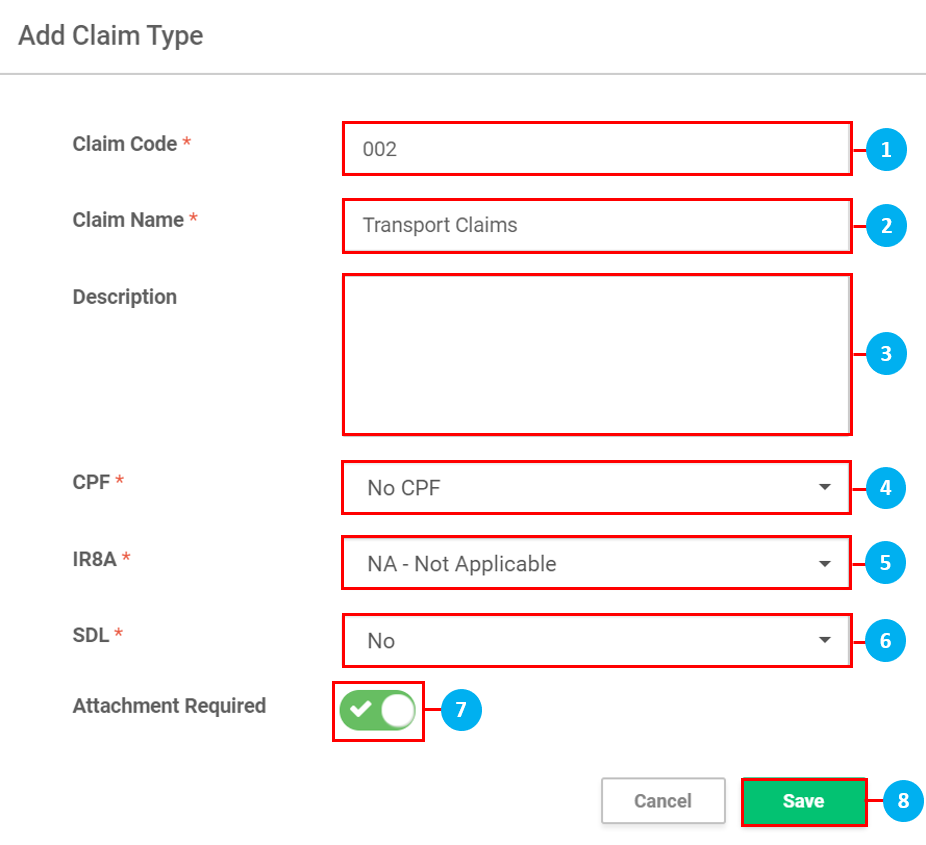
Create Claim Type
- Type in the Claim Code for the Claim Type you are creating.
- Type in the Claim Name for the Claim Type you are creating.
- Type in a Description if required.
- Select if there is CPF from the drop down list.
- Select if there is IR8A from the drop down list.
- Select if there is SDL from the drop down list.
- Select if an Attachment is required to be submitted.
- Once done, click Save.
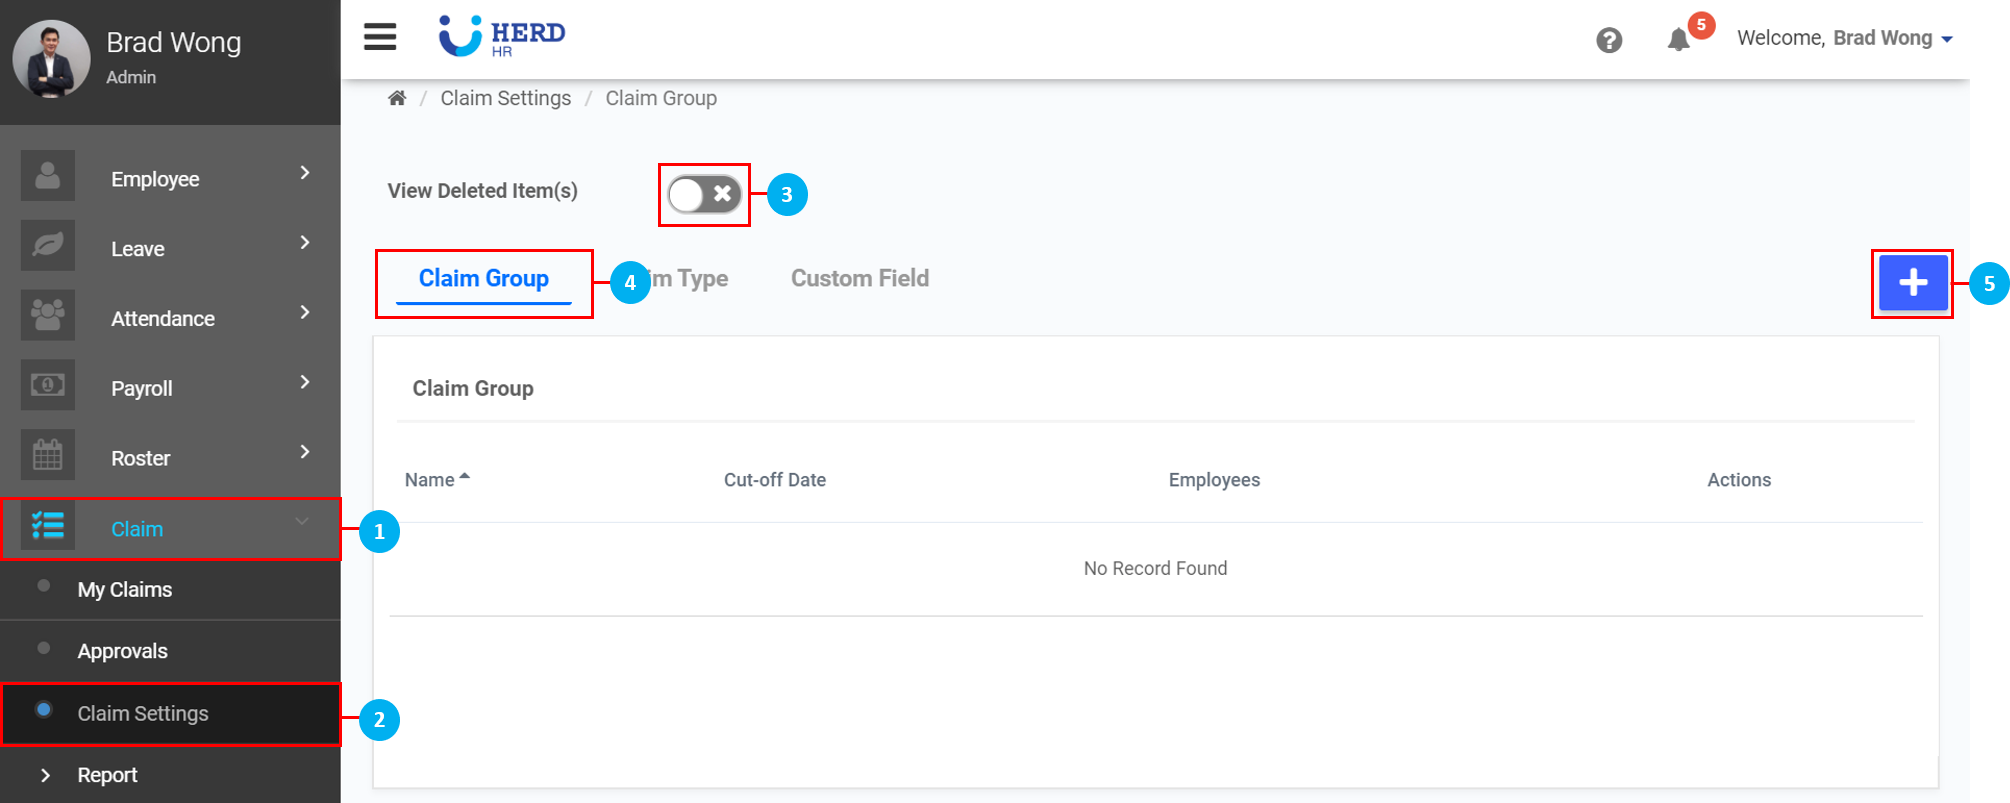
Claim Group
- On the left sidebar menu, click “Claim”.
- Click "Claim Settings".
- Use the toggle switch to view deleted Claim Groups. Click on the icon to restore deleted Claim Group if required.
- Click "Claim Group".
- Click on the icon to create a new Custom Group.
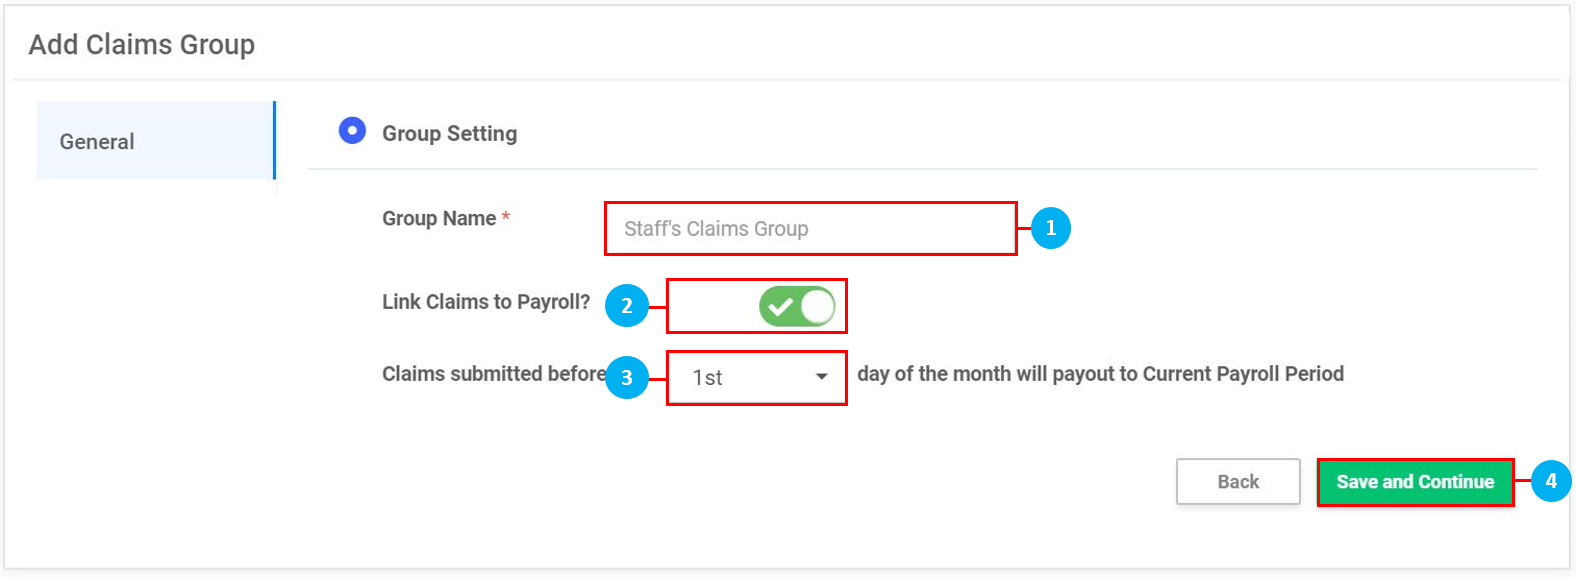
Create Claim Group
- Type in the Group Name for the Claim Group you are creating.
- Select if Claims are included in the Payroll calculations every month. (*Note: This option is turned on by default)
- Select the day of the month the Claims have to be applied for them to be paid out in the current payroll period. (*Note: If the day falls on the 29th, 30th and 31st of the month, select Last).
- Once done, click Save and Continue.
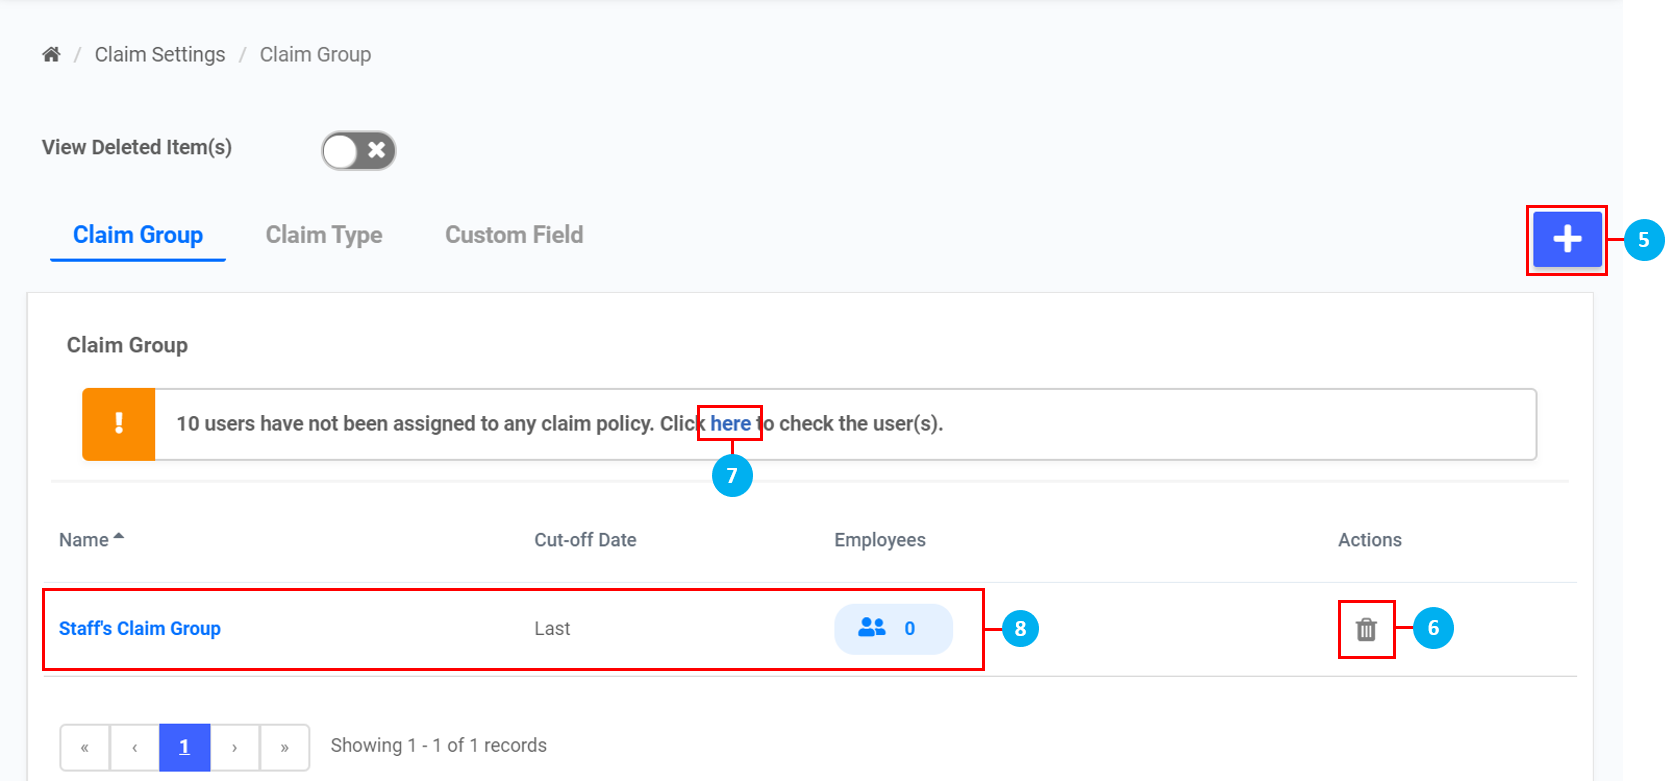
- Click on the icon to create more Claim Groups.
- Click on the
 icon to delete the Claim Group.
 - Click here to view a list of users who have not been assigned to any Claim Groups. (*Note: This is for information purposes only.)
- Click on the Claim Group to edit the settings of the Claim Group.
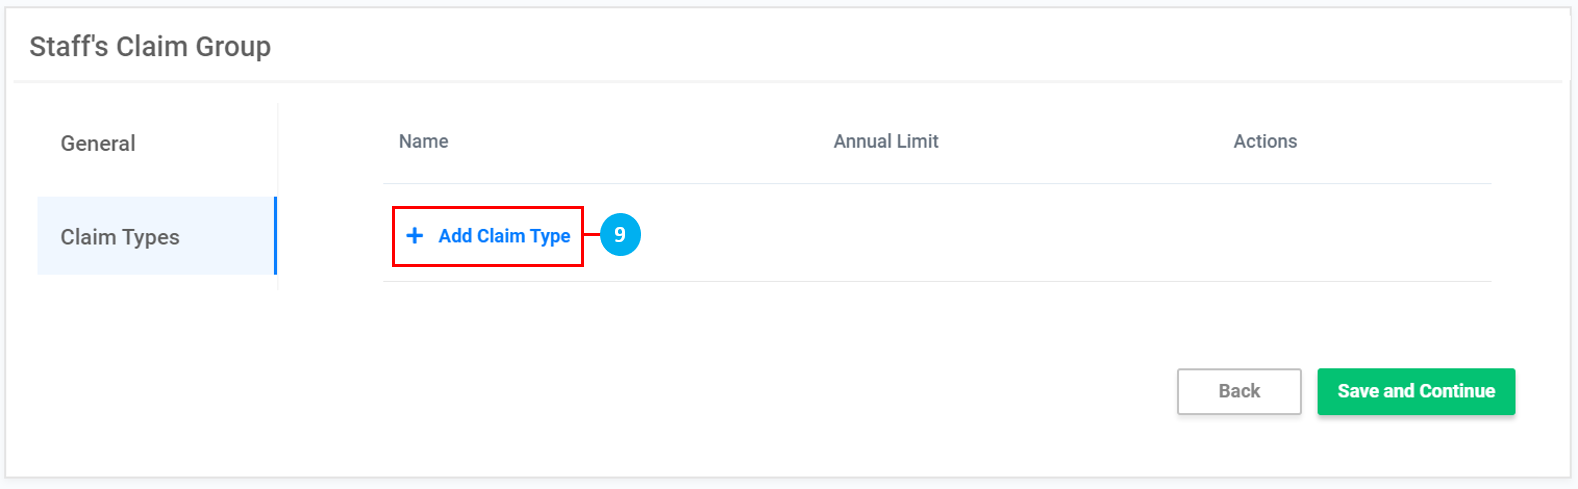
- Click on + Add Claim Type.
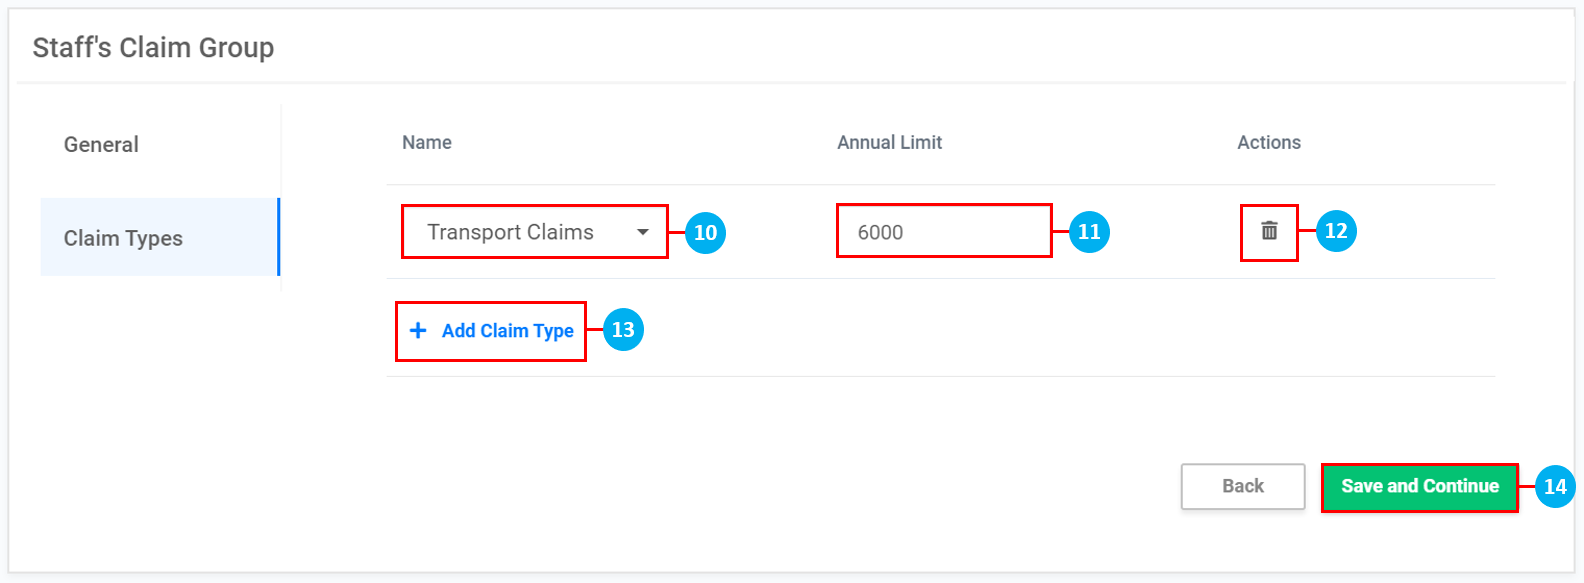
- Select a Claim Type from the preexisting list of Claim Types already created.
- Key in the Annual Limit of the Claim amount. (*Note: If Claim has a monthly limit, multiply that by 12)
- Click on the icon to delete the Claim Type if required.
- Click on + Add Claim Type to add more Claim Types to this Claim Group.
- Once done, click on Save and Continue.
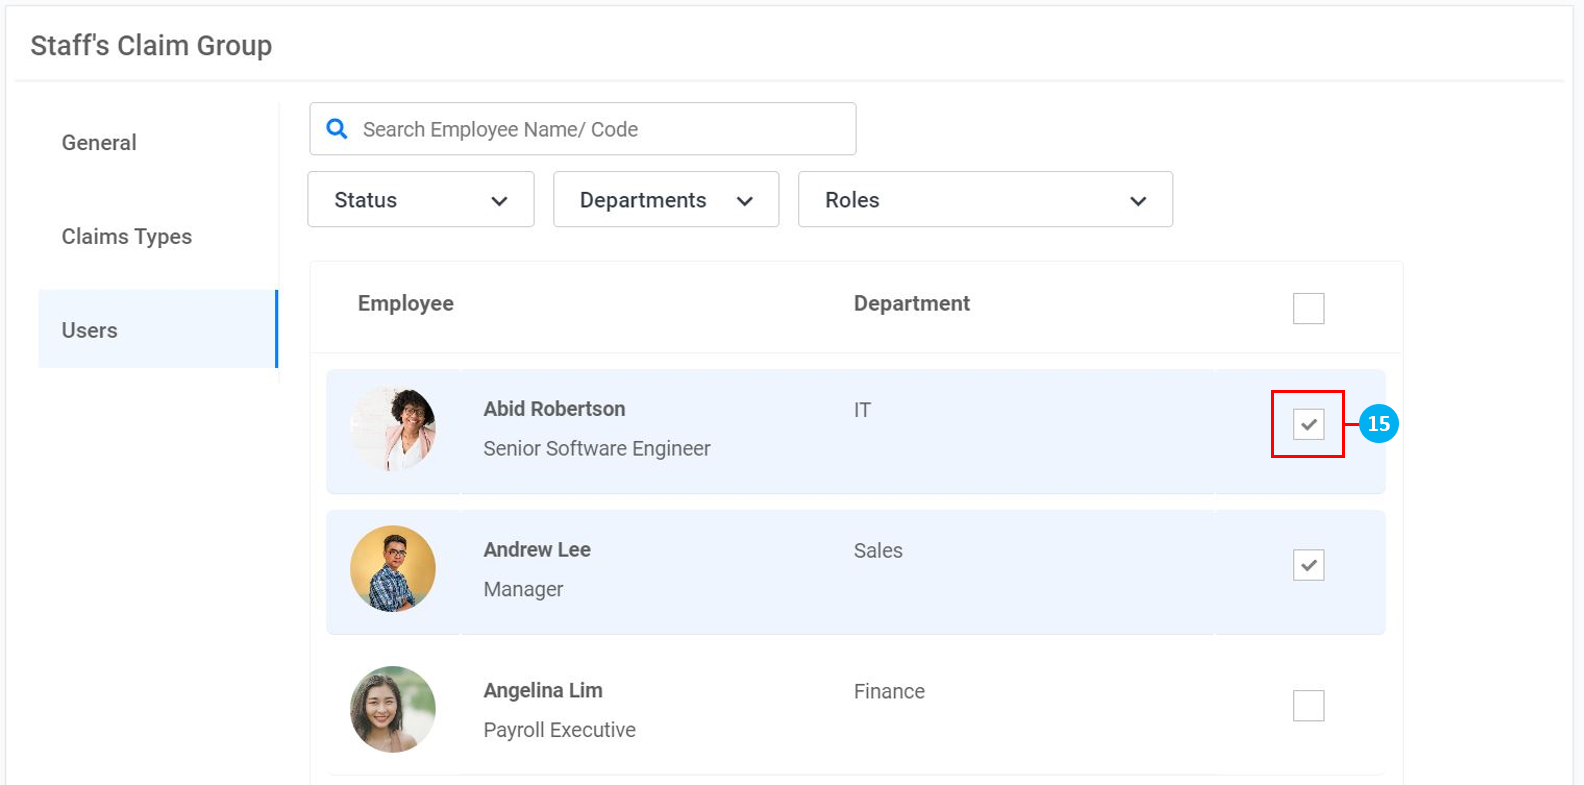
- Click to select the users to add to this Claim Group. Once done, click Save.