Shifts assigned to employee helps the system determine if they are early for work / leaving late from work, vice versa.
Configuring Shifts and Breaks
Adding Shifts
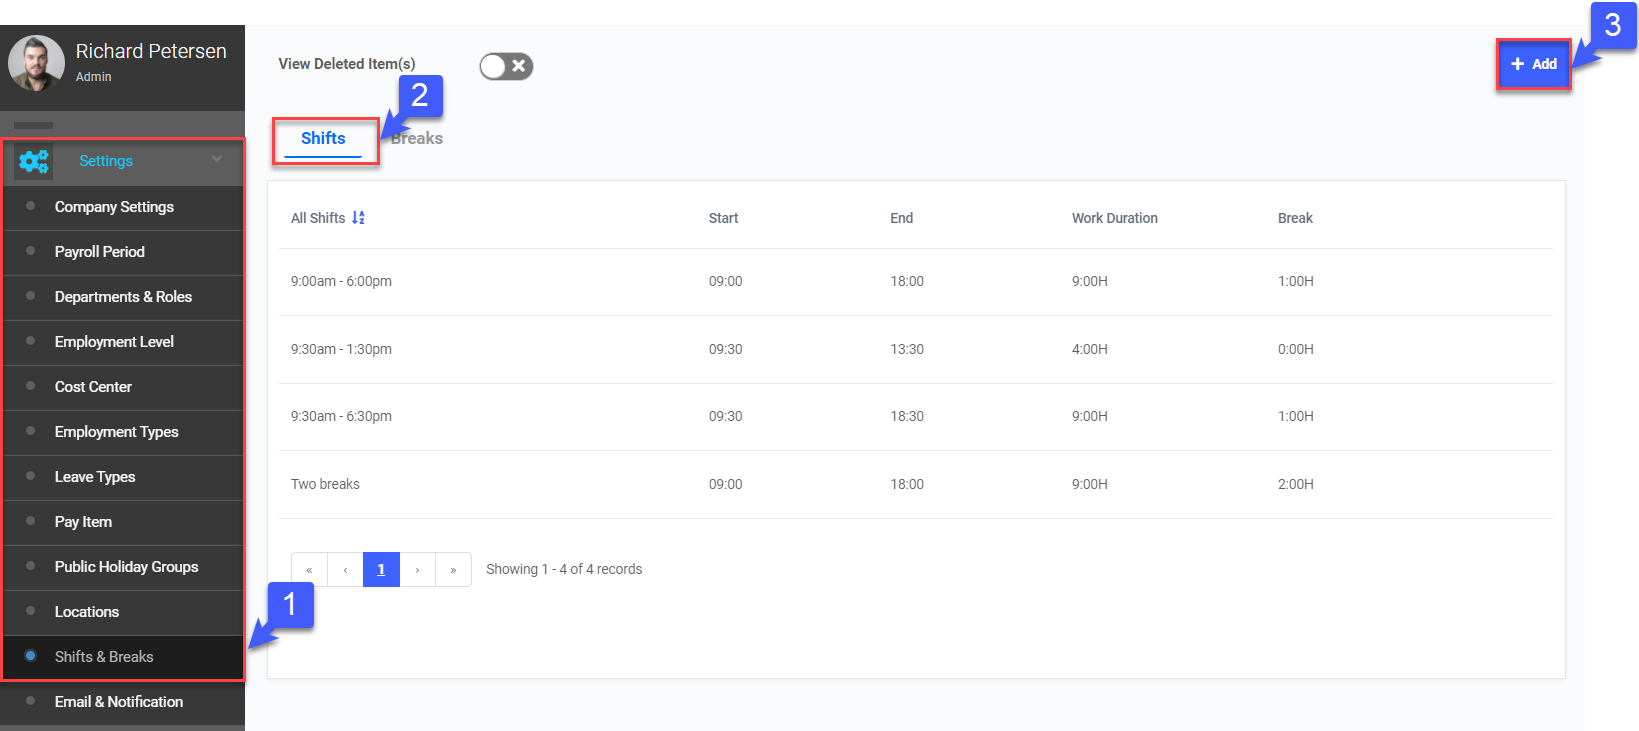
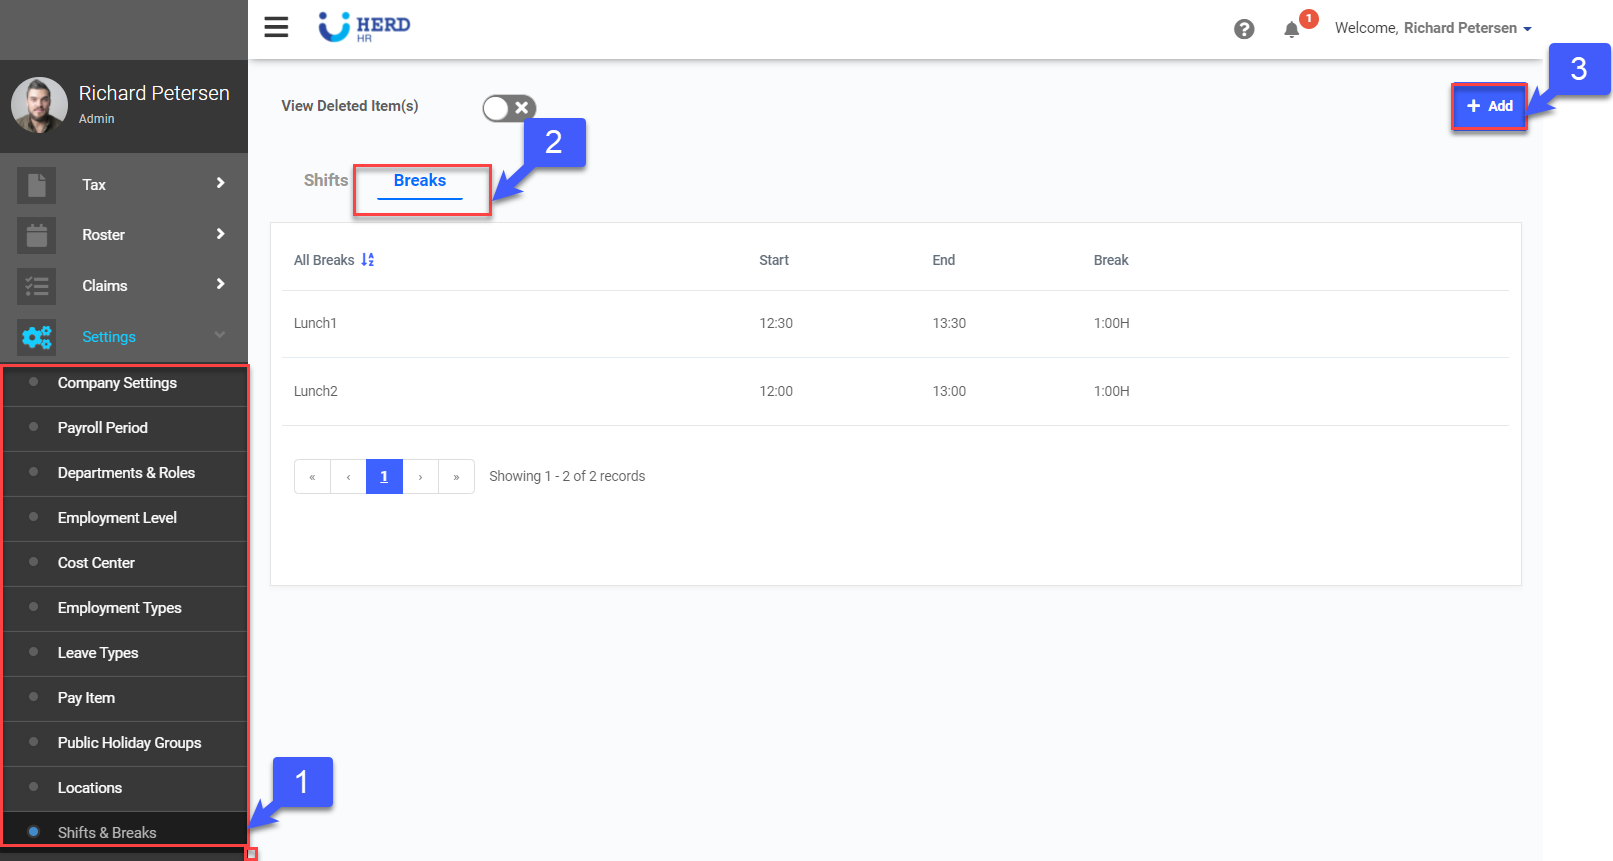
- On the left sidebar menu, Click Settings > Shifts & Breaks
- Click on Shifts tab
- Click + Add to add a new shift
- Key in Shift Name
- Enter Shift Code
- Select Shift Color
- Click
 to set Start and End Time of Shift
 - Select desired pre-set Available Break to add into the shift
- Click + Add to create more breaks, if required (Refer to Point 5 in Step 2)
- Click Save
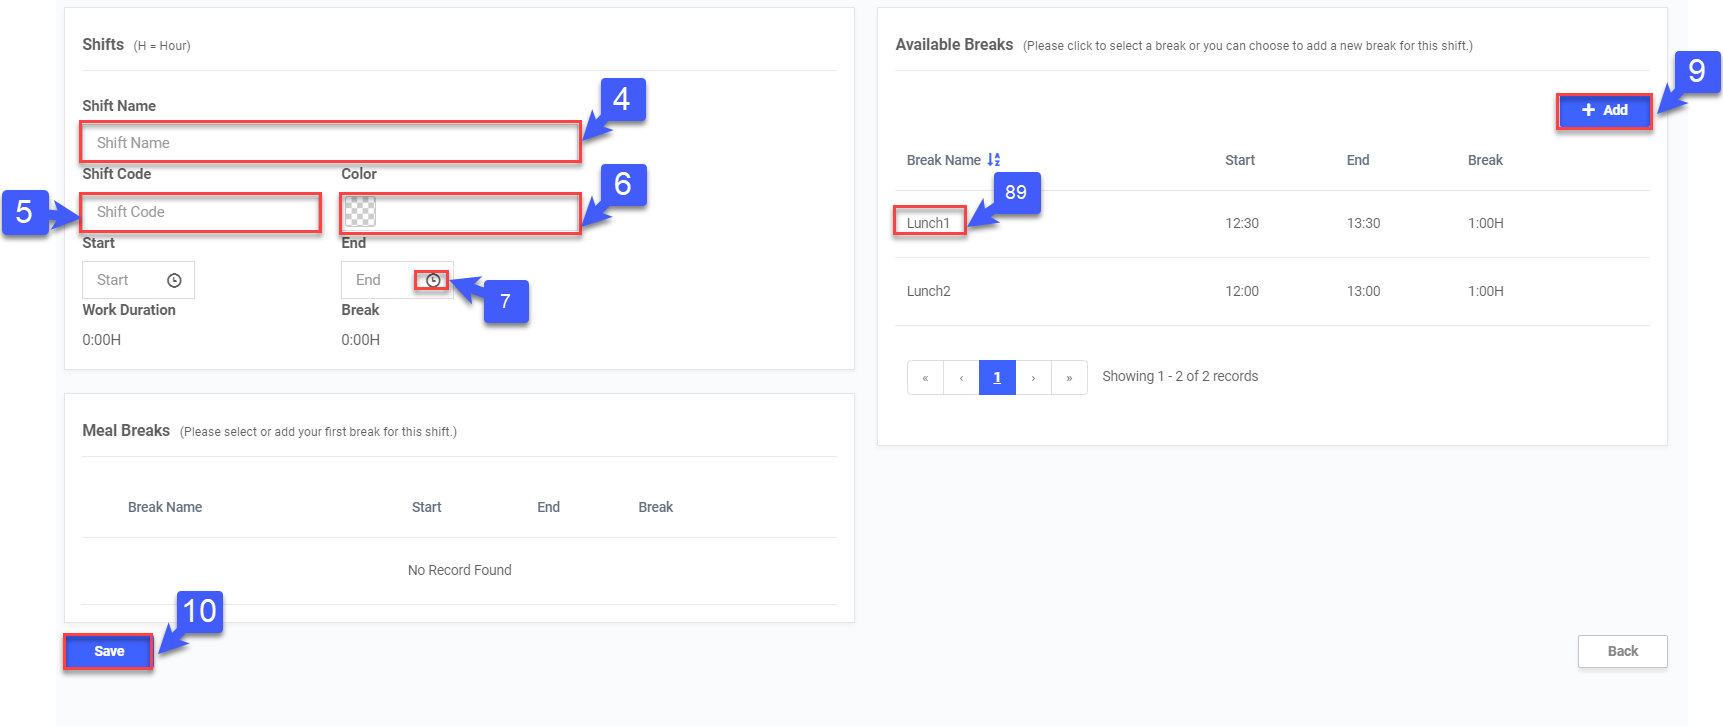
*Note: If Employee has a fixed schedule, his shift would have to be created here before it can be added to his attendance tab
Deleting Shifts
- On the left sidebar menu, Click Settings > Shifts & Breaks
- Click on Shifts tab
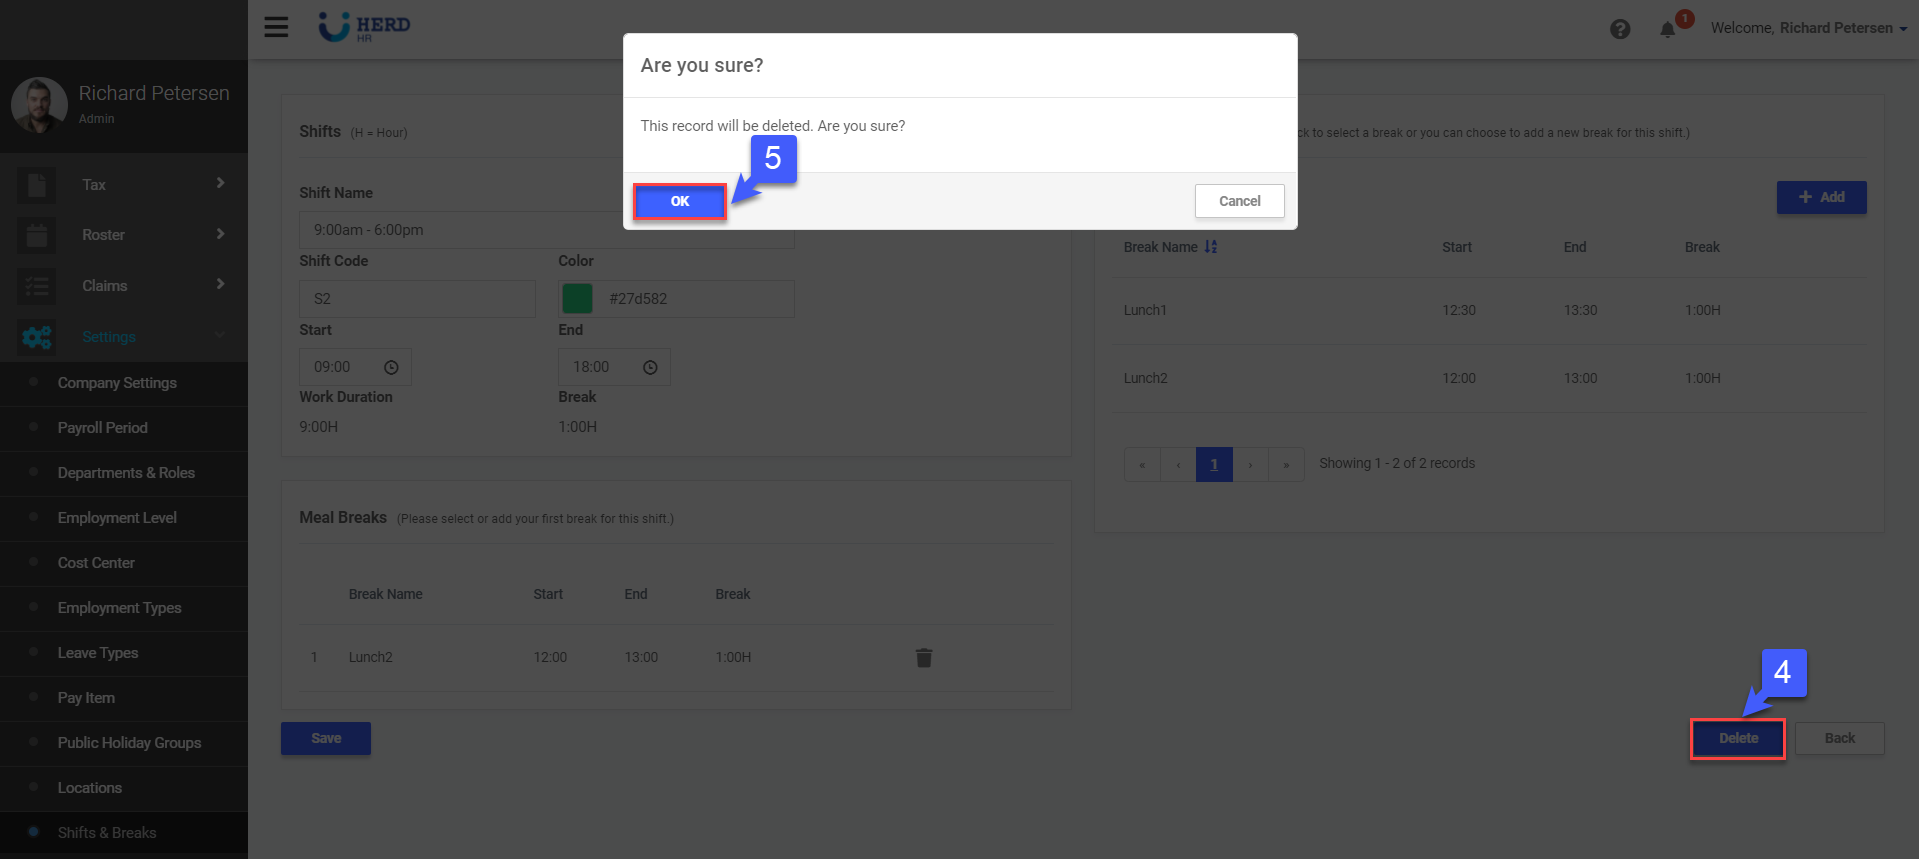
- Select the desired shift to delete

- Click Delete to remove shift
- Click OK to confirm
- Toggle View Deleted Item(s) to view deleted records, if required
- Click
 to restore deleted records, if required
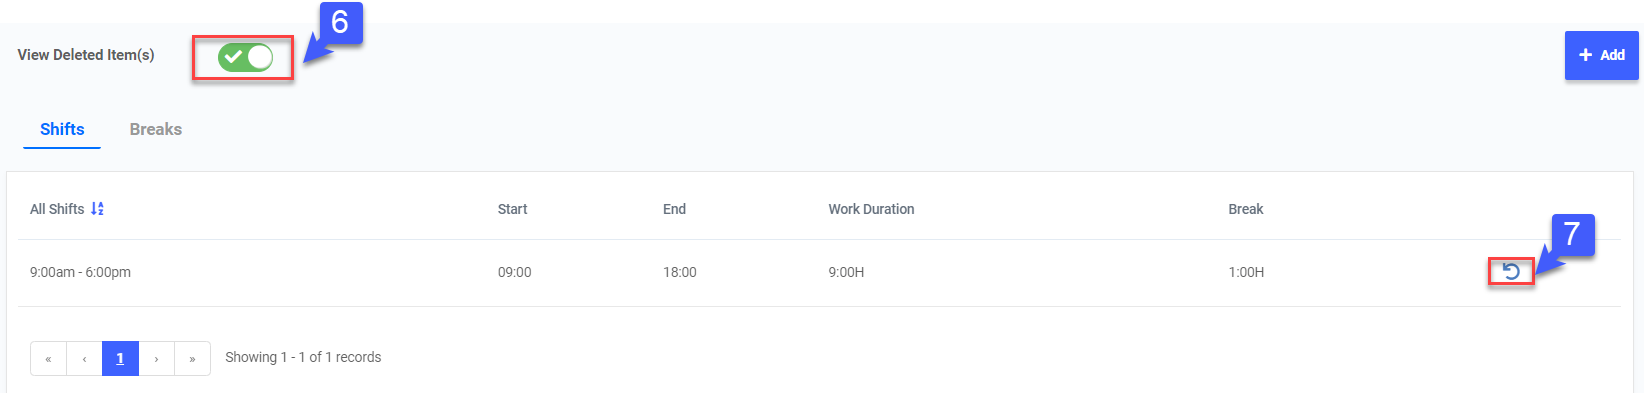
Adding Breaks
- On the left sidebar menu, Click Settings > Shifts & Breaks
- Click on Breaks tab
- Click + Add to add a new break
- Key in Break Name
- Click
 to set Start Time of Break
 - Click to set End Time of Break
- Click Save
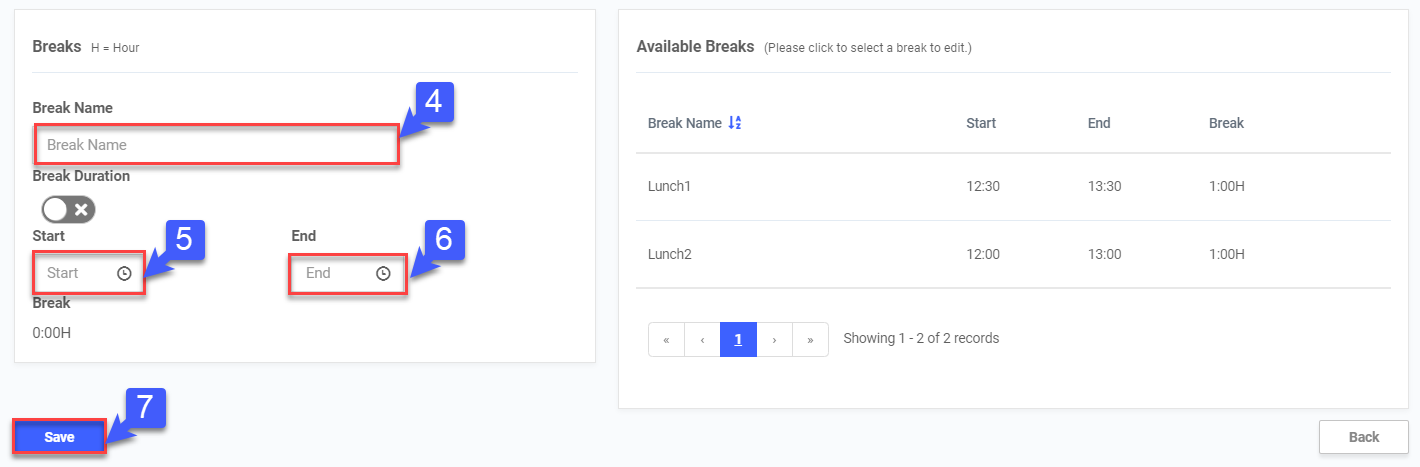
*Note: Instead of keying in Start and End Time of Break, you may toggle Break Duration and key in the duration of breaks in minutes.
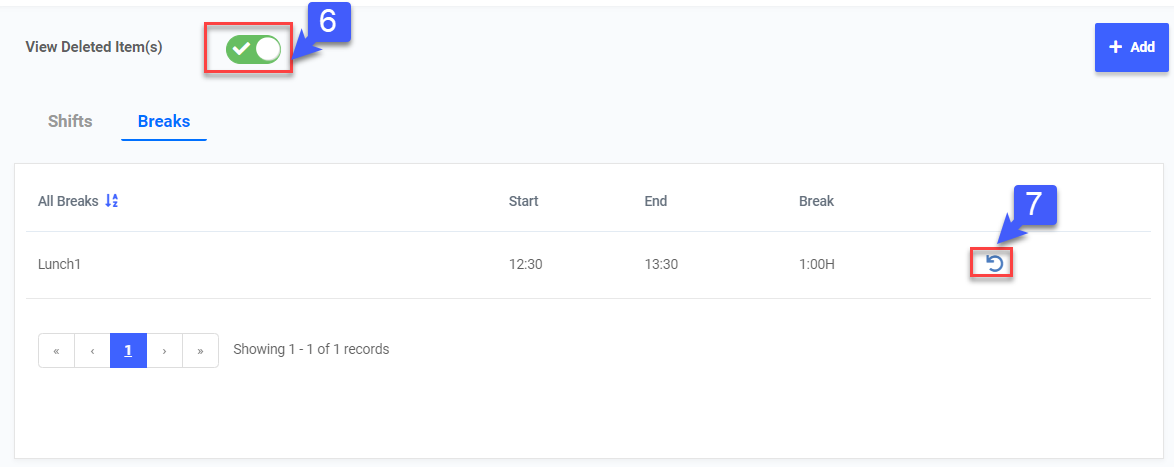
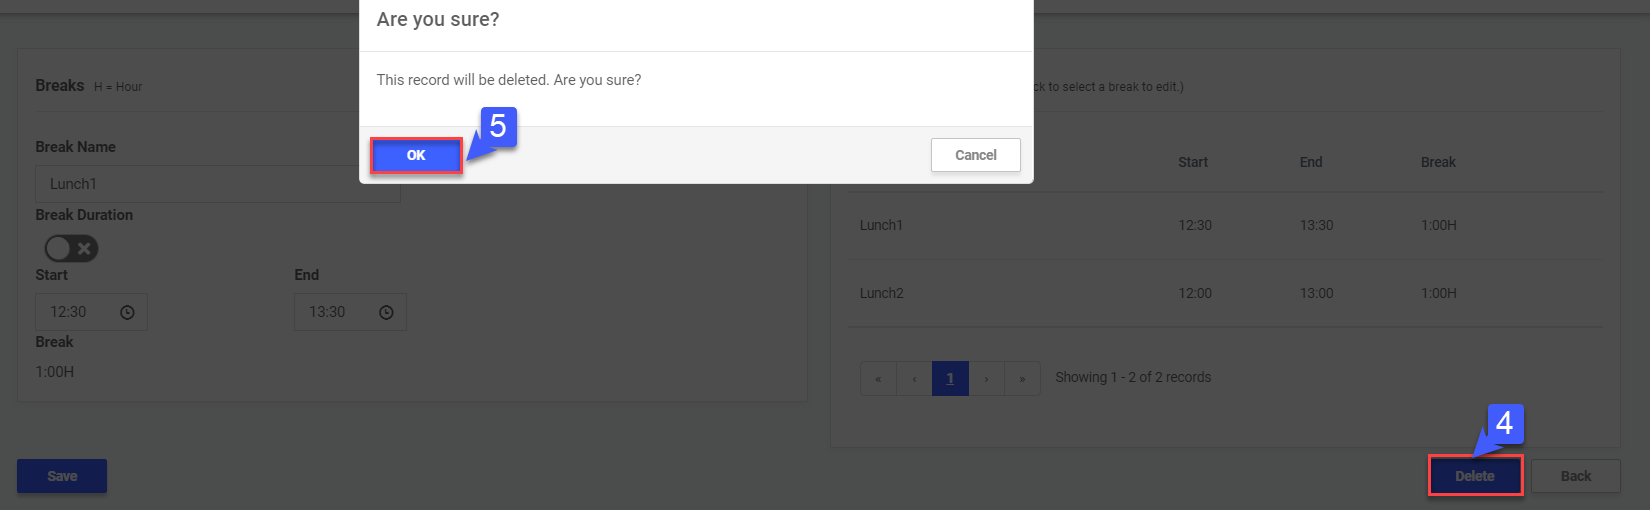
Deleting Breaks
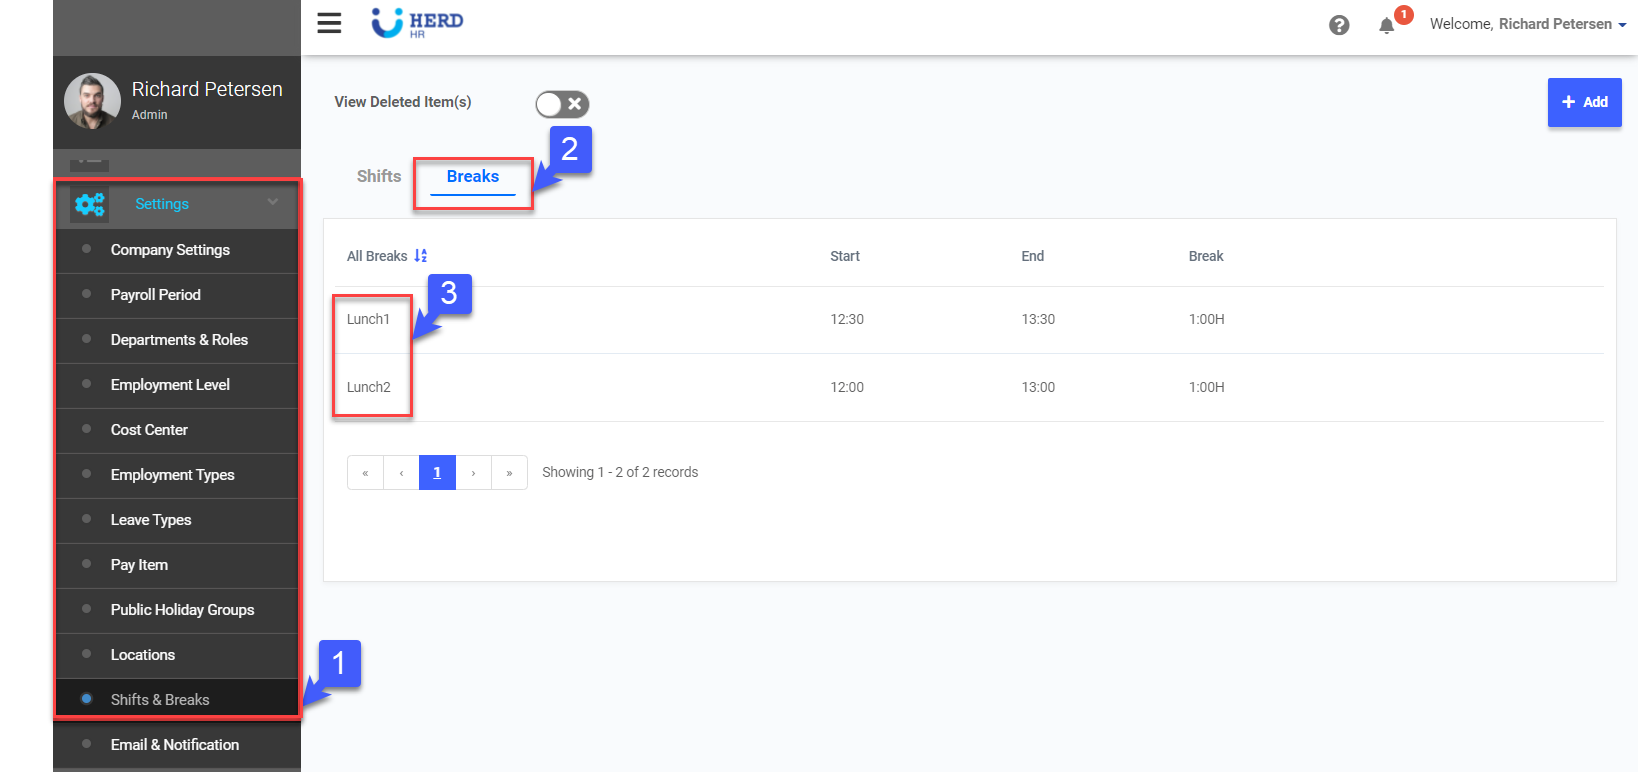
- On the left sidebar menu, Click Settings > Shifts & Breaks
- Click on Breaks tab
- Select the desired break to delete
- Click Delete to remove break
- Click OK to confirm
- Toggle View Deleted Item(s) to view deleted records, if required
- Click
 to restore deleted records, if required