Using Herd APP:
Home:
Explore:
Manage:
Leave Balance
Work Schedule
Notifications
Settings
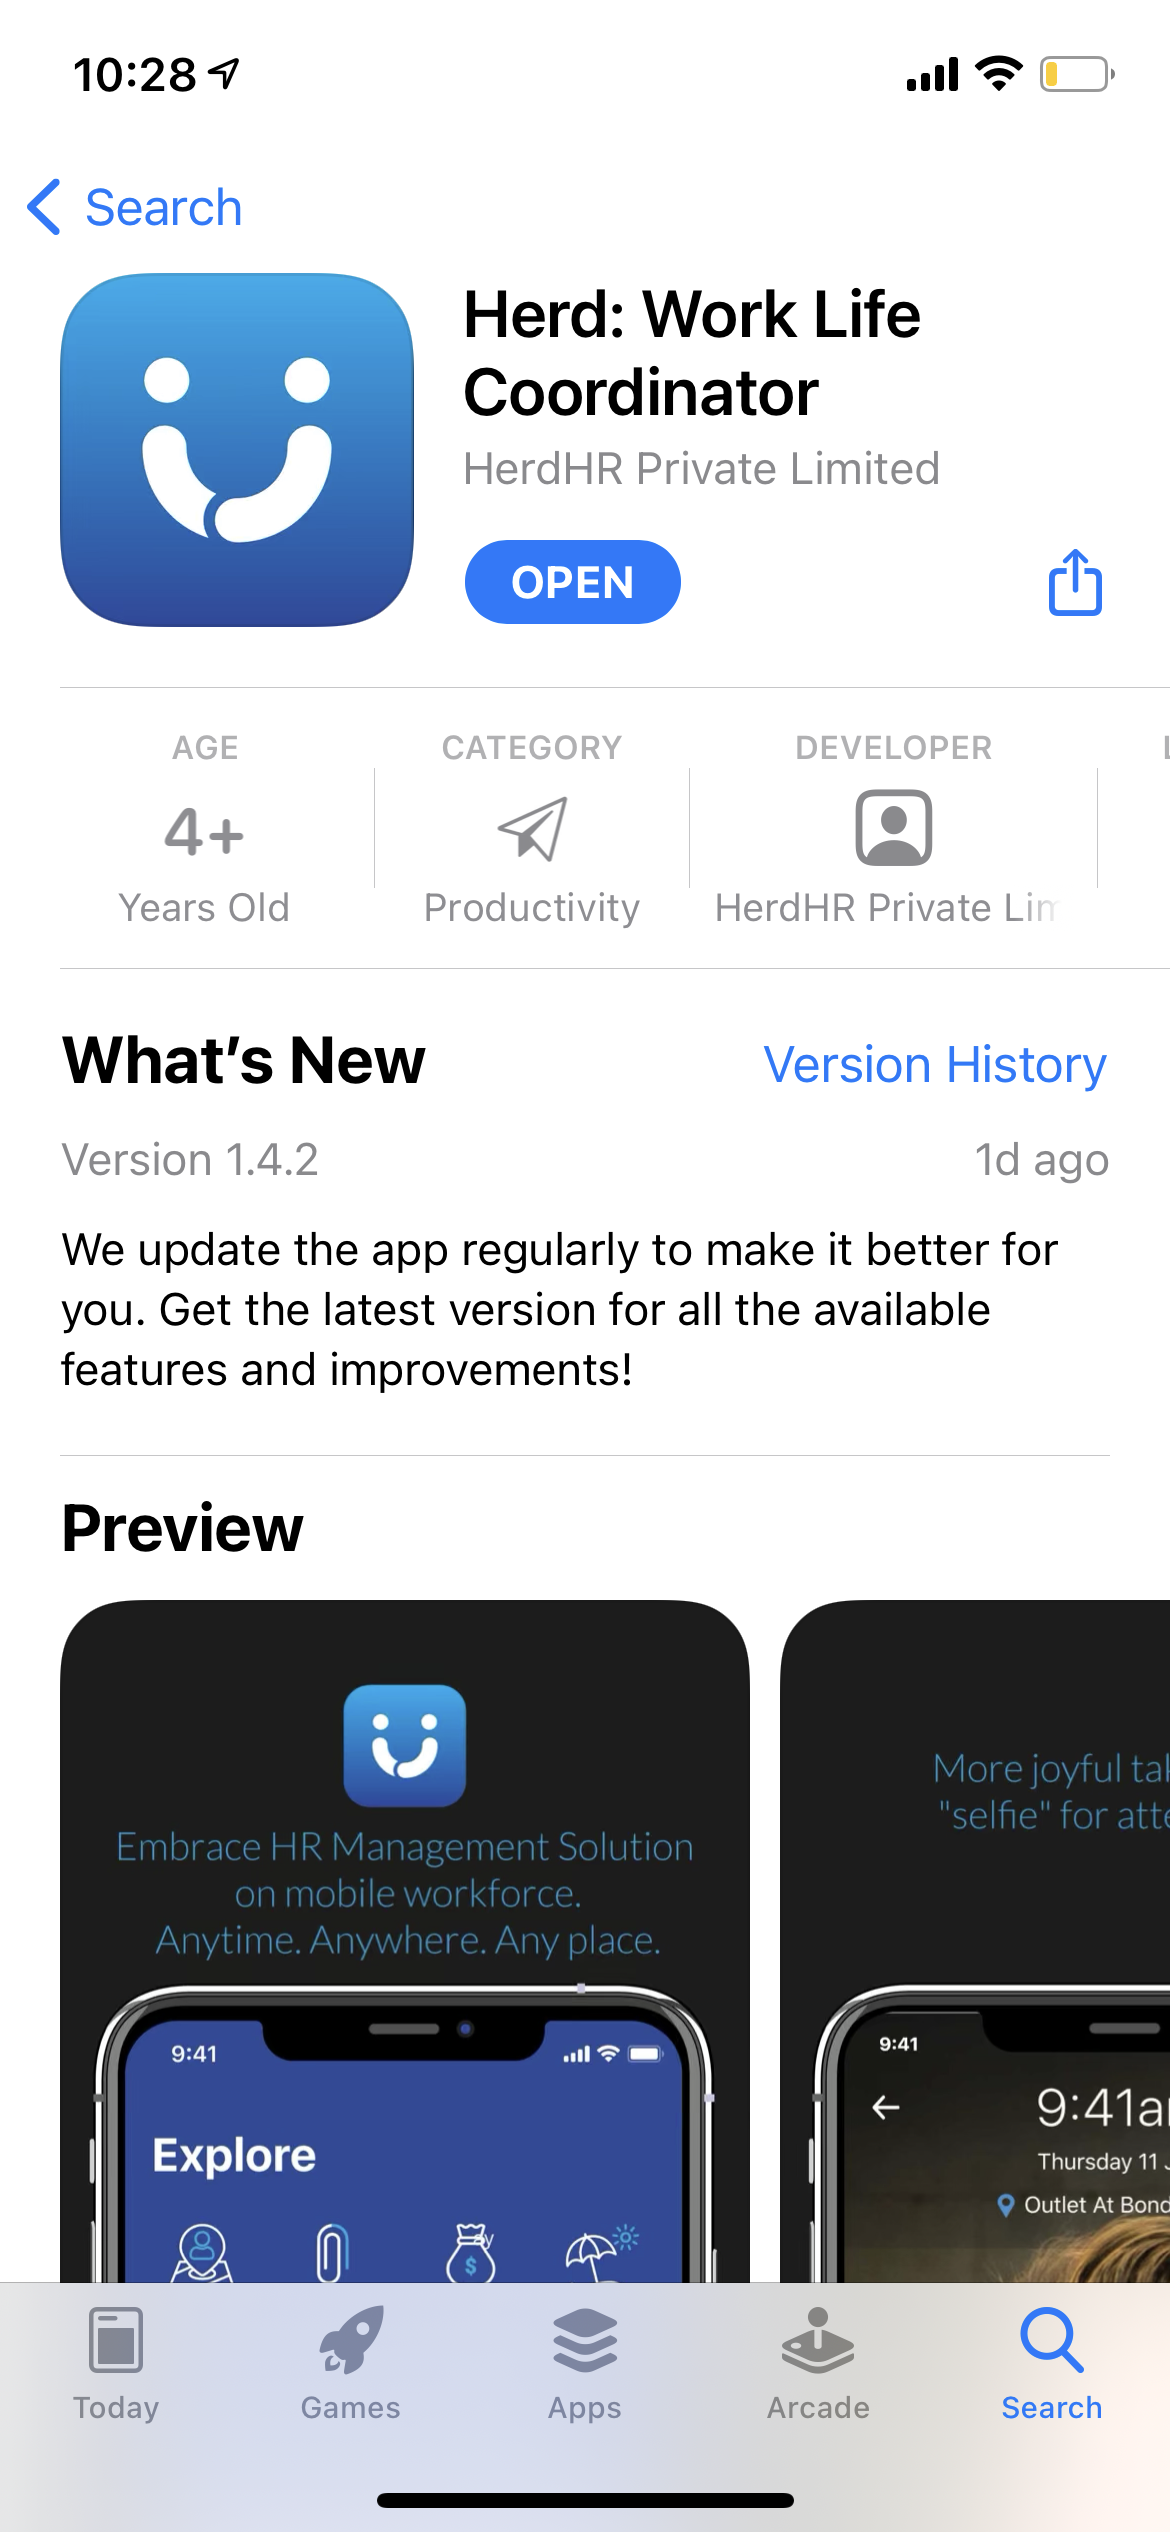
Download the Herd APP
- Download the Herd APP from the Apple App Store / Google Play Store / Huawei AppGallery.
Navigating the Herd APP
-
Sign in using your Herd account credentials which will be sent to you via email.
Hostname: herdhr <- Tenant Name (Not required when accessing Herd by clicking on the URL below.)
Email: sample@gmail.com <- Your working email address.
Password: G@H#H$JF <- Change this to something easy to remember once you log in.
- Tap on Sign In at the bottom of the screen.

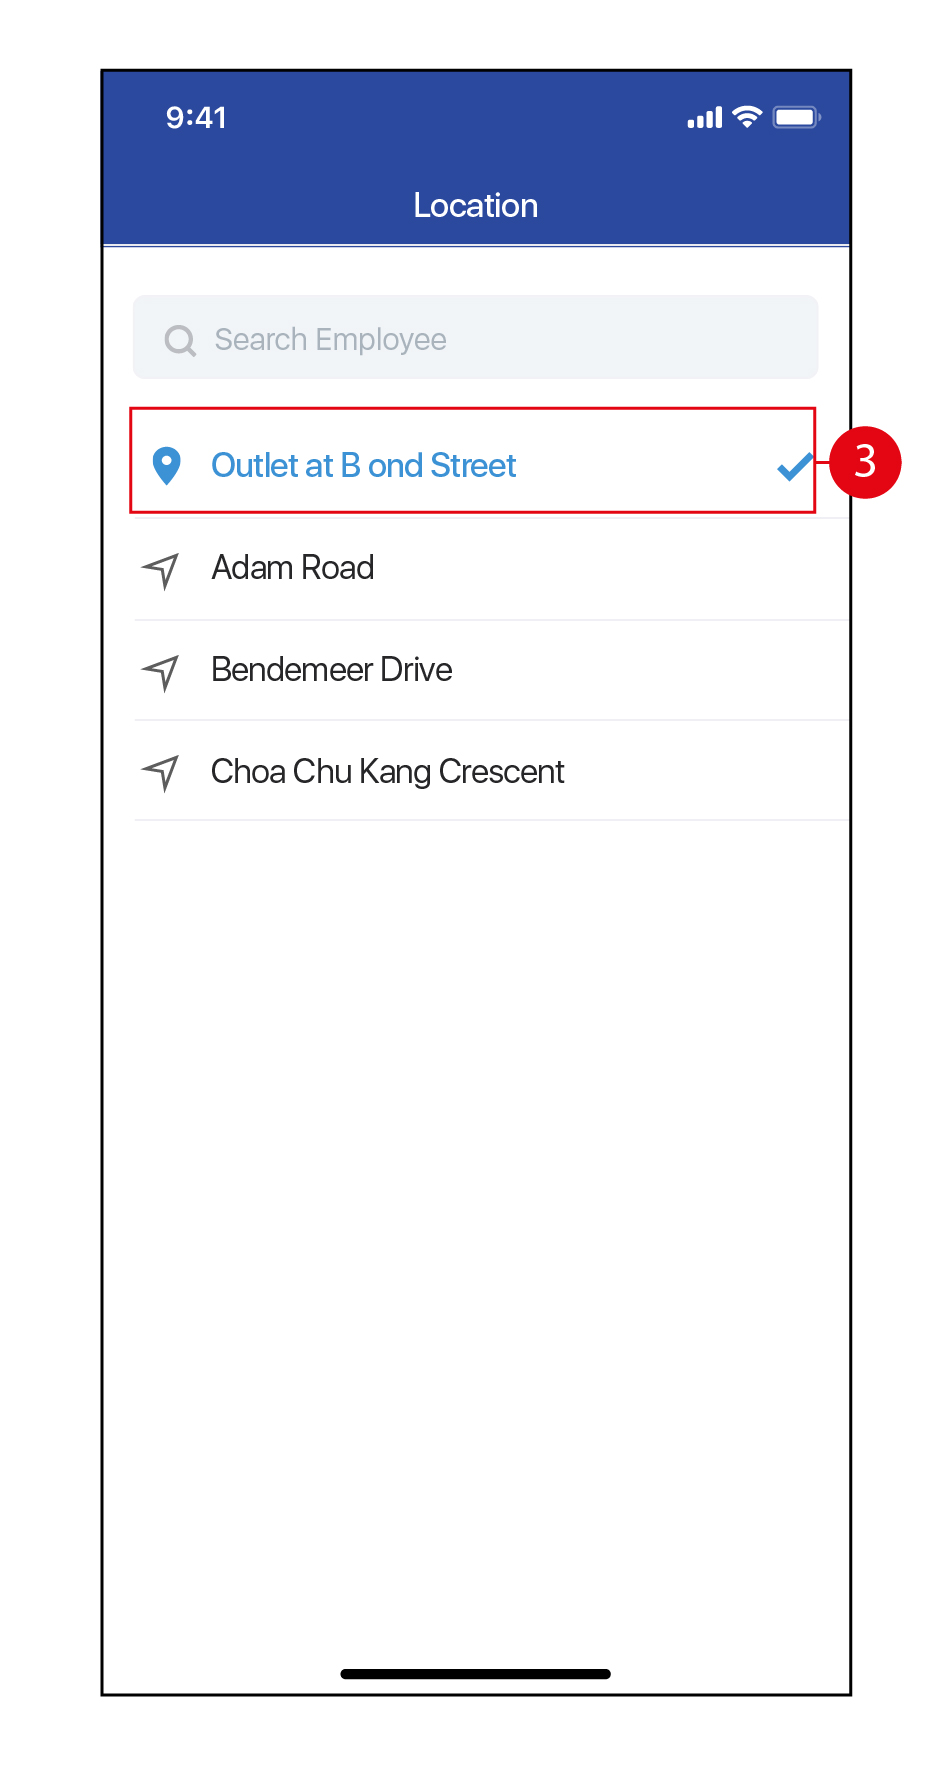
- Once you have signed in, you will be prompted to select your current location where your Employees will use the Herd APP for Attendance taking.
- Tap on the
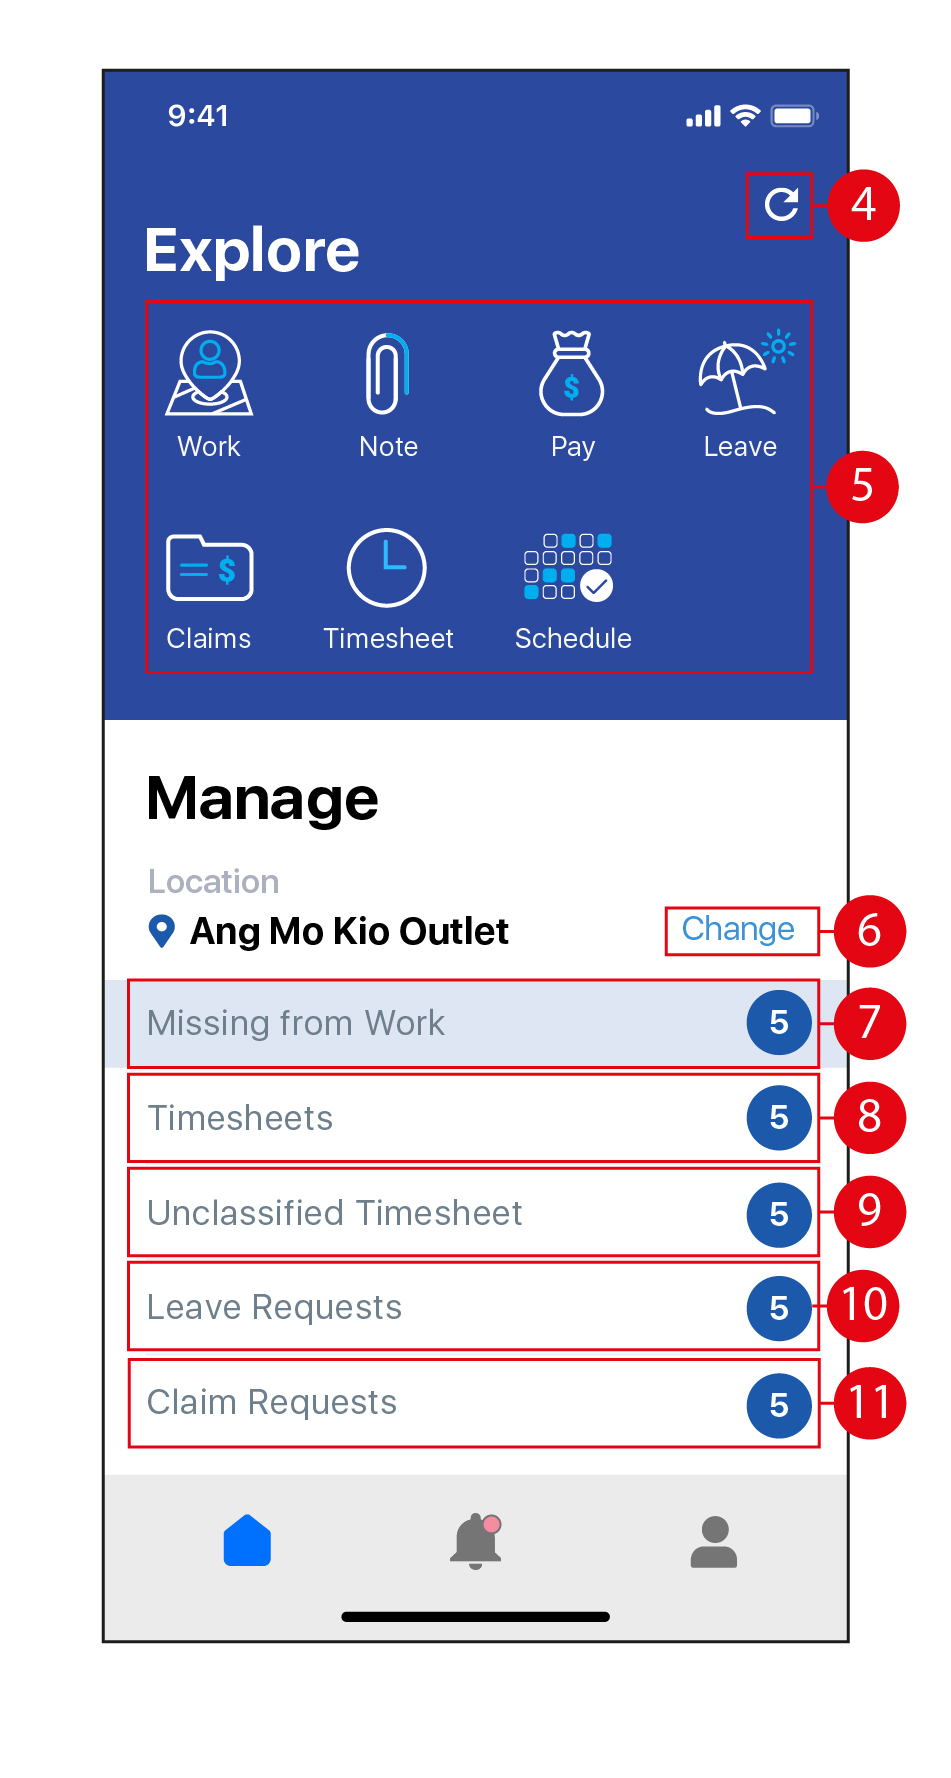
 icon to sync the app if required. (*Note: Syncing the app should be performed to ensure any data within the app is up-to-date. This is important when Attendance taking was performed in Offline Mode without data / Wi-Fi connection.)
 - Tap on the individual icons to access the Time / Note / Payslip / Leave / Claims / Timesheet / Work Schedule functions.
- Tap on Change to change your location for Attendance taking.
- Tap on Missing from Work to view the Employees who are scheduled to work but have not clocked in for work.
- Tap on Timesheets to view Employee timesheets which will be split into 'To Clear' and 'Cleared' sections.
- Tap on Unclassified Timesheet to view the timesheets of New Joiners who have a profile created in Herd+ (Kiosk Mode) but who are not registered under a profile in the Herd WEB portal. (*Note: This function enables Employees to clock in to start work on their first day, even before their profile has been set up by the Admin in Herd WEB.)
- Tap on Leave Requests to view pending leave requests awaiting approval.
- Tap on Claim Requests to to view pending claim requests awaiting approval.
- Tap on the
 icon to view your Leave Balance and apply for Leave.
 - Alternatively, swipe left or right and tap on a Leave type (with the number of days of entitlement left) to apply for Leave.
- Tap on the
 icon to view your Work Schedule in Calendar view.
 - Swipe left or right and tap on the day / date to view your Work Schedule.
- Your Work Schedule and Work Location will appear here in blue.
- Tap on the
 icon to return to the main / Home page.
 - Tap on the
 icon to view all Notifications.
 - Tap on the
 icon to access the Settings page.
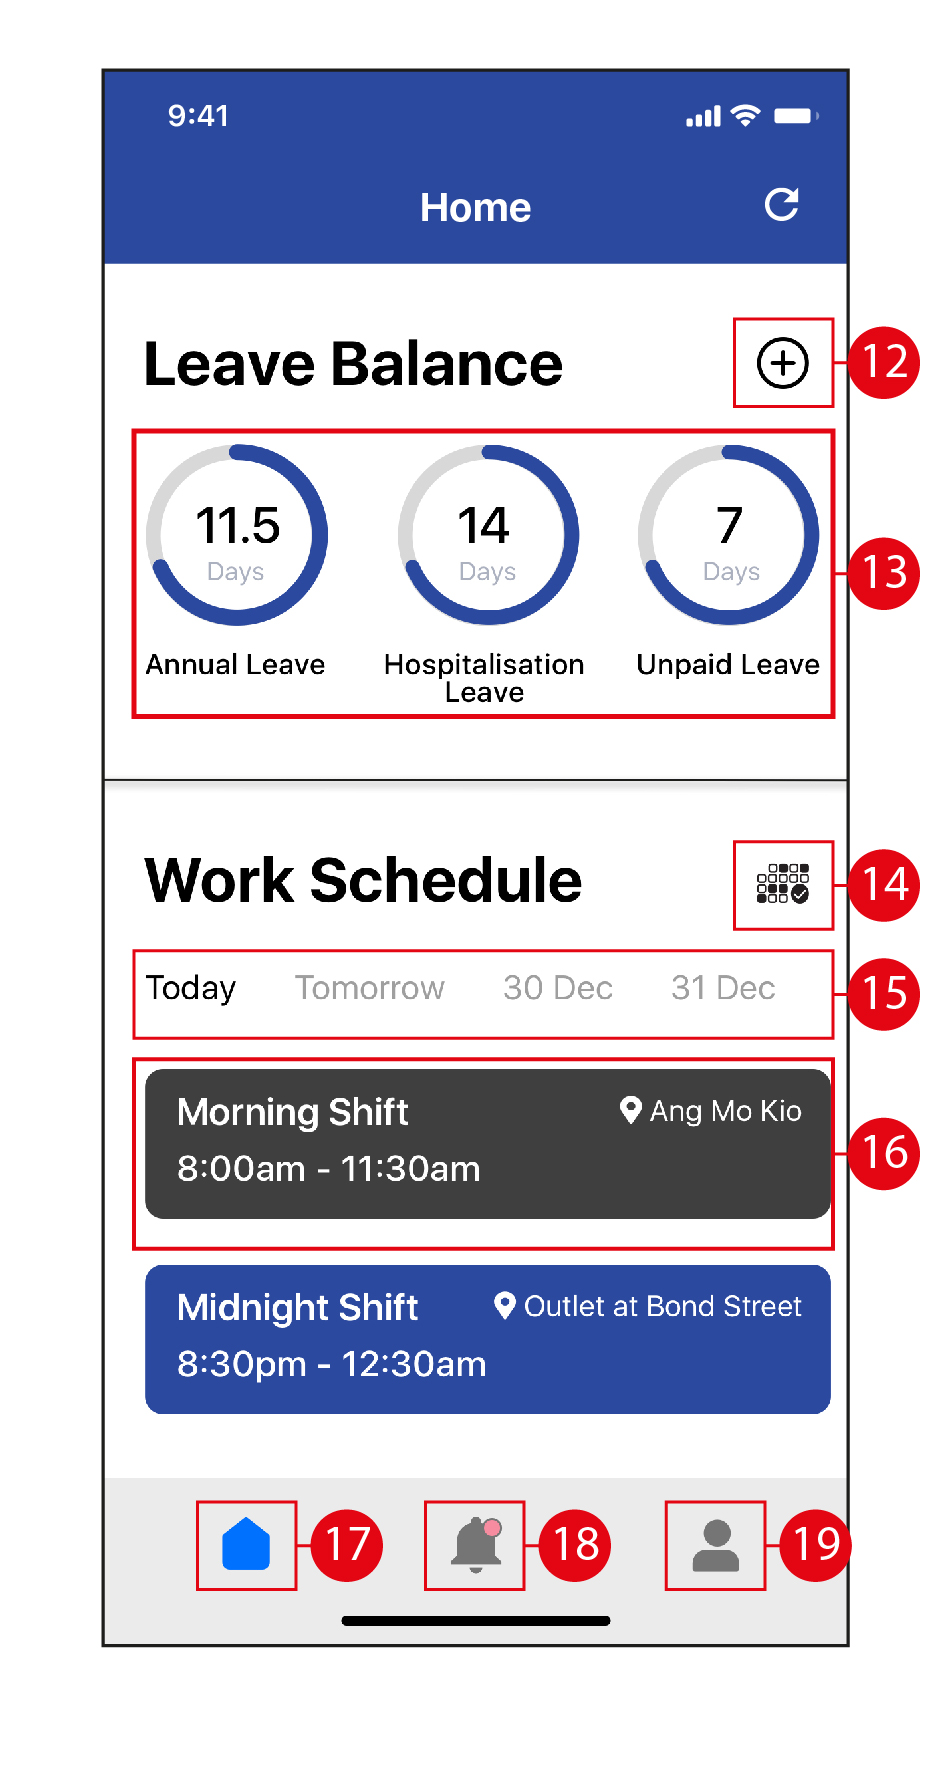
Time
- Tap on Change to change your location for Attendance taking.
- Tap on the
 icon to toggle between the forward facing camera or rear camera on your device.
 - Use the dotted lines as a guide as to how to frame your face before taking a selfie to take Attendance.
- Tap on the
 icon to center your location on the map, if required. (*Note: This is not usually necessary as the GPS on your device would have locked in your position on the map automatically.)
 - Once you are ready to take your selfie, tap on Start or End to take your Attendance at the start / end of your work shift / break / travel / meeting.
- Swipe left or right to select Work / Break / Travel / Meeting to select which activity you would like to clock / take Attendance for.
- Tap on the
 icon to return to the previous page / Home page.
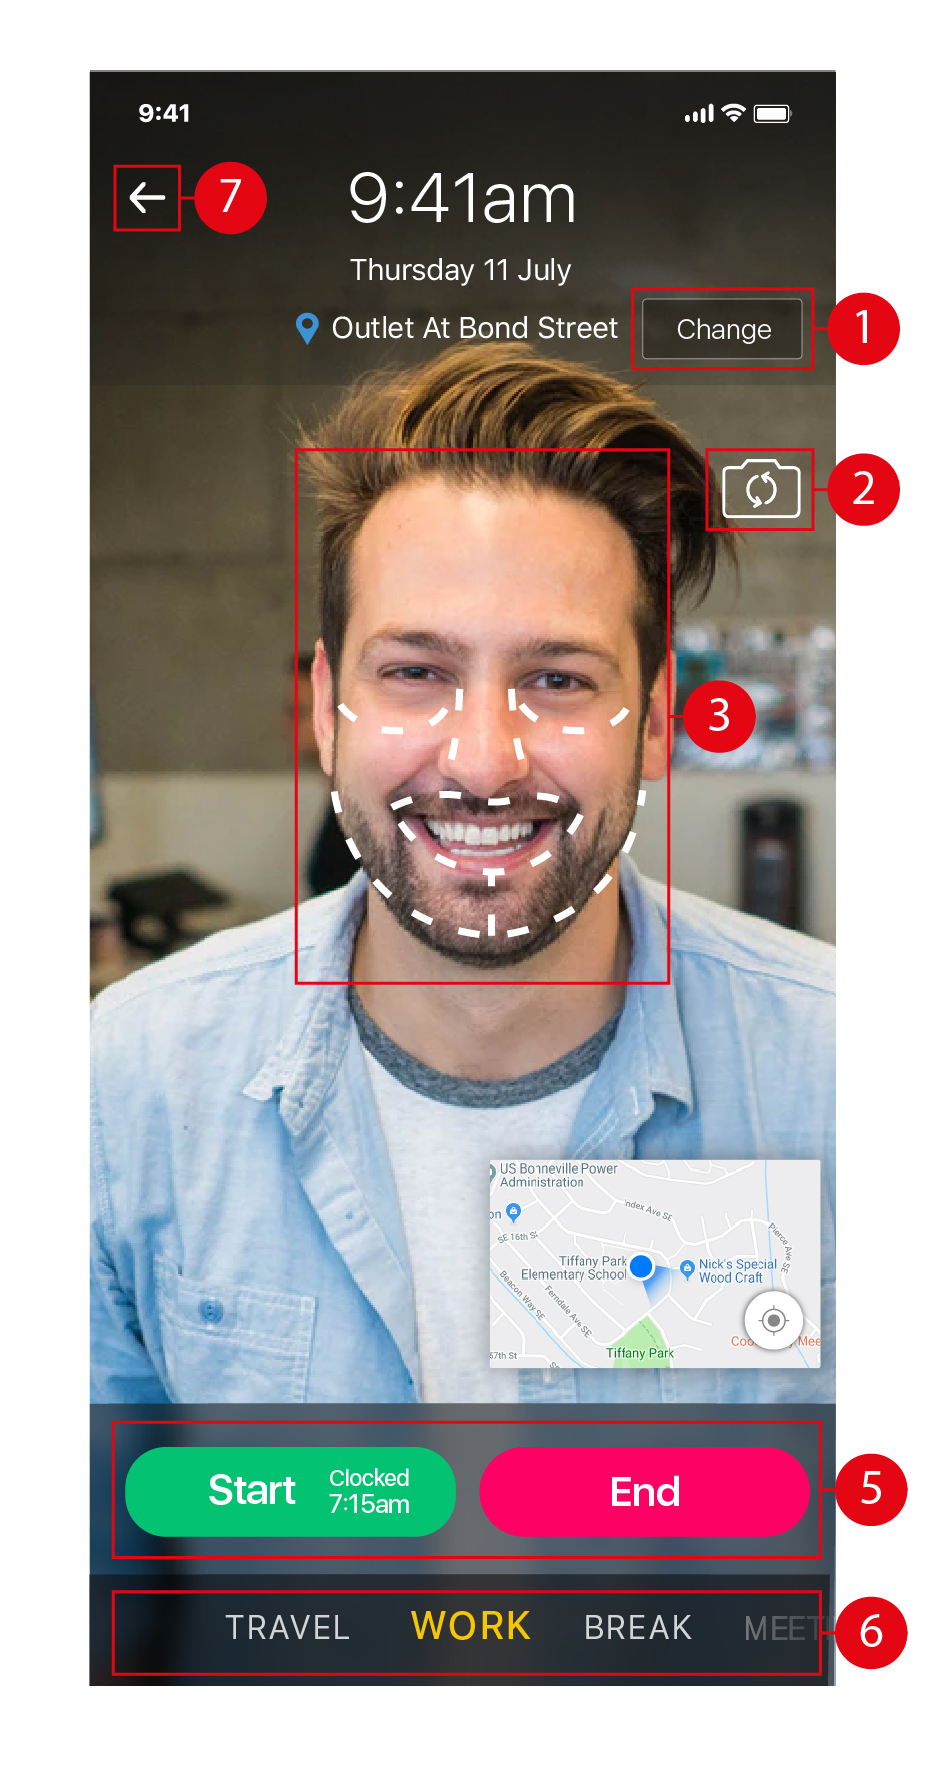
Note
- Tap on the
 icon to Filter Notes by Date Range and Category.
 - Tap on the
 icon to Add Notes.
 - Tap on Unsynced Notes, then tap on the
 icon to sync up unsynced notes, if any. (*Note: This will be necessary if a Note has been created and saved without data / Wi-Fi connection. Once data / Wi-Fi connection is available, you will then be able to sync and upload that Note.)
 - Tap on created Notes to Edit / Remove them.
- Tap on the
 icon to return to the previous page / Home page.
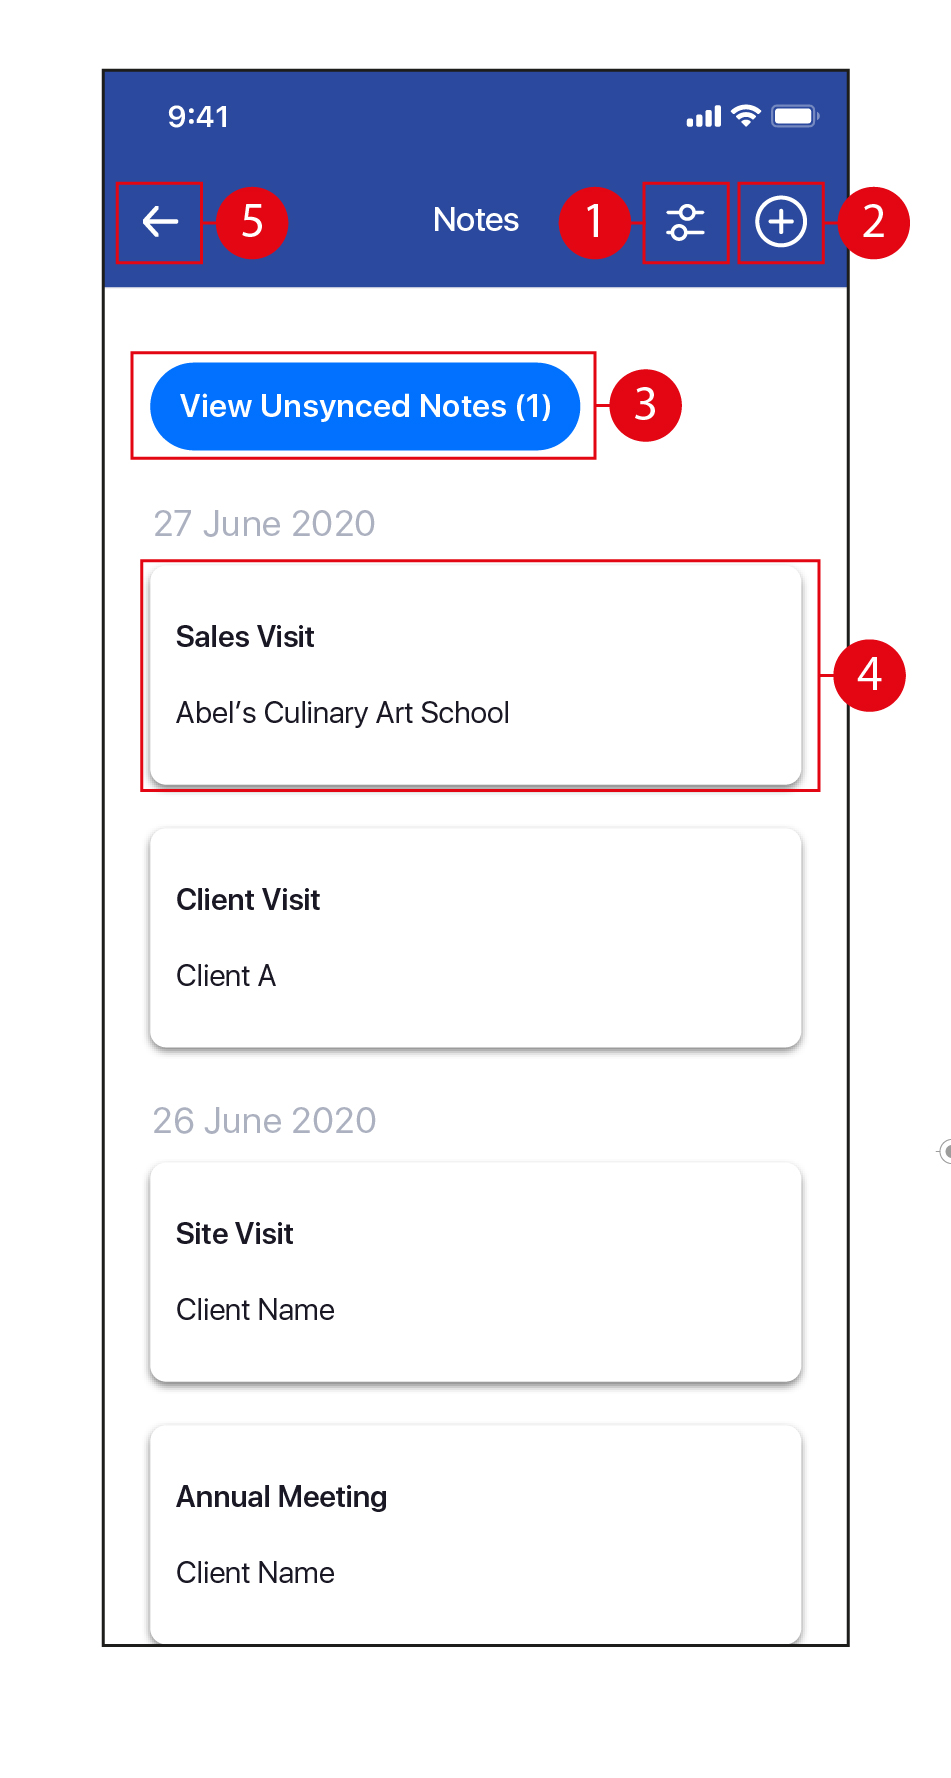
Filter Notes
- Tap on the Date Range boxes to select the start and end dates.
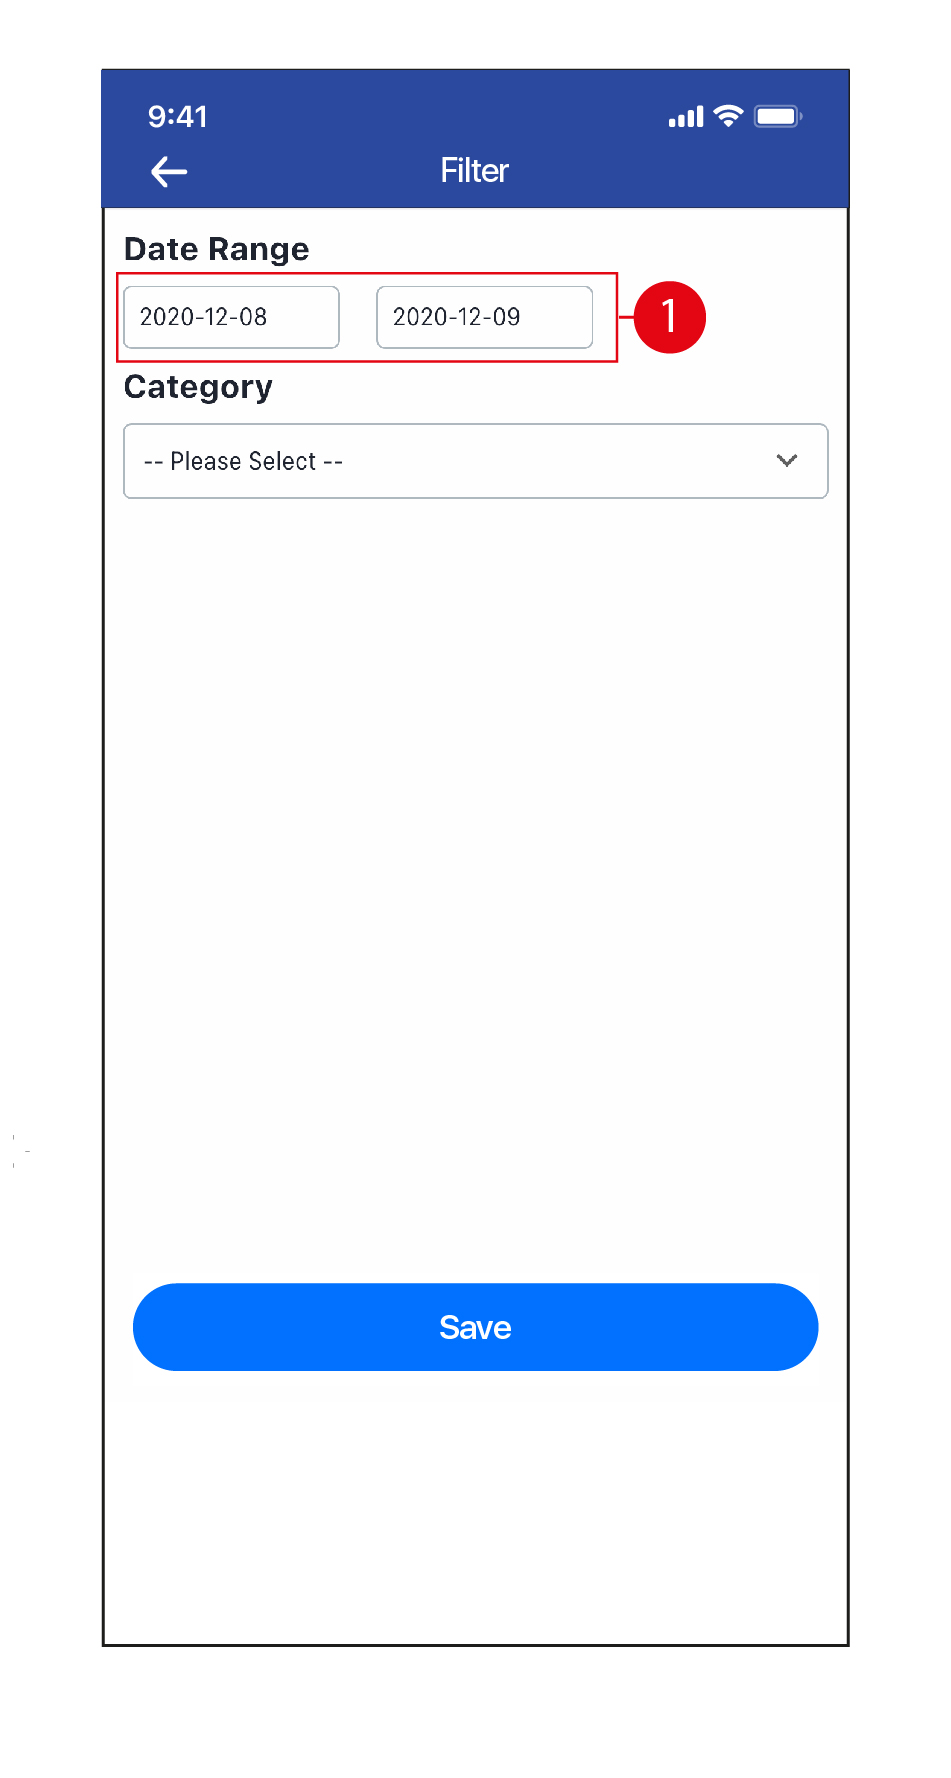
- Tap to change the Year.
- Tap on < and > to change the Month.
- Tap to select the Date.
- Tap on the
 icon to enter date manually by typing.
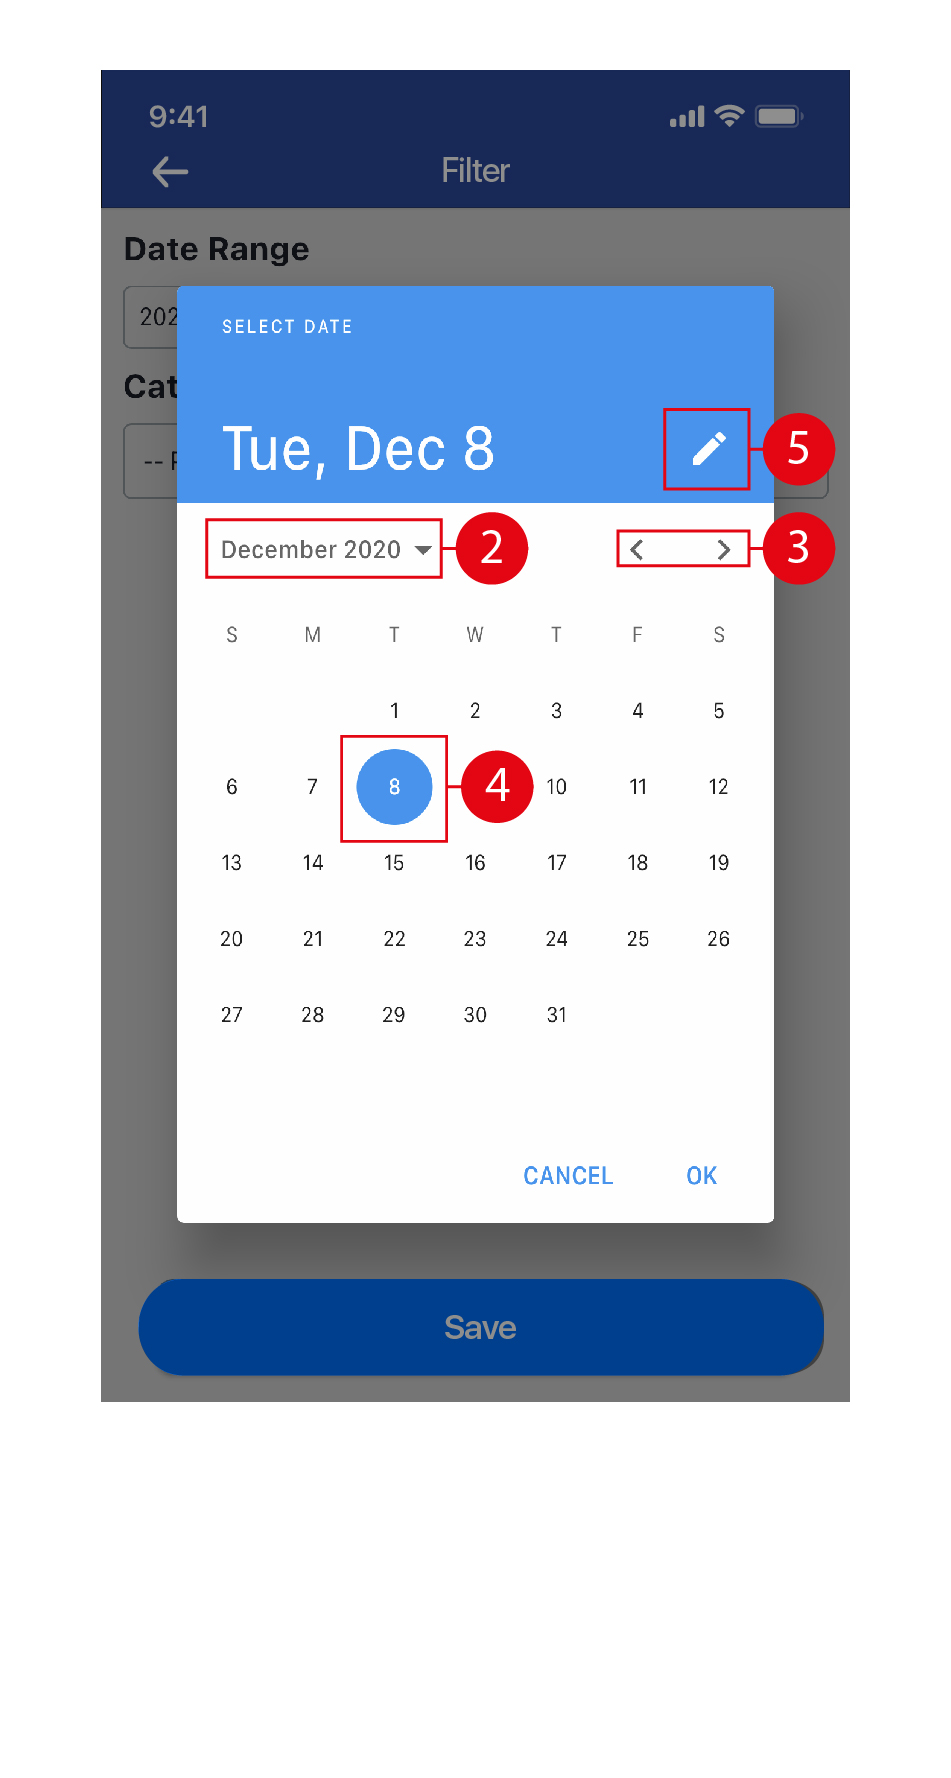
- Tap on the
 icon to return to the calendar view. Once done, click OK.
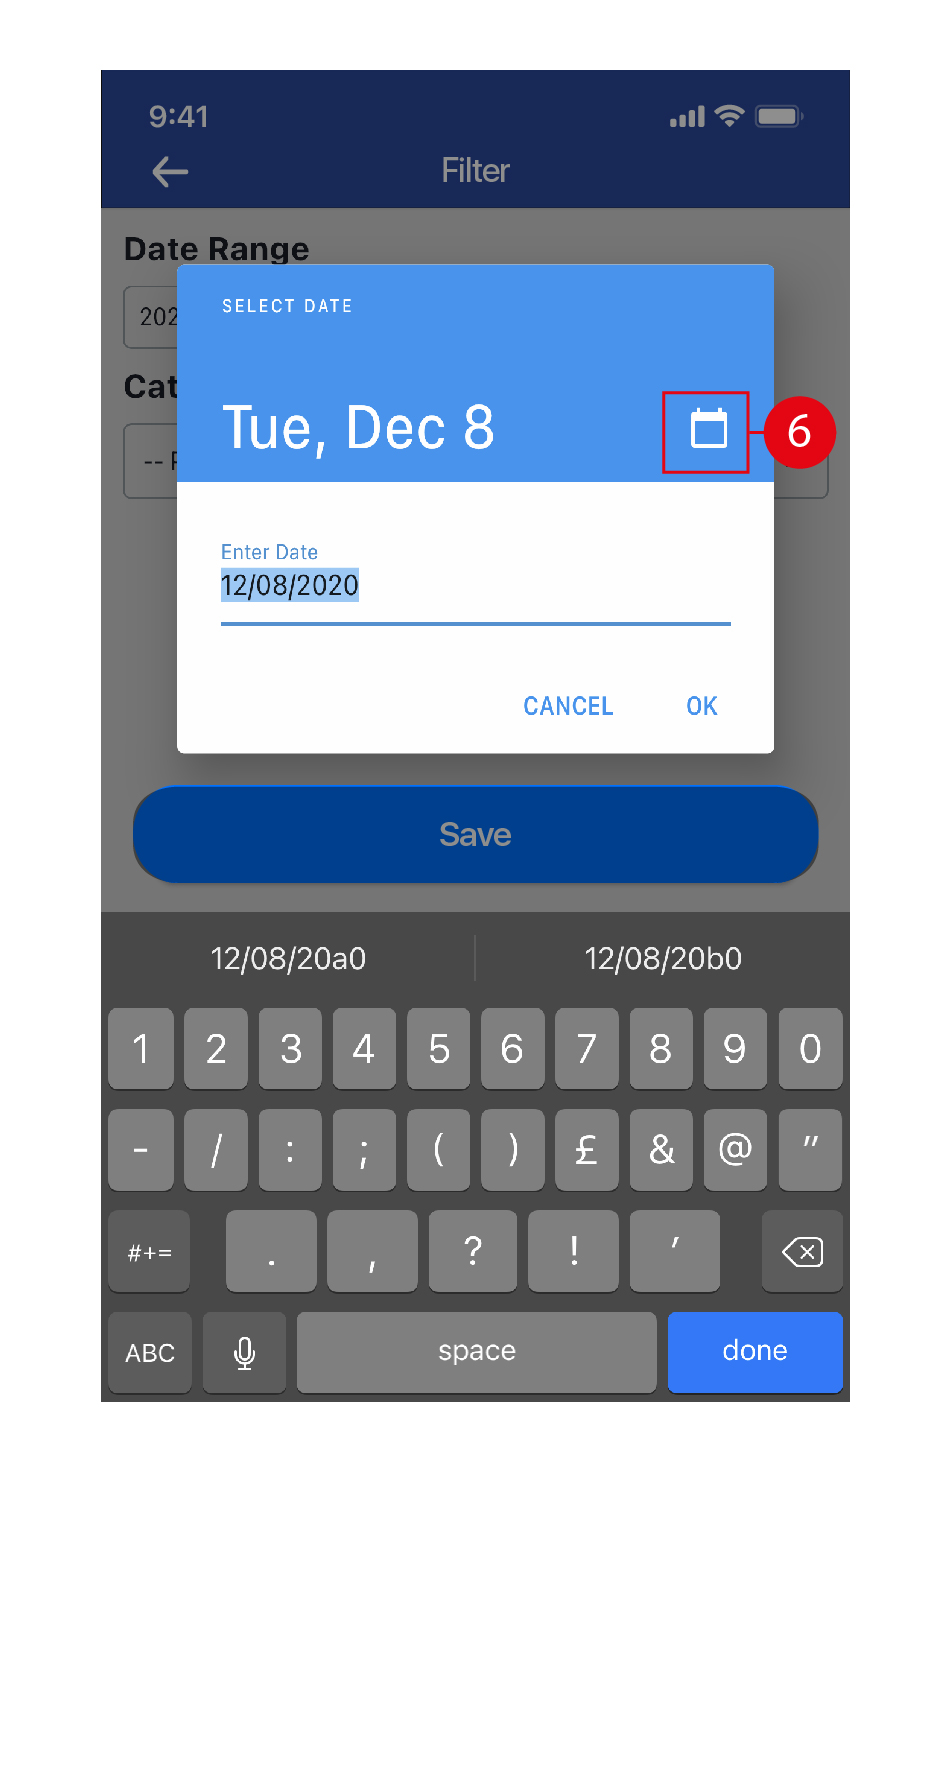
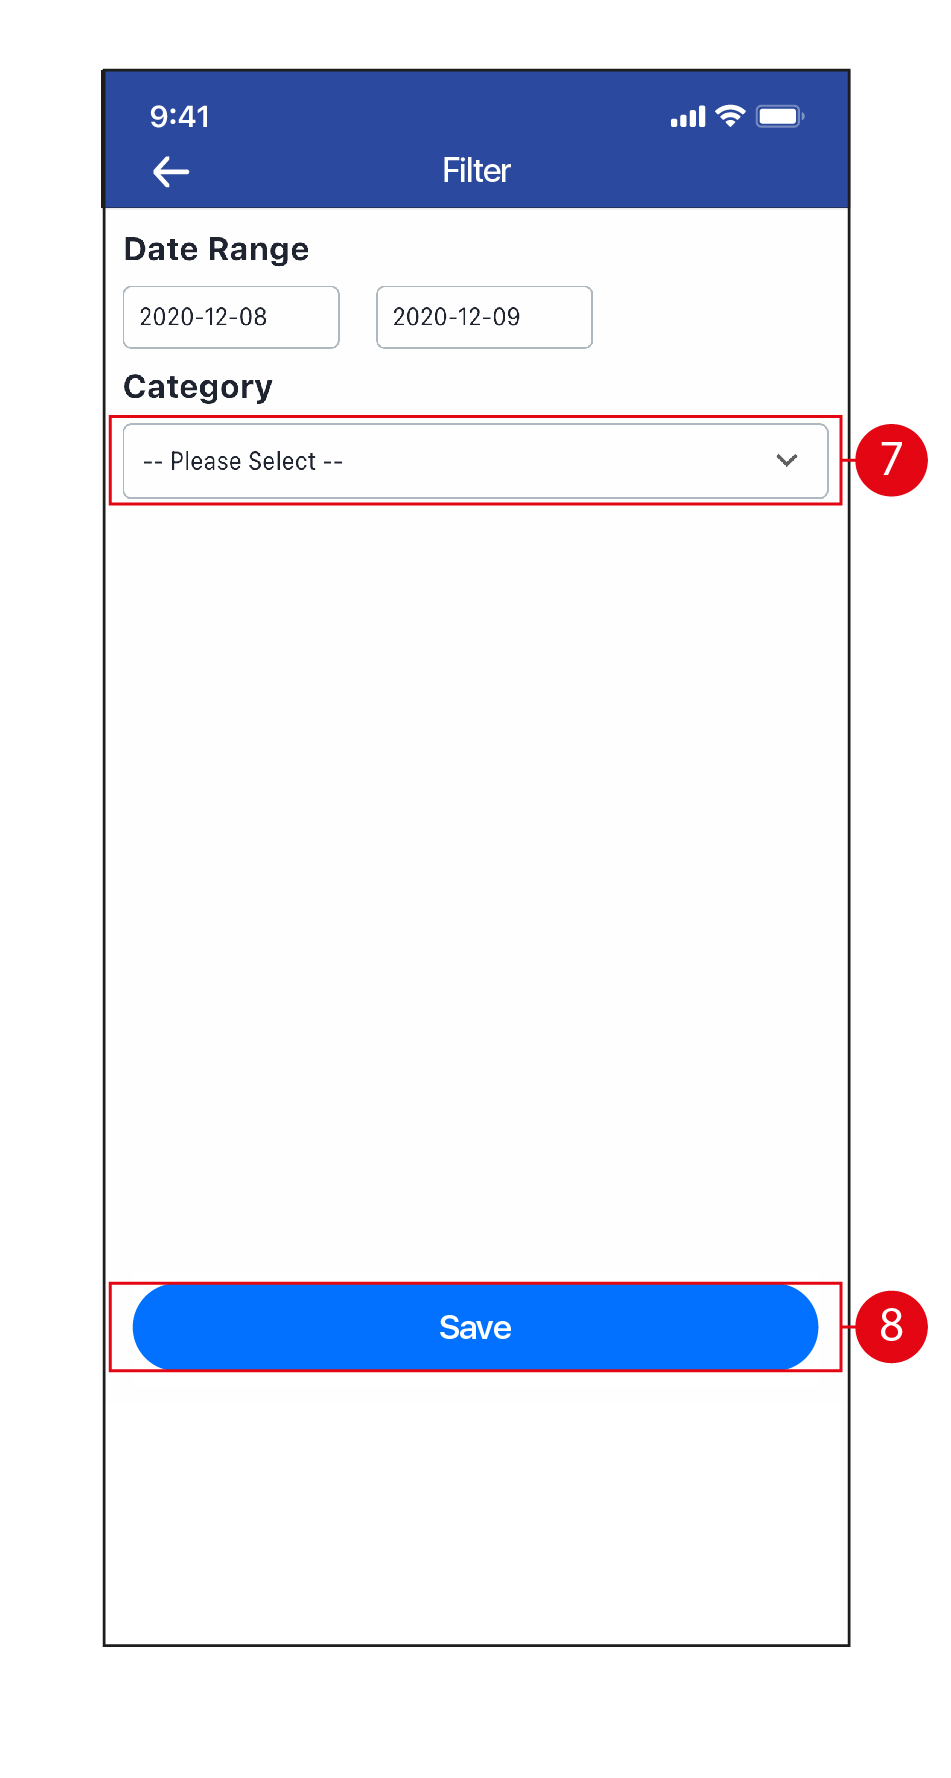
- Select the Category for the Note from the drop down list.
- Once done, click Filter to filter all Notes in the selected Date Range and Category.
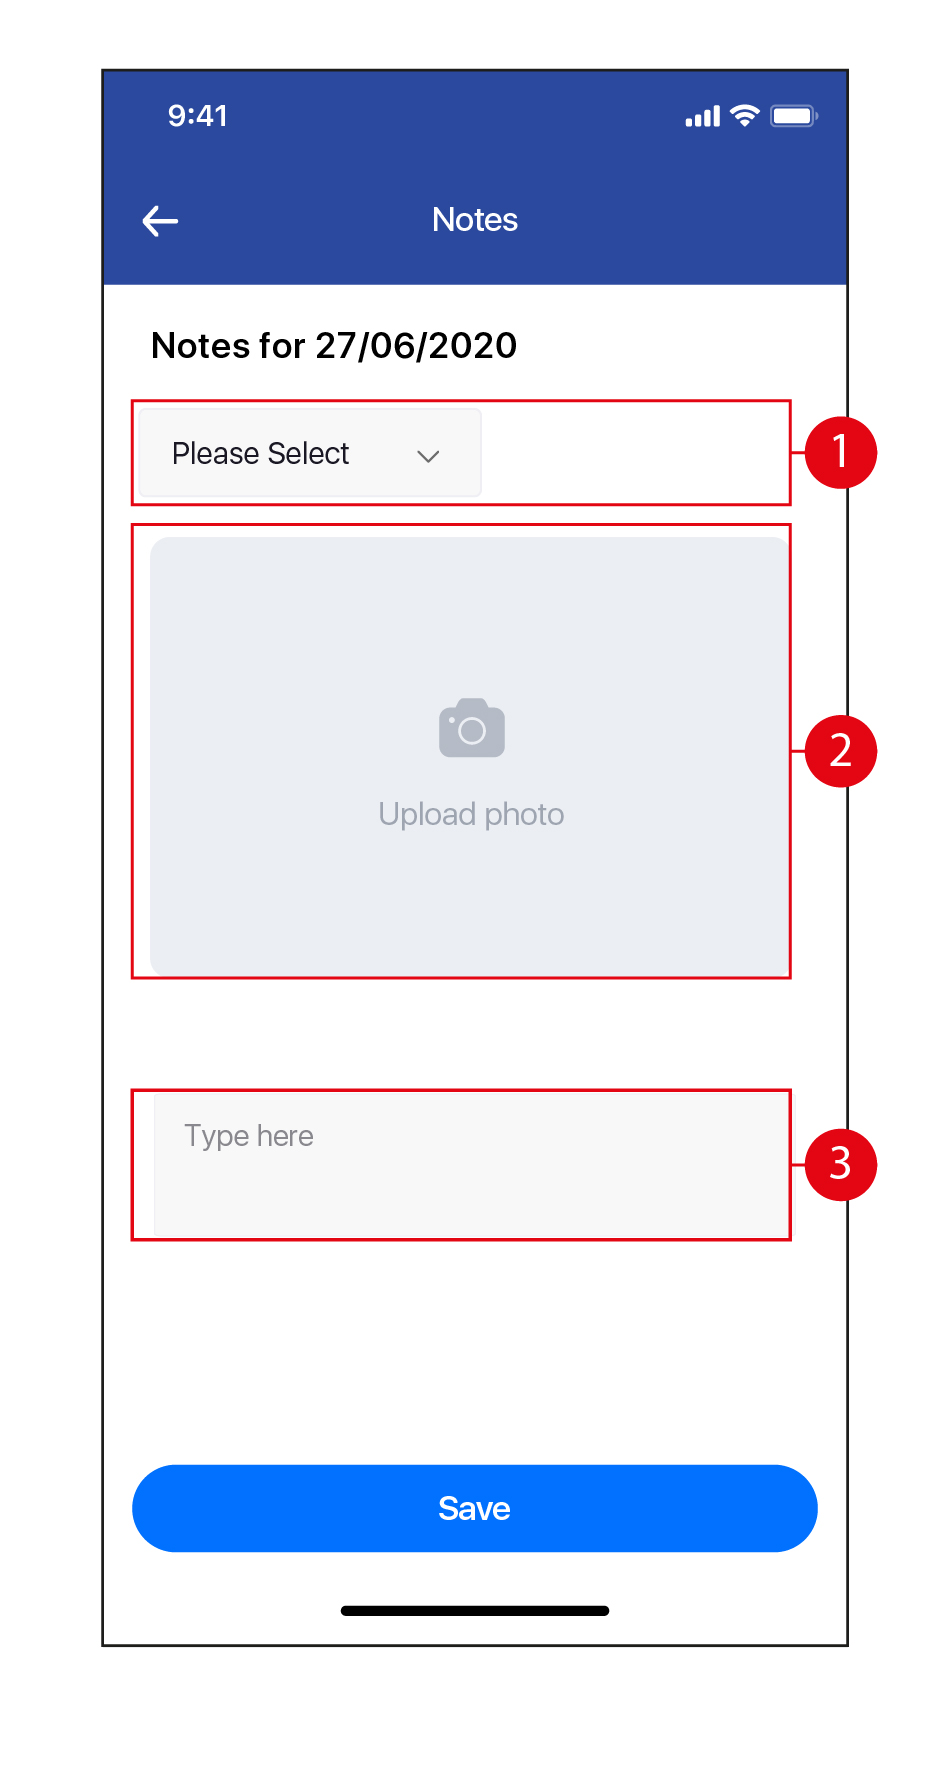
Add Notes
- Tap to select the Category for the new Note from the drop down list.
- Tap to upload a photo, either by taking a photograph or uploading a picture from the gallery in your device.
- Key in your remarks for this Note. Once done, tap Save.
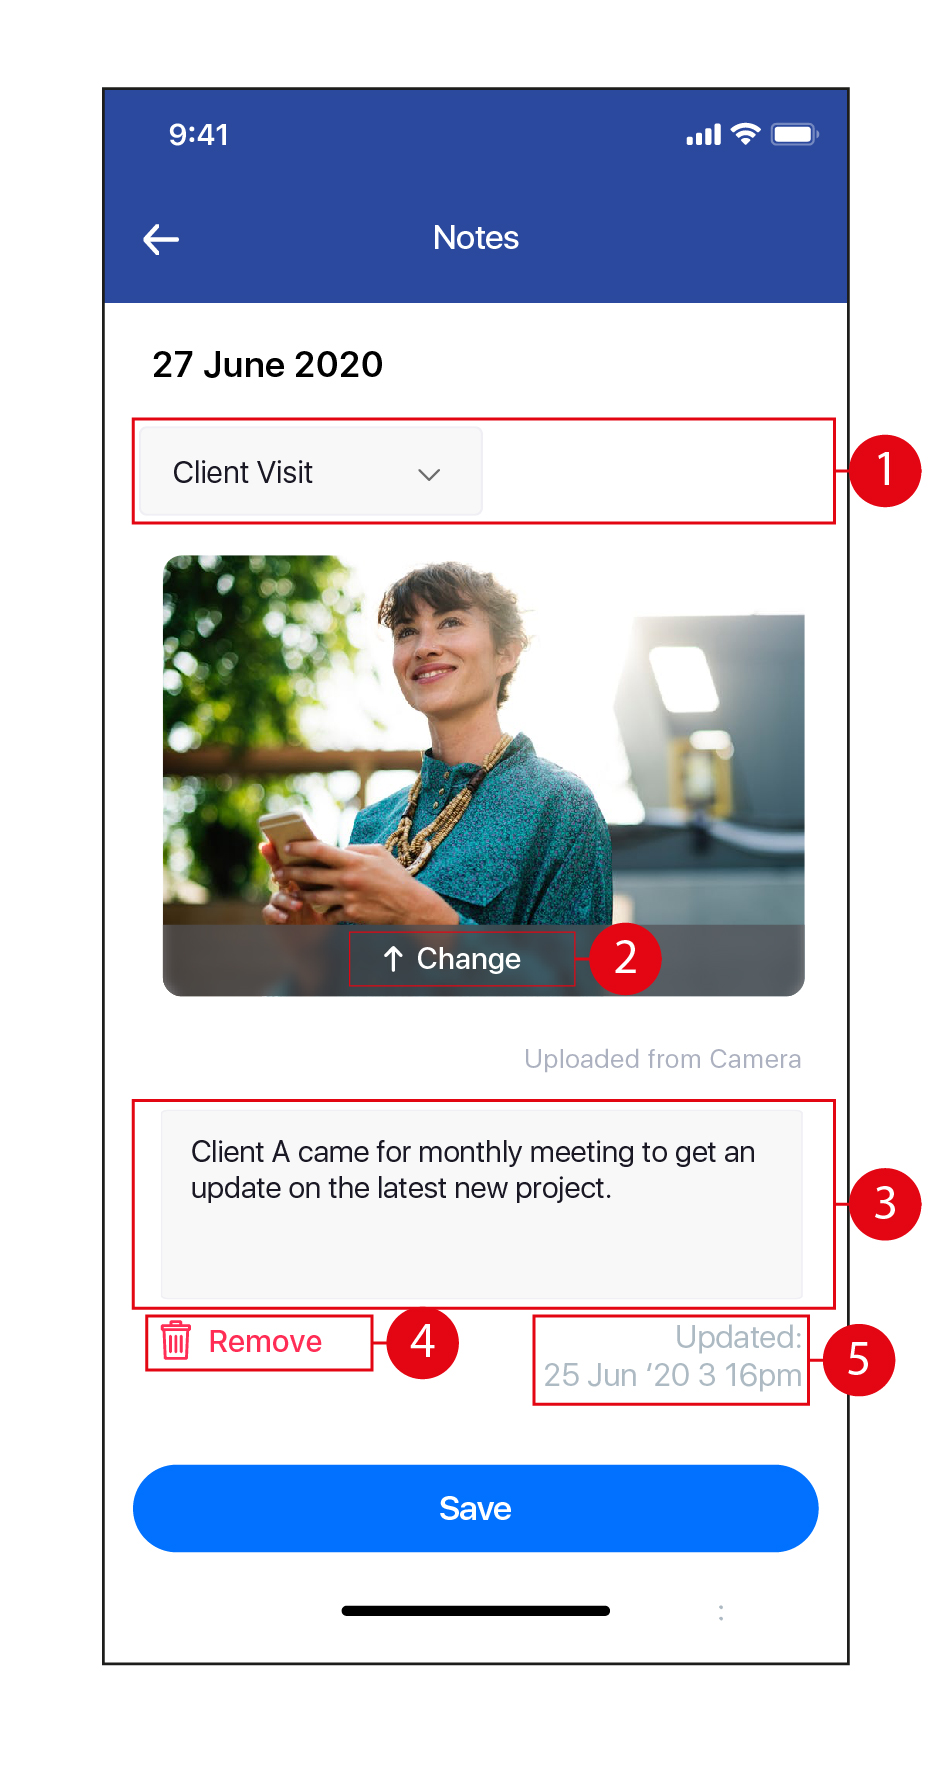
Edit / Remove Notes
- Tap to change the Category.
- Tap to take a new photograph, select another picture from your device gallery, or remove the existing photograph.
- Edit your remarks if required.
- Tap on Remove to delete this Note. (*Note: This action cannot be undone.)
- The timestamp of the latest edit of this Note will be reflected here. Once done, tap Save.
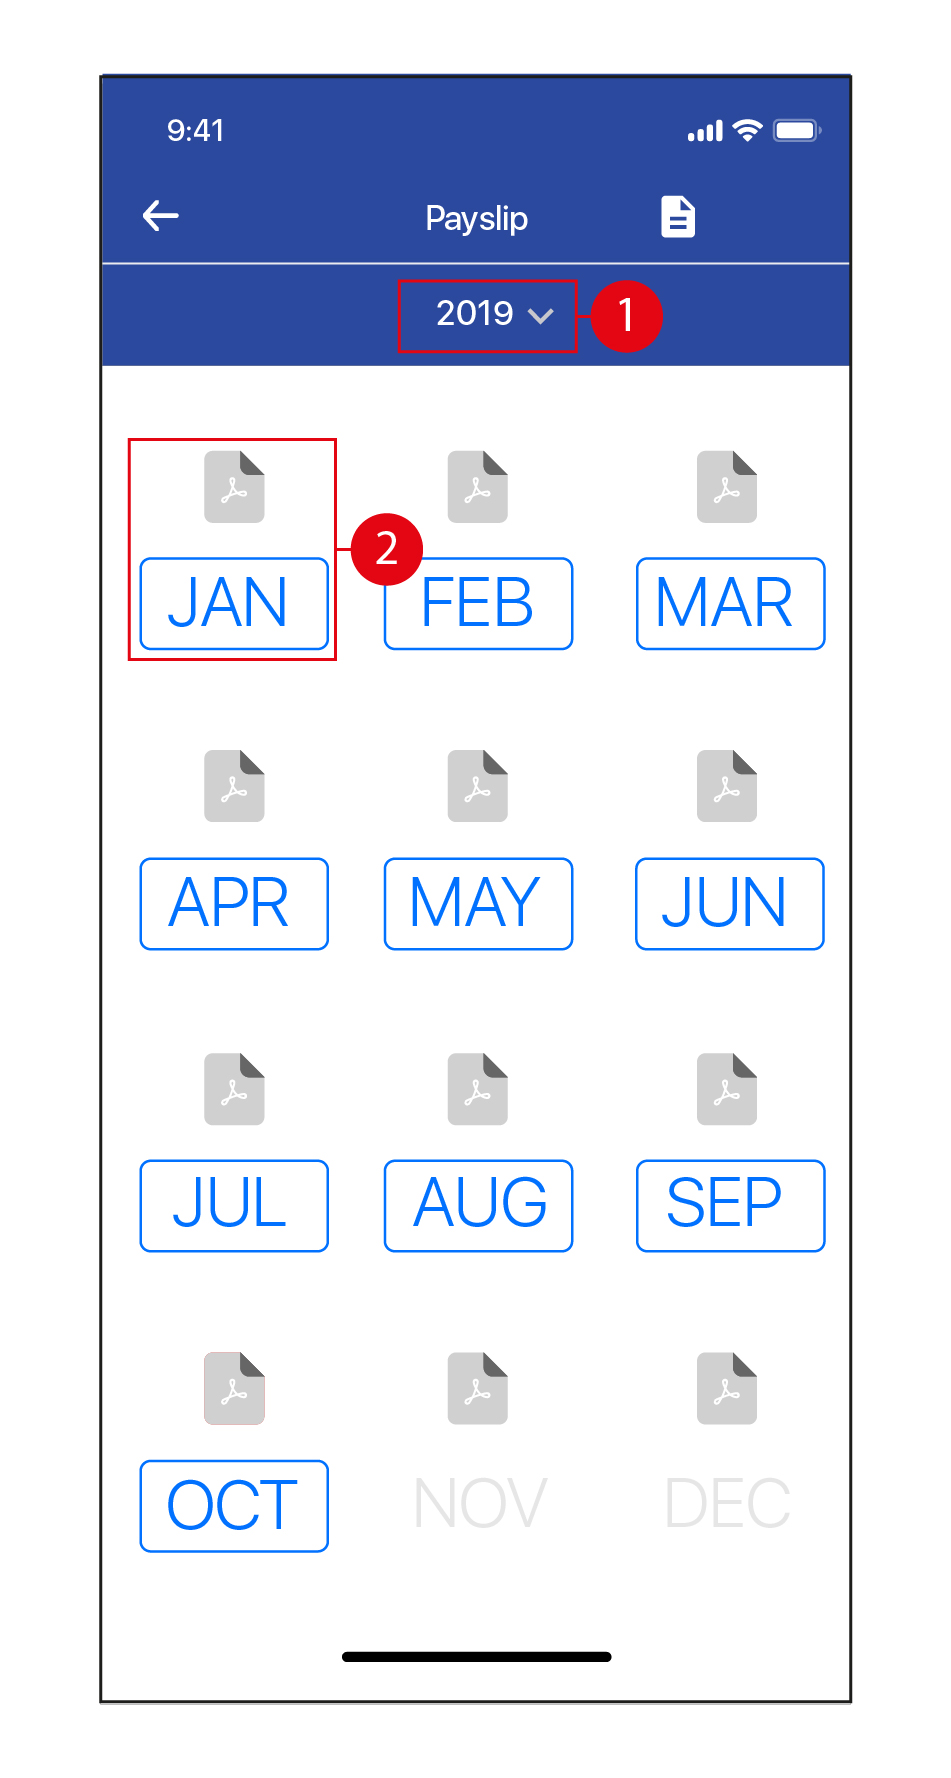
Payslip
- Tap to select Year from the drop down list.
- If the Month is in blue, there is a Payslip available for that month. Tap to view.
- Tap on the
 icon to view your download Payslip in PDF format.
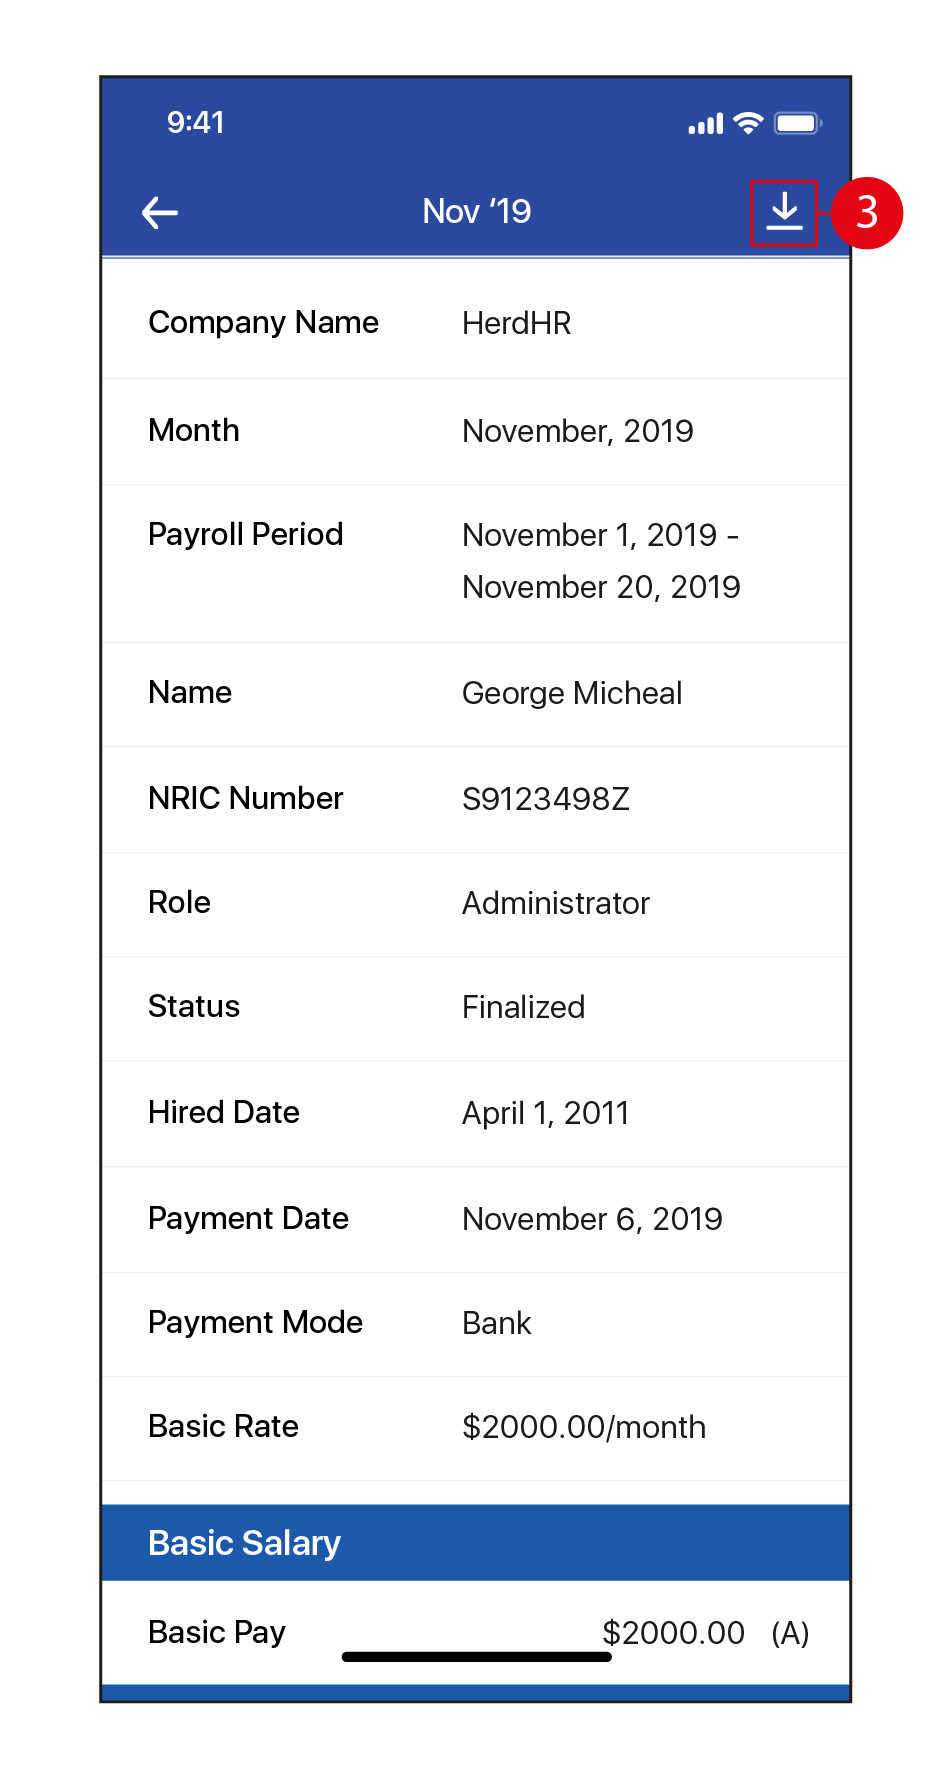
- Tap anywhere on the screen to return to your Payslip.
- Tap on the
 icon to return to the main page.
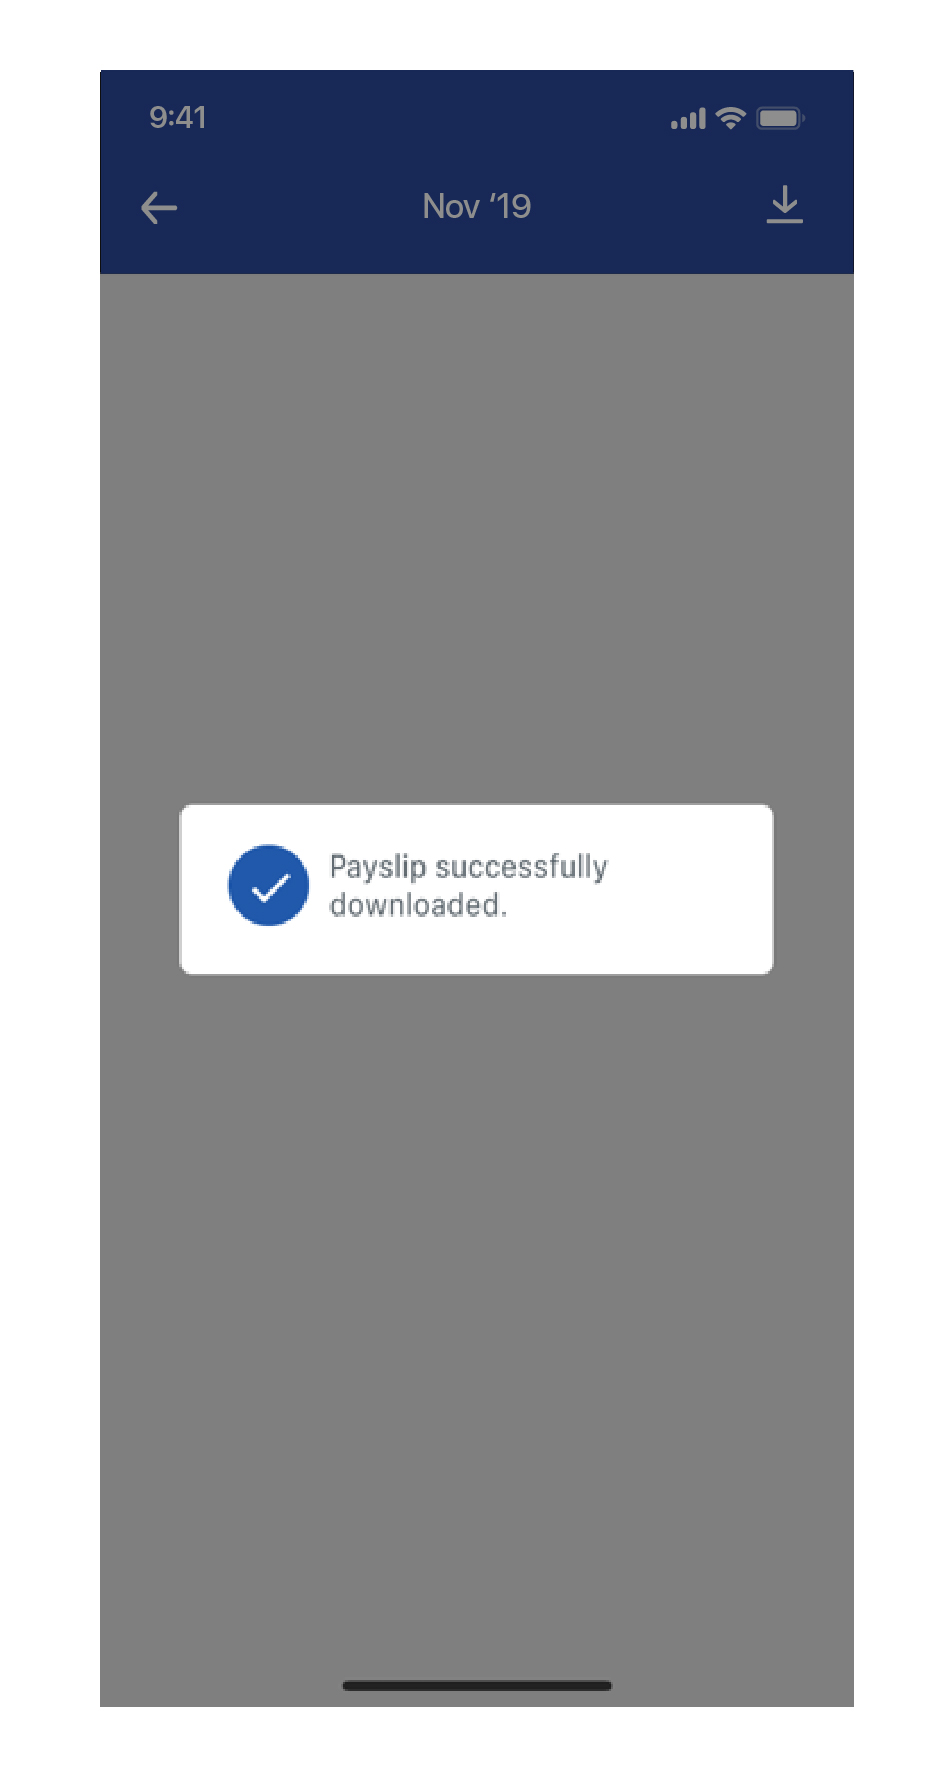
- Once the Payslip has been downloaded, the PDF logo will be in red. Tap on it to view the PDF version.
- Alternatively, tap on the
 icon to view all the downloaded Payslips.
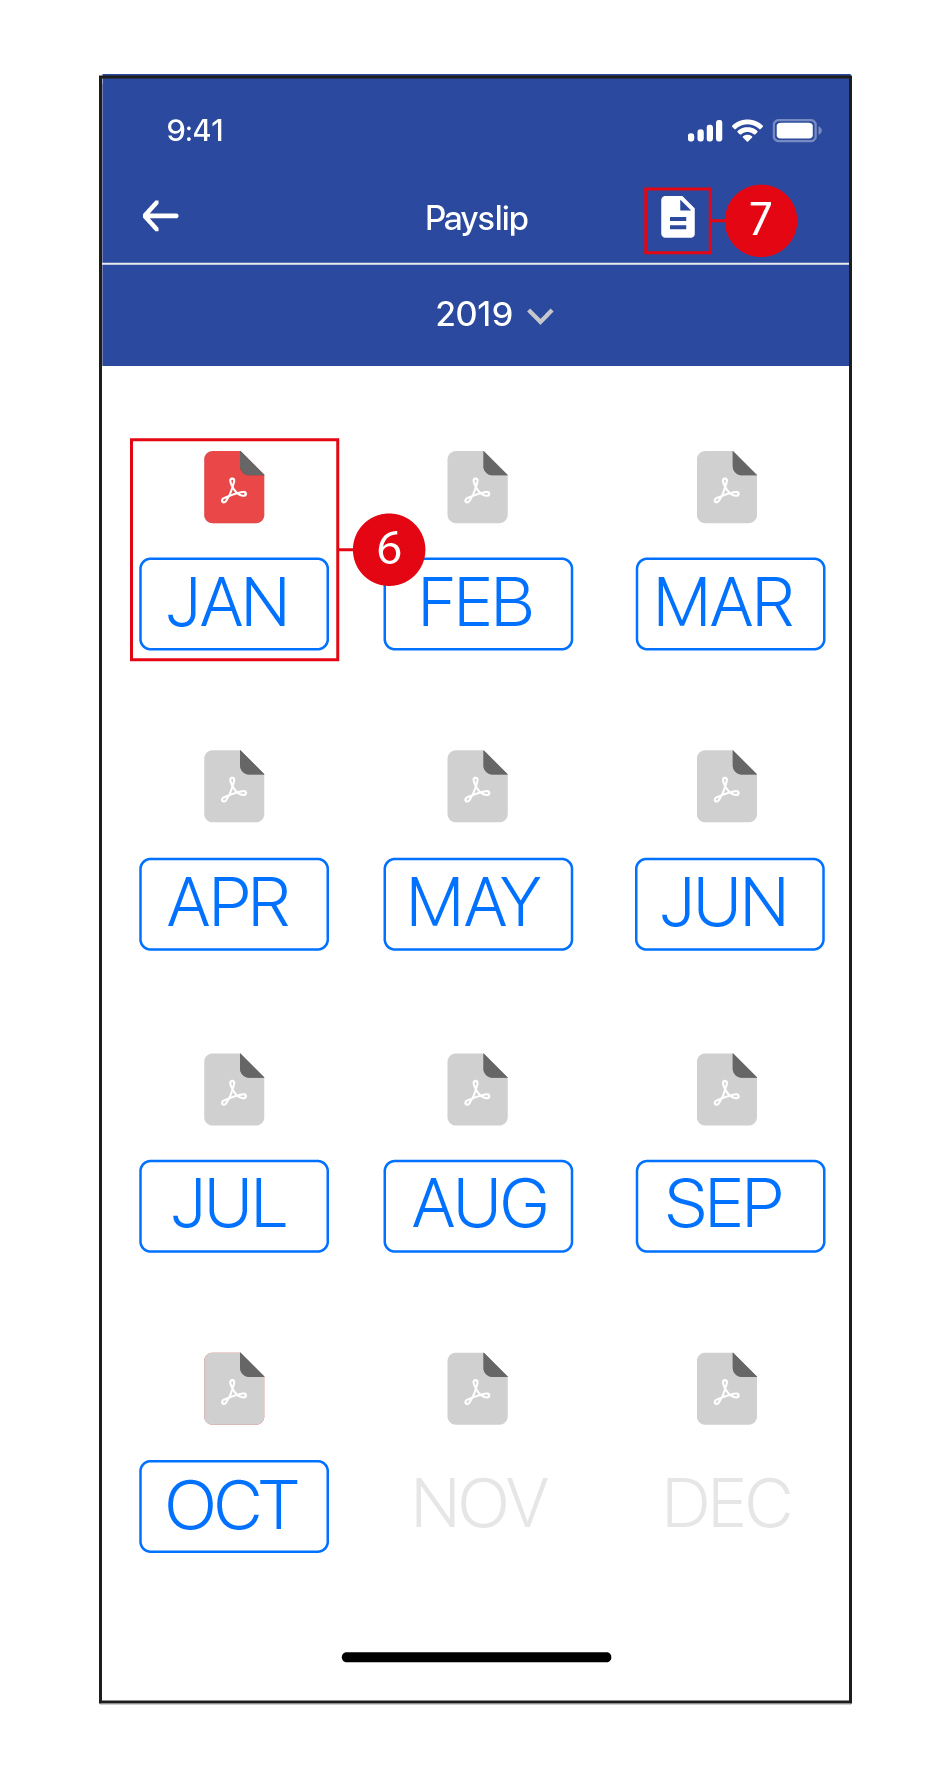
- Tap on the
 icon to access the various options to 'Share' your Payslip from your device.
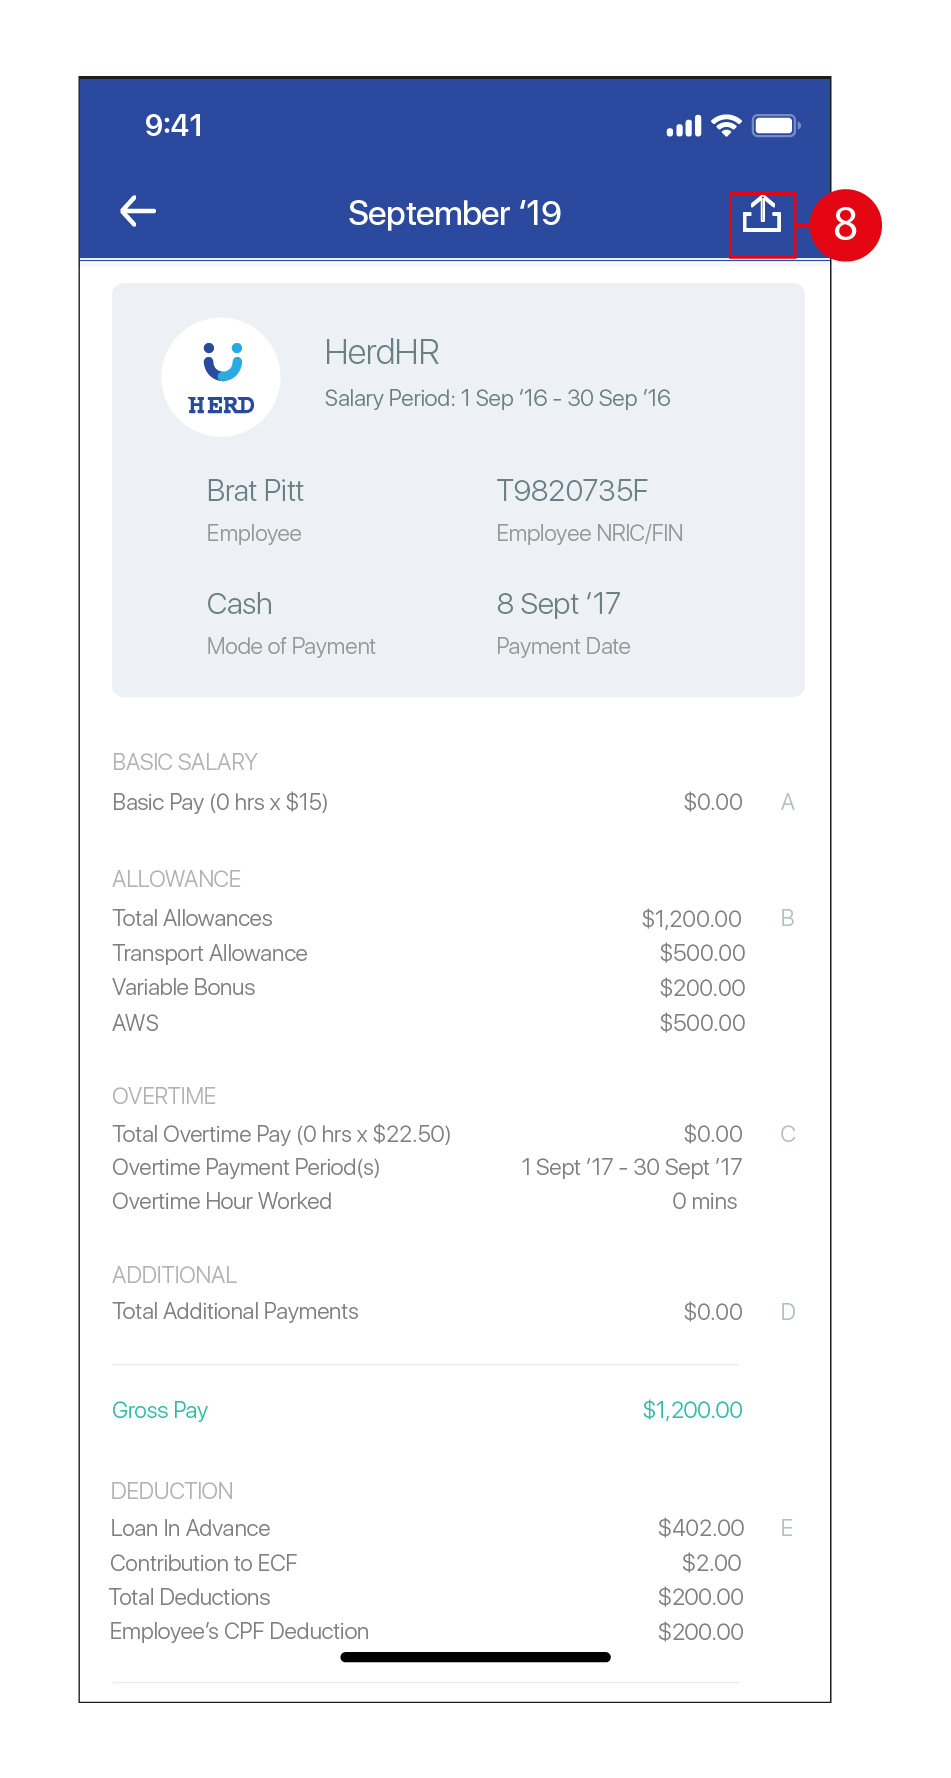
Leave
- Tap on the
 icon to create a Leave application.
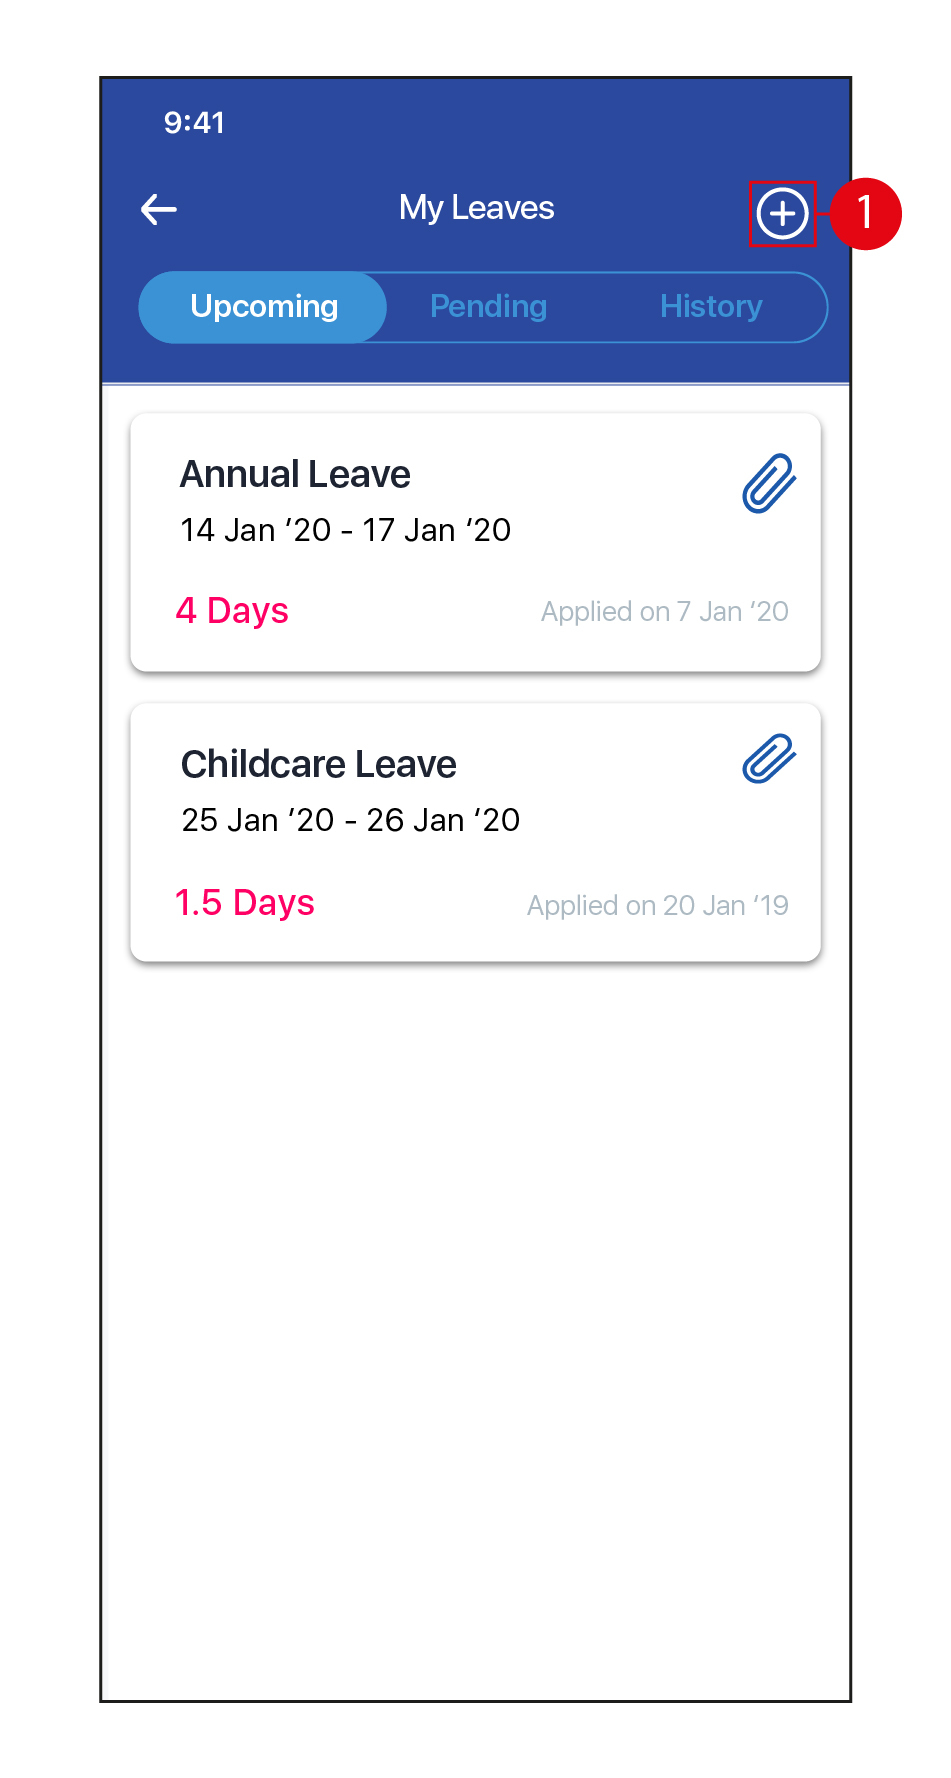
- Select the Leave Type from the drop down list. (*Note: The Leave Types have to be created and assigned to the Employee making the Leave application in Herd Web first for it to be reflected here. Click on this link to learn how to configure Leave Types in Herd Web)
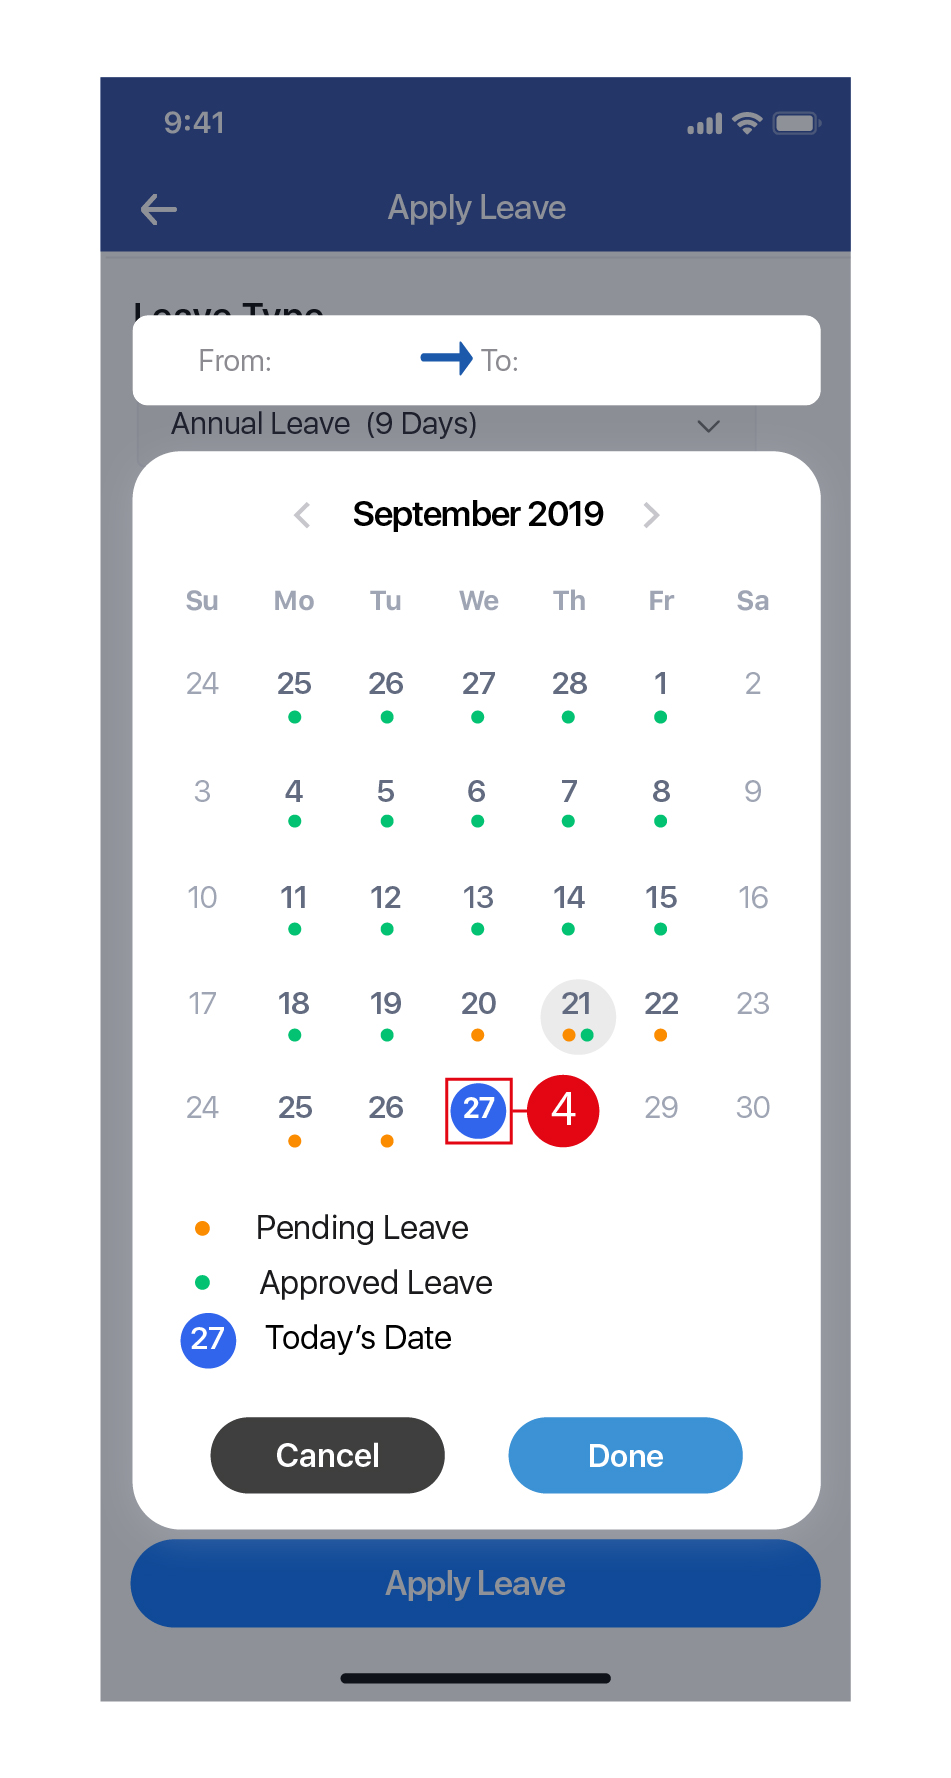
- Tap to select the Duration (Start date and End date) of the Leave.
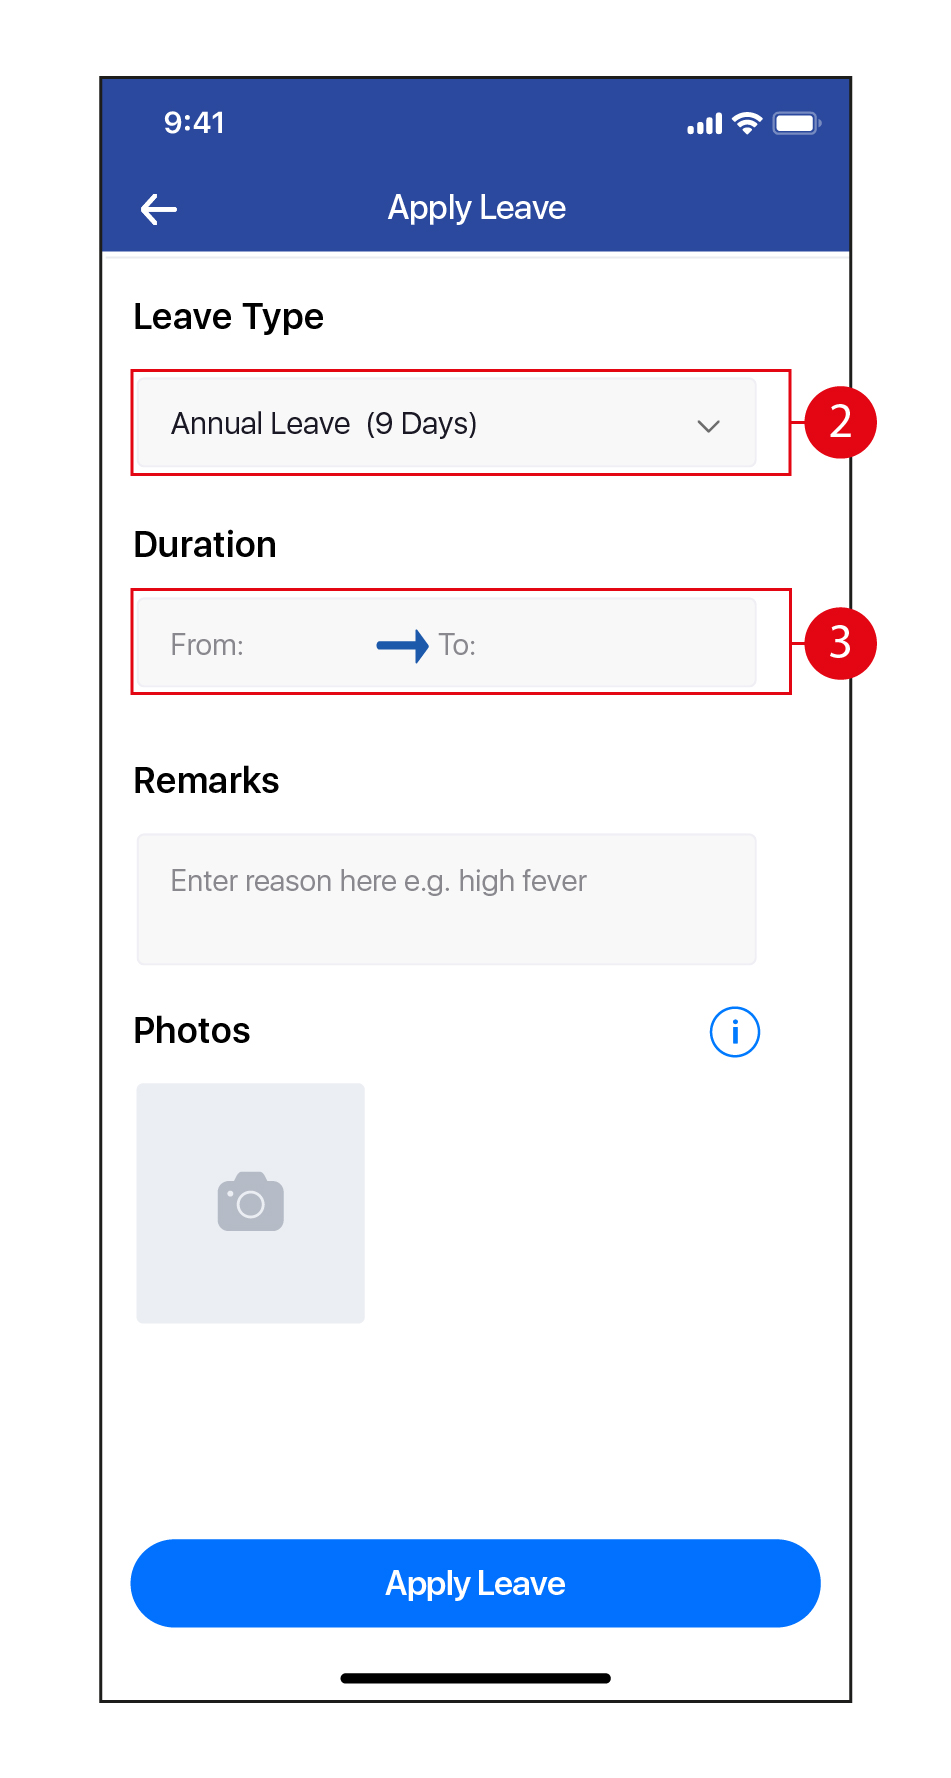
- Tap on the Start date, and then on the End date. Tap Done to continue.
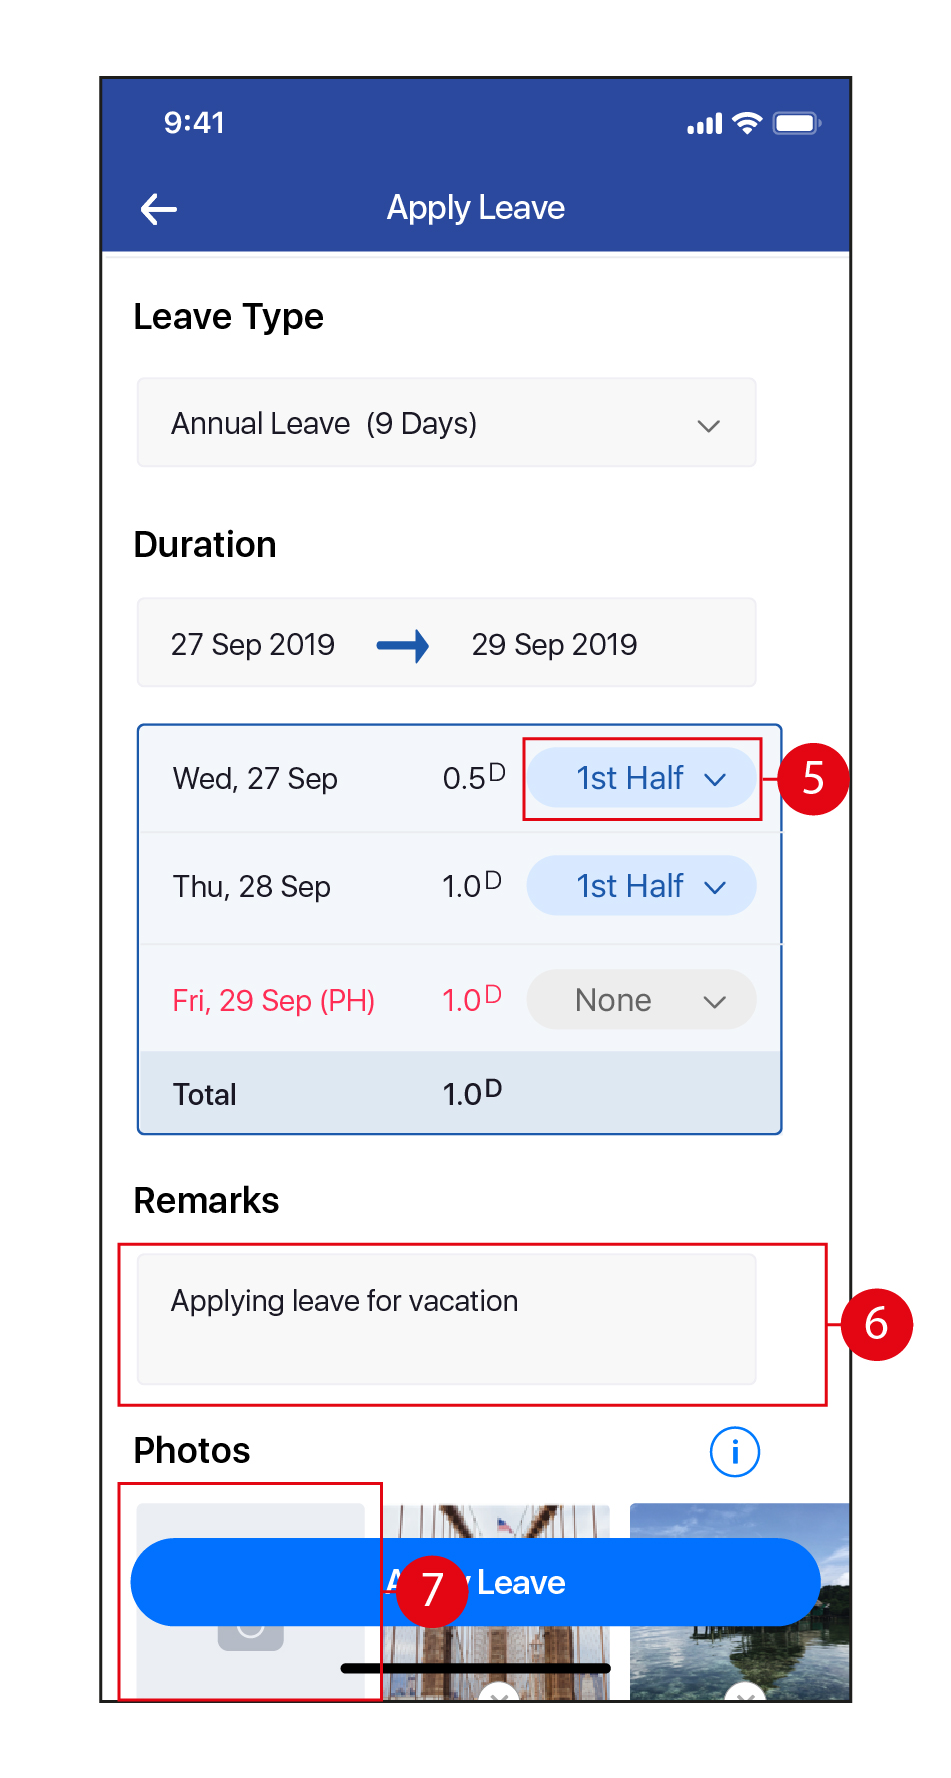
- Tap to toggle between Full Day / 1st Half (for 1/2 day Leave in the AM) / 2nd Half (for 1/2 day Leave in the PM) / None (to remove this date from the Leave application).
- Key in Remarks, if required.
- Tap to attach photo(s) to this Leave application if required, either by taking a photograph or uploading a picture from the gallery in your device. Once done, tap Apply Leave.
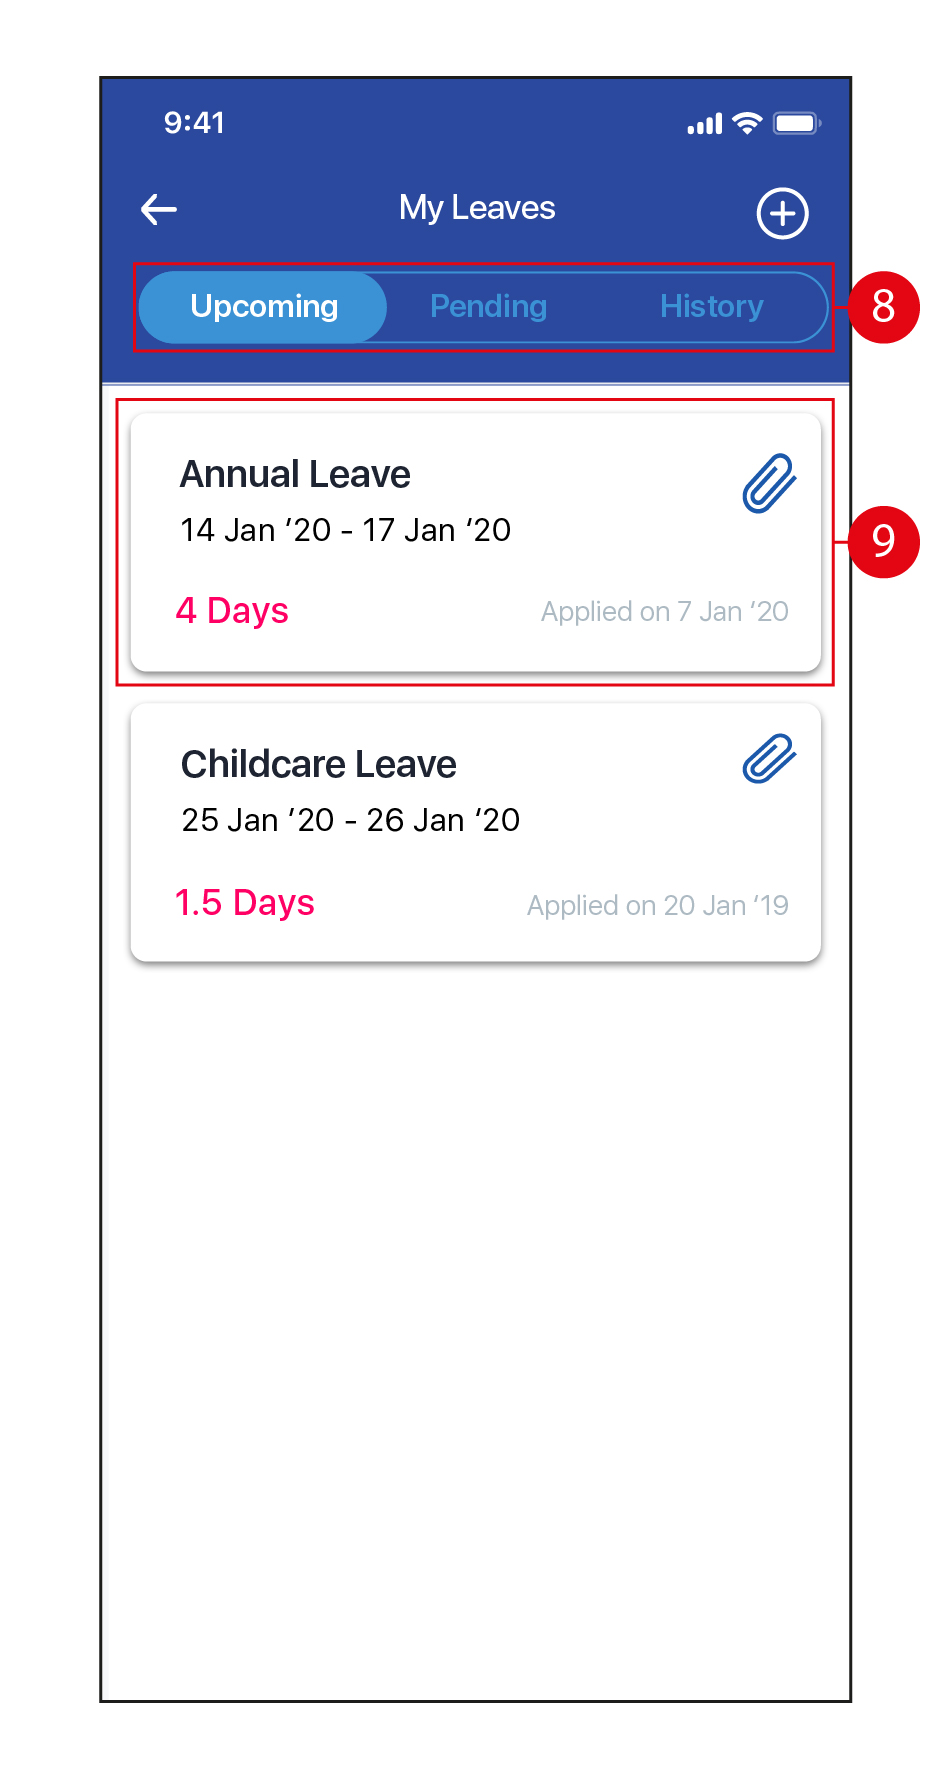
- Tap to view applied Leave that is Upcoming (approved) / Pending (pending approval) / History (Leave history).
- To cancel an existing Leave application, tap on the Leave.
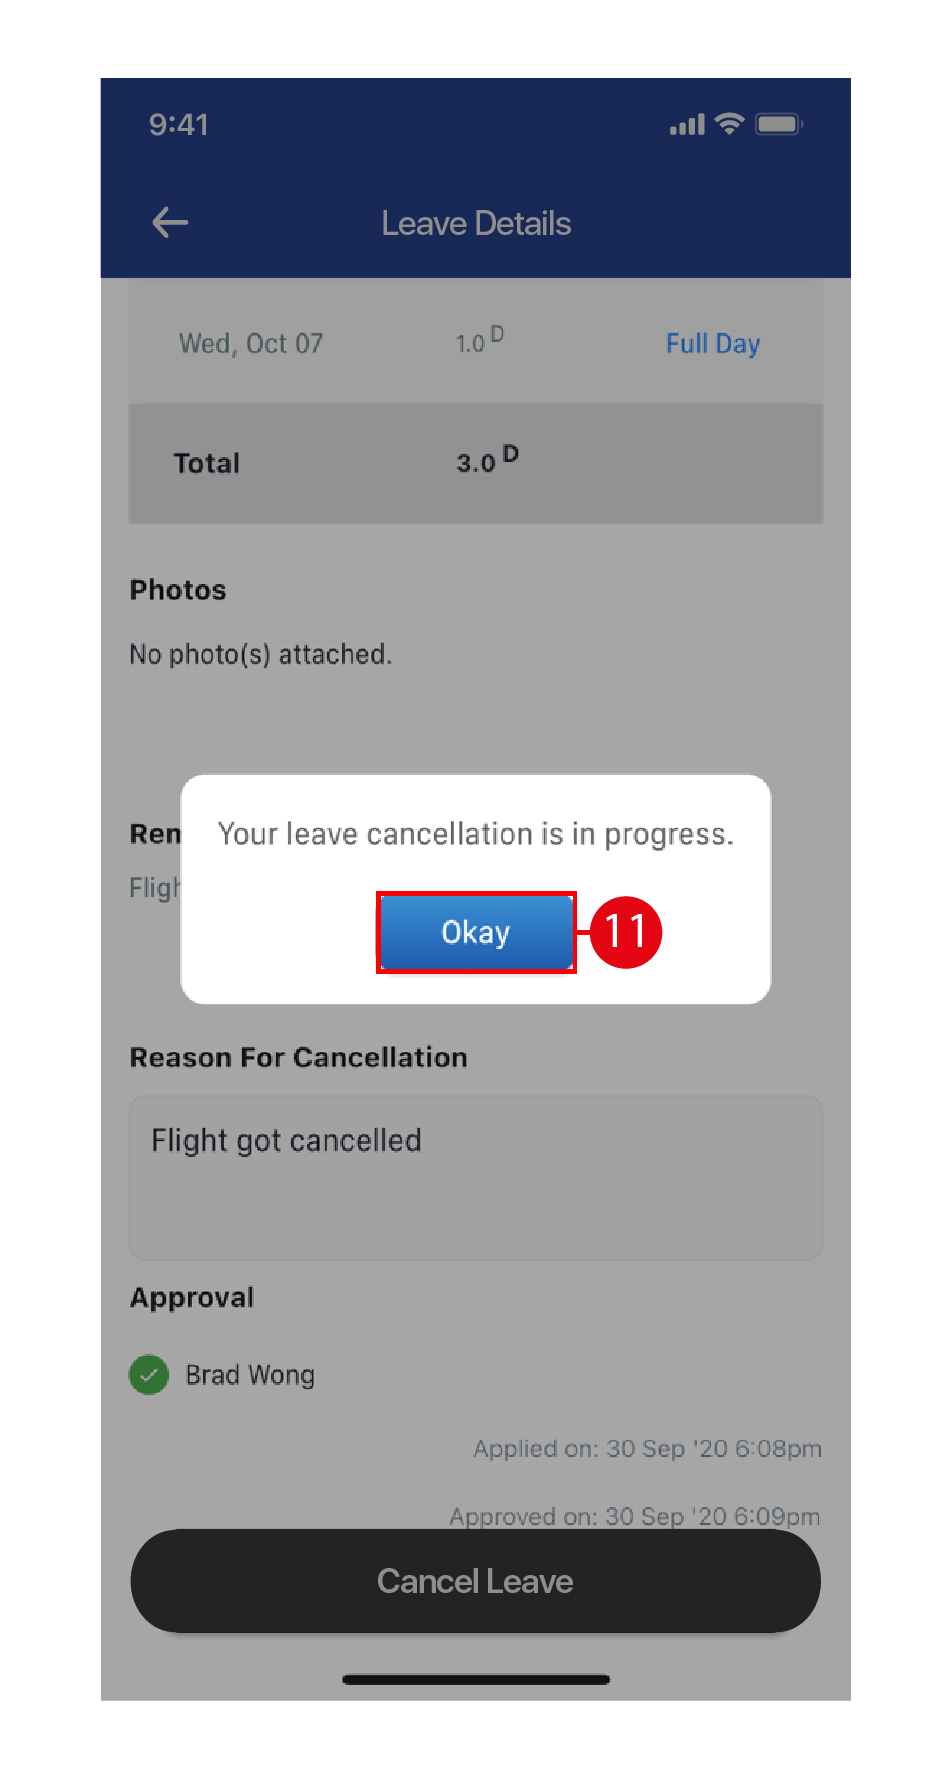
- Key in the Reason For Cancellation, if required. Once done, tap Cancel Leave.
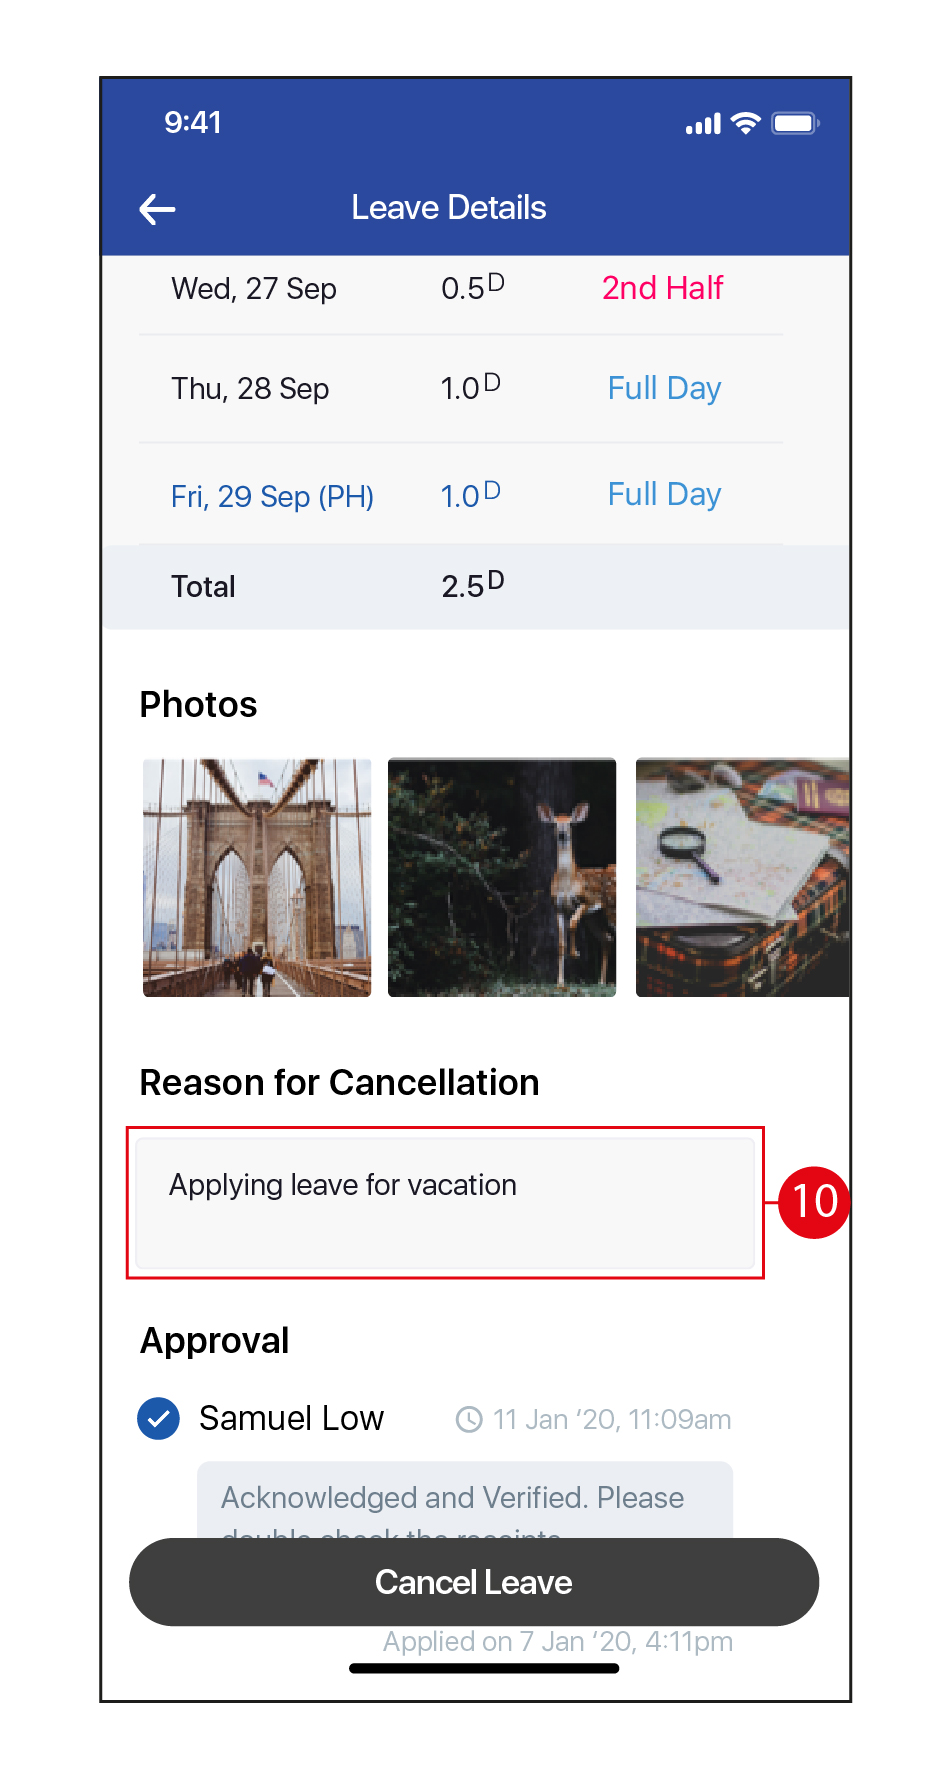
- Tap Okay to return to the main My Leaves page.
Claims
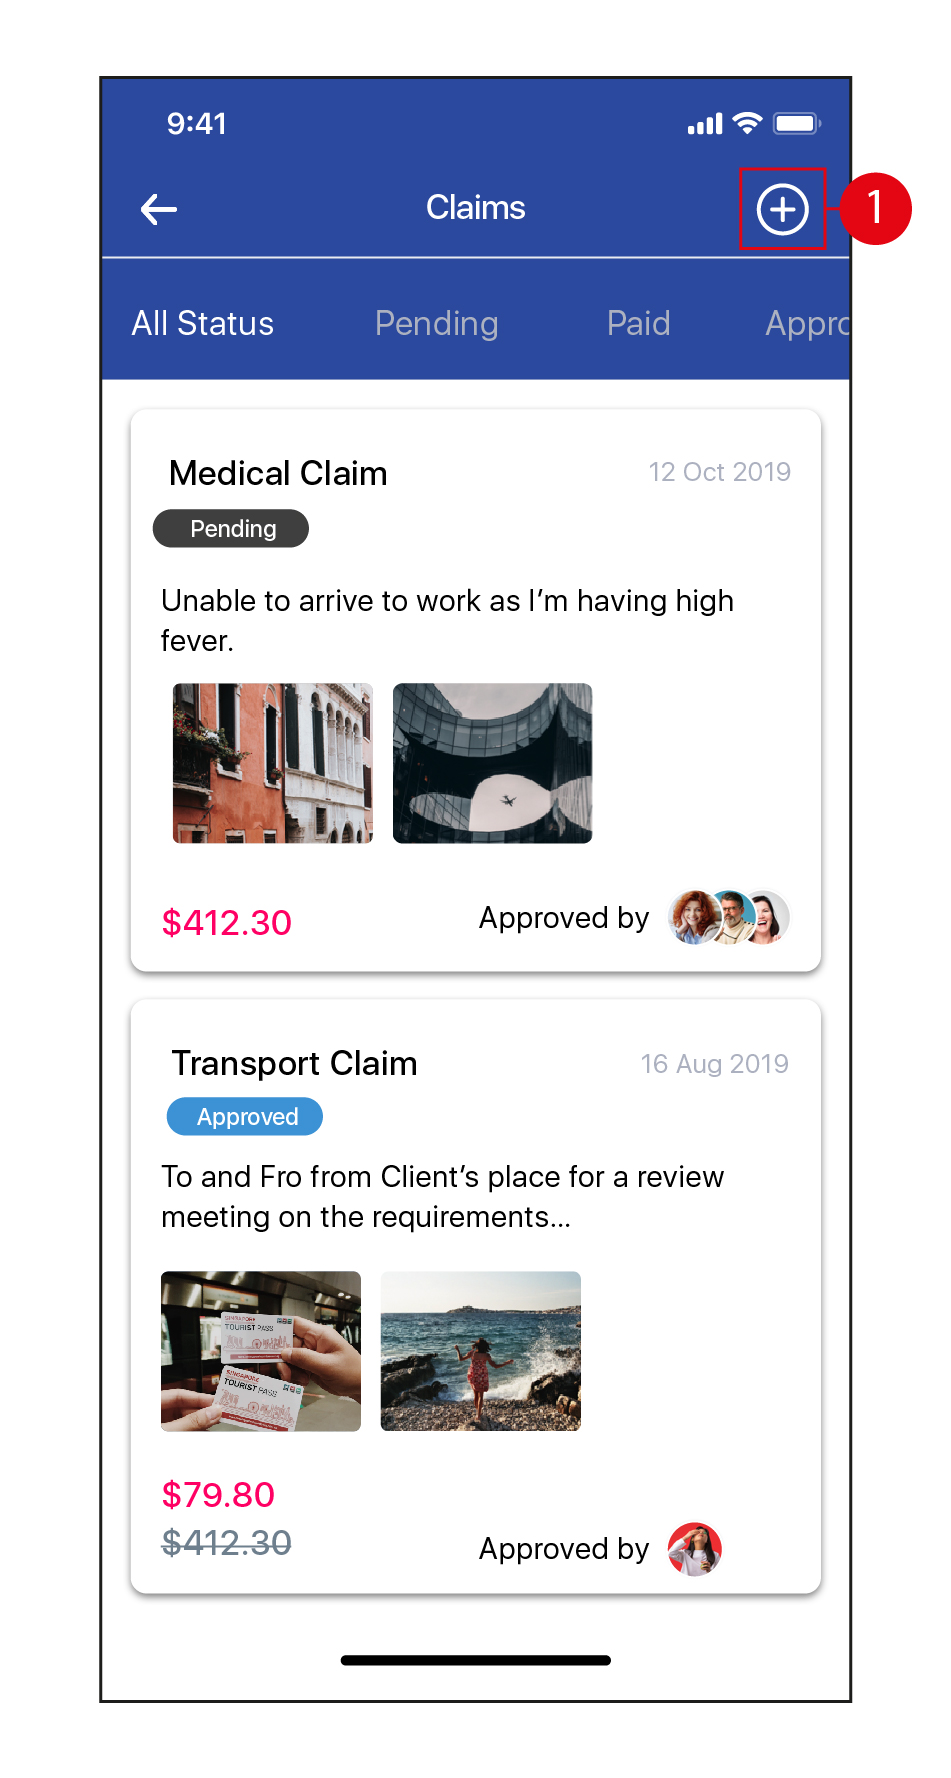
- Tap on the icon to create a Claims application.
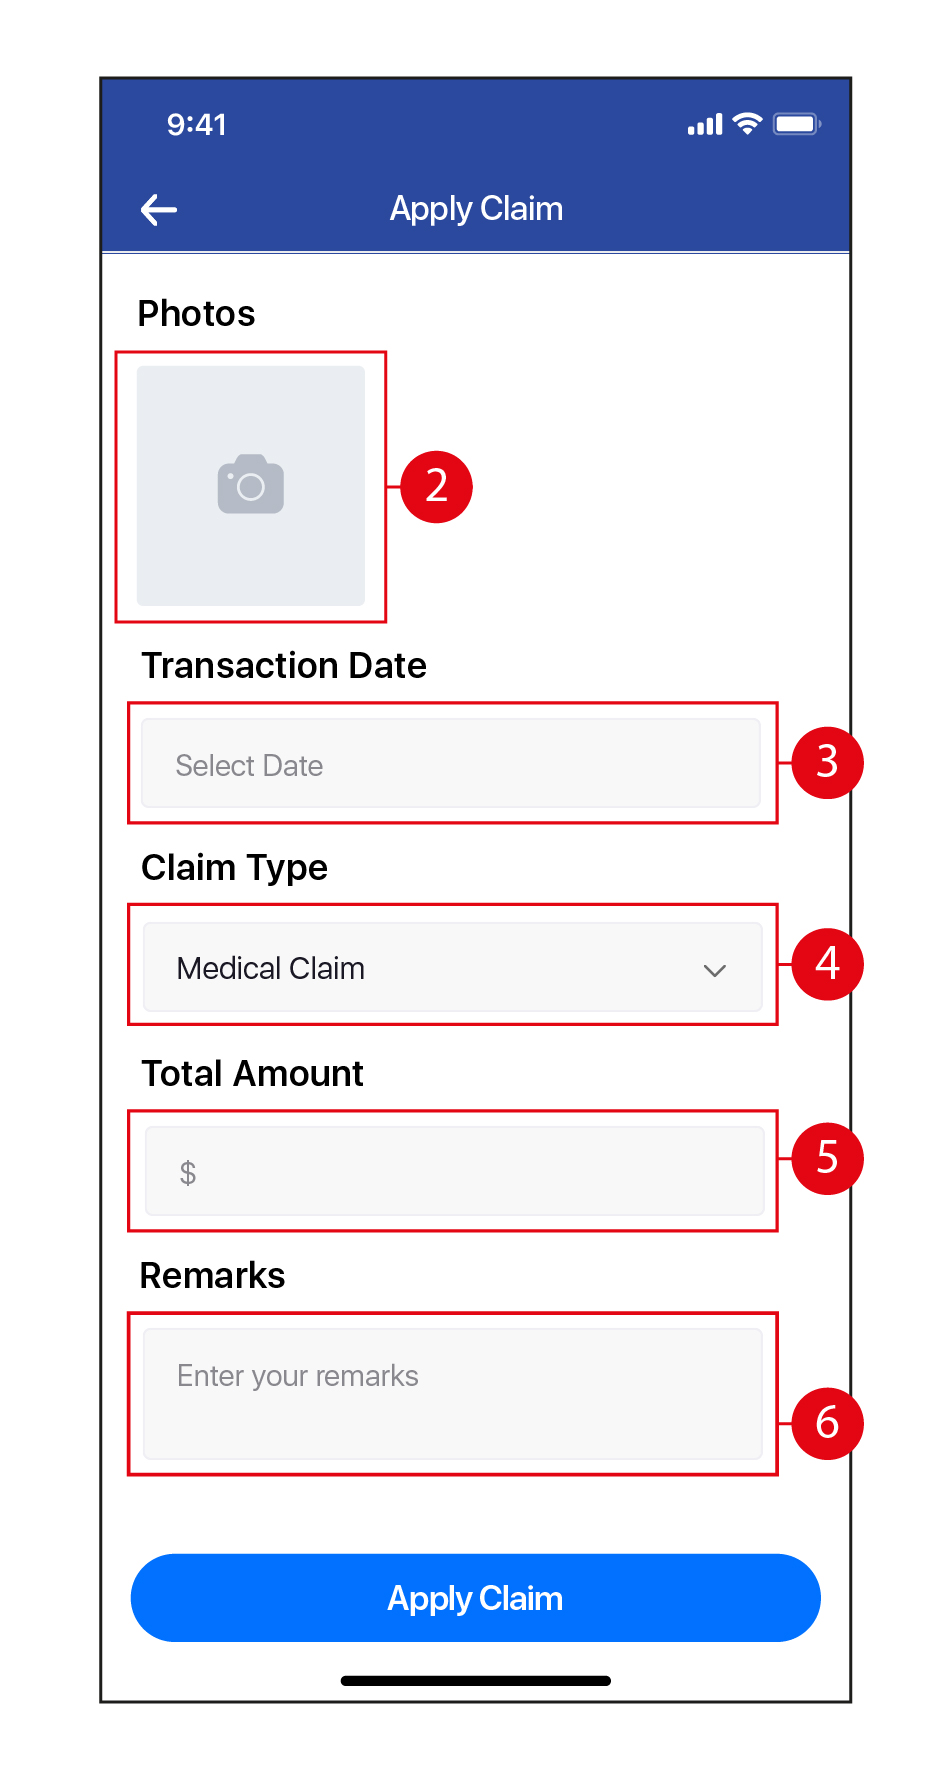
- Tap to attach a photo, either by taking a photograph or uploading a picture from the gallery in your device, or a file.
- Tap to select the date of the Claim. Tap on the date to select, and once done, tap OK.
- Select the Claim Type from the drop down list. (*Note: The Claim Types have to be created and assigned to the Employee making the Claim application in Herd Web first for it to be reflected here. Click on this link to learn how to configure Claim Types in Herd Web)
- Tap to input the Total Amount. You may select an amount presented to you if it matches the total amount on the attachment, or key in an amount manually.
- Key in any remarks if required. Once done, tap Apply Claim.
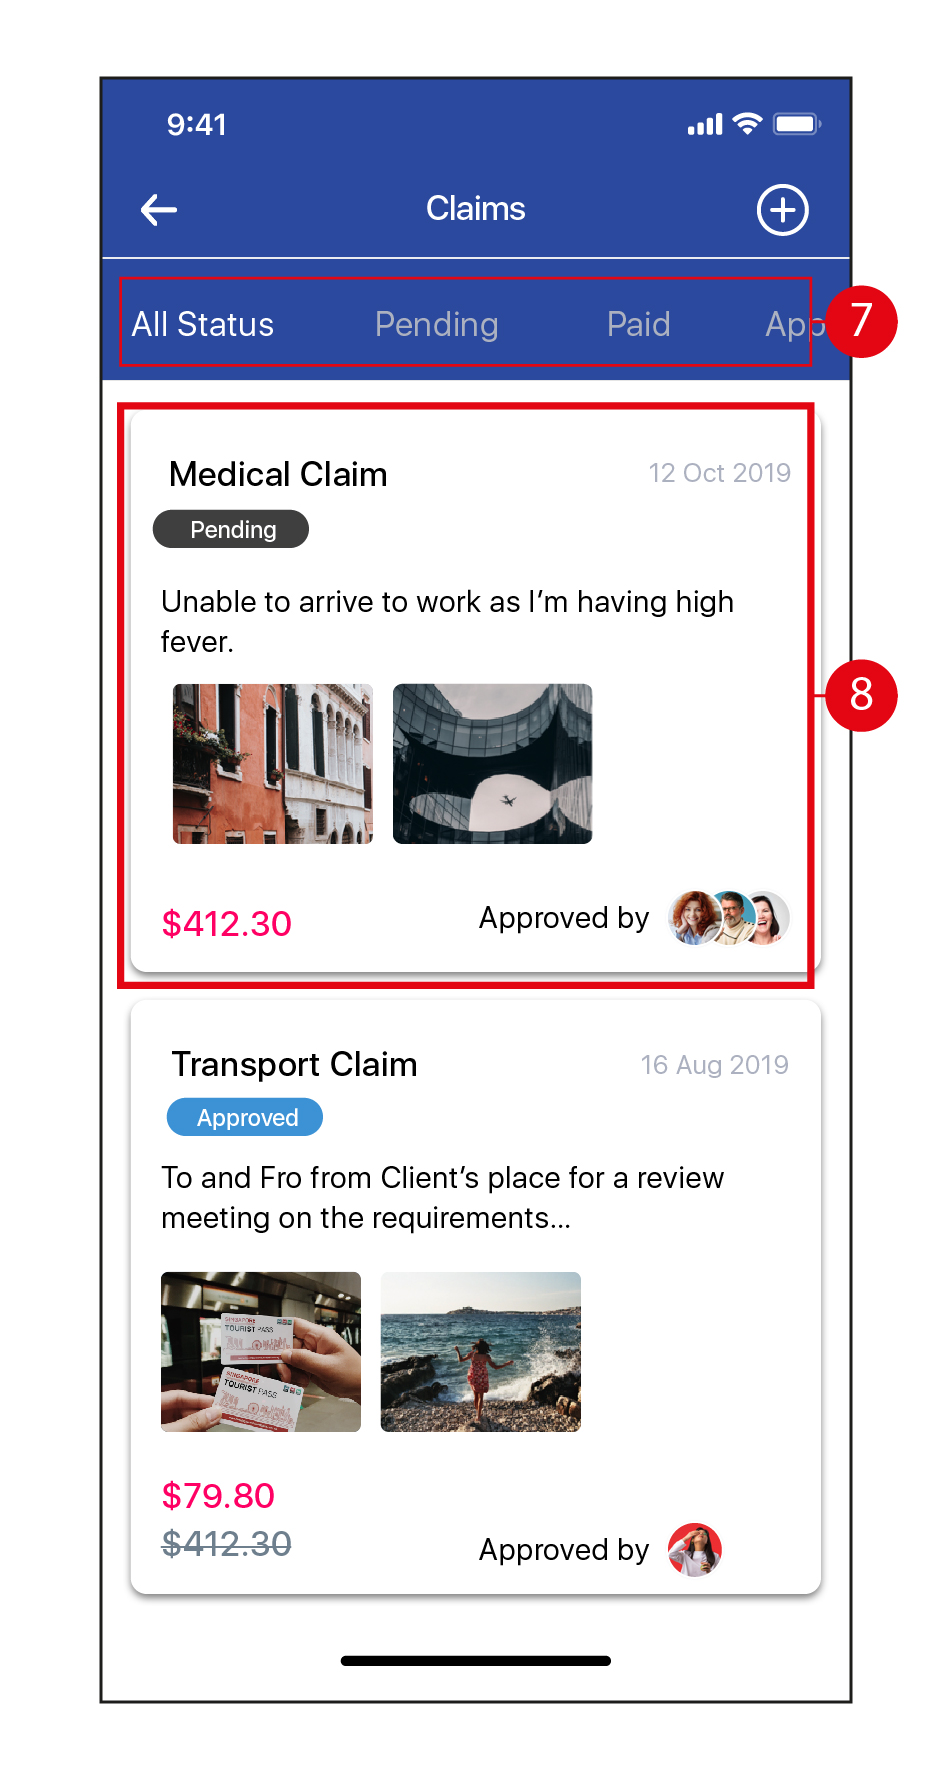
- Swipe left or right to view Claim applications categorized by All Status / Pending / Approved / Paid / Rejected / Cancelled.
- To cancel a Claim application, tap on the Claim.
- Tap on an attachment to enlarge it, if required. To confirm, tap Cancel Claim.

- Tap Okay to return to the main Claims page.

Timesheet
- Tap on < and > to change the Month.
- Tap on a date to view the details of the Timesheet.

- You will be able to see an overview of the Attendance taken for that date.
- Tap on the
 icon to view the Notes created on that date.
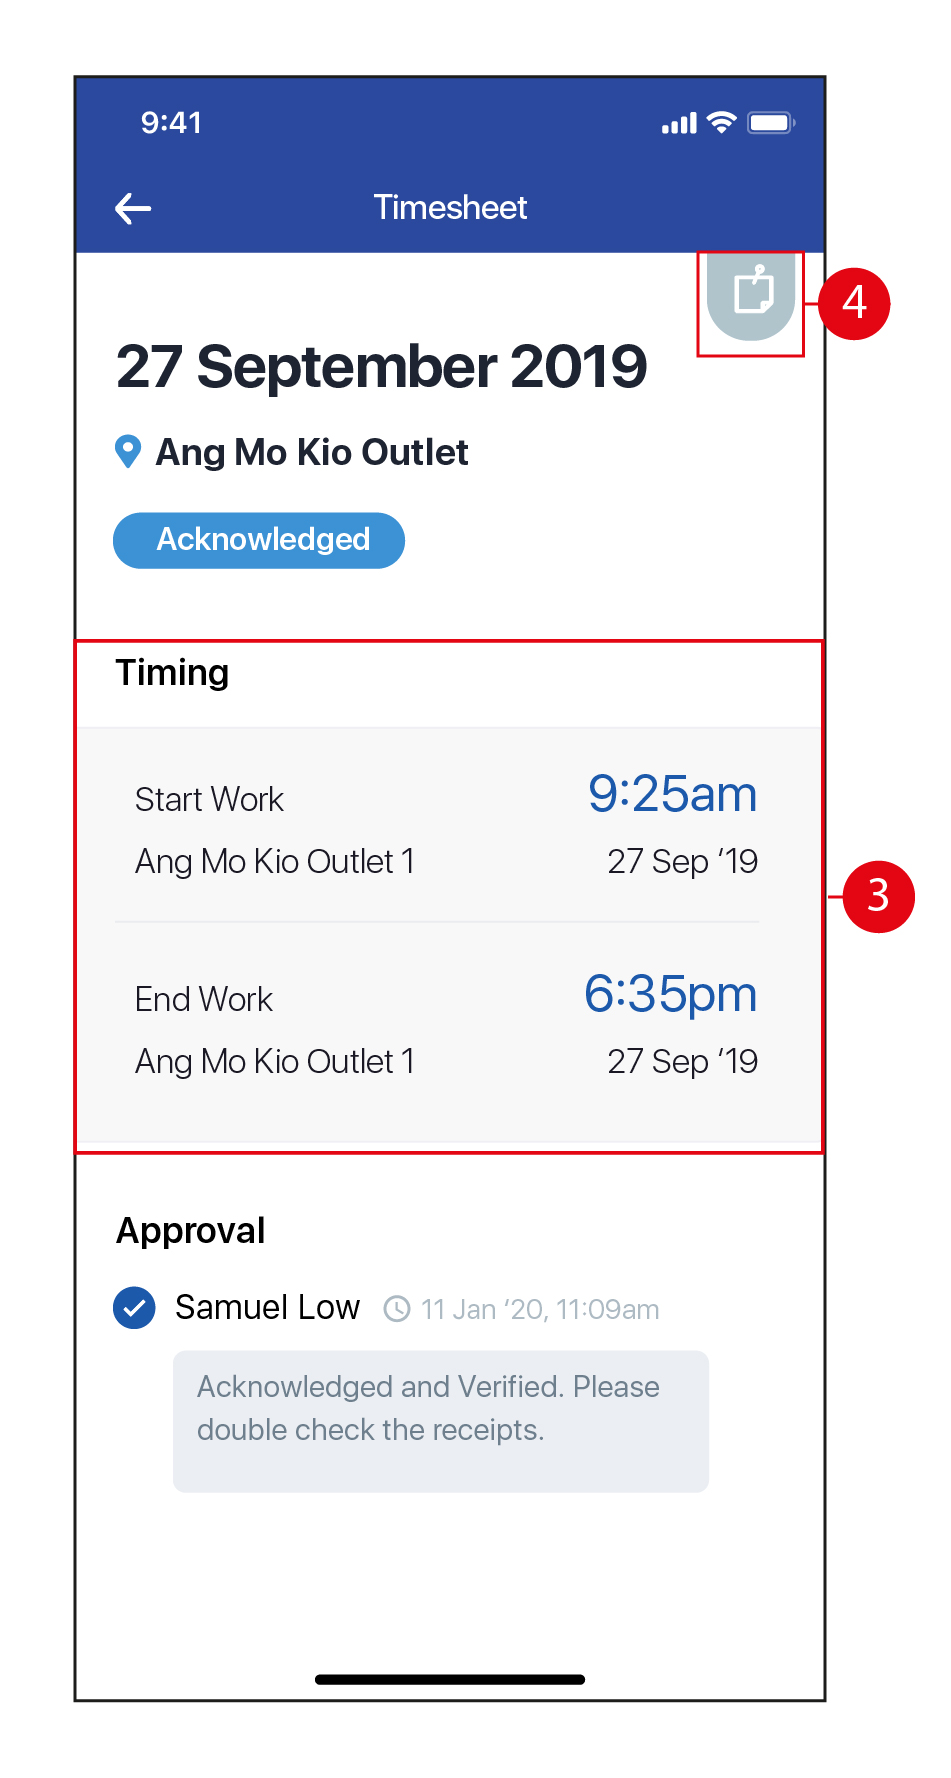
- Once done, tap on the
 to return to the Home page.
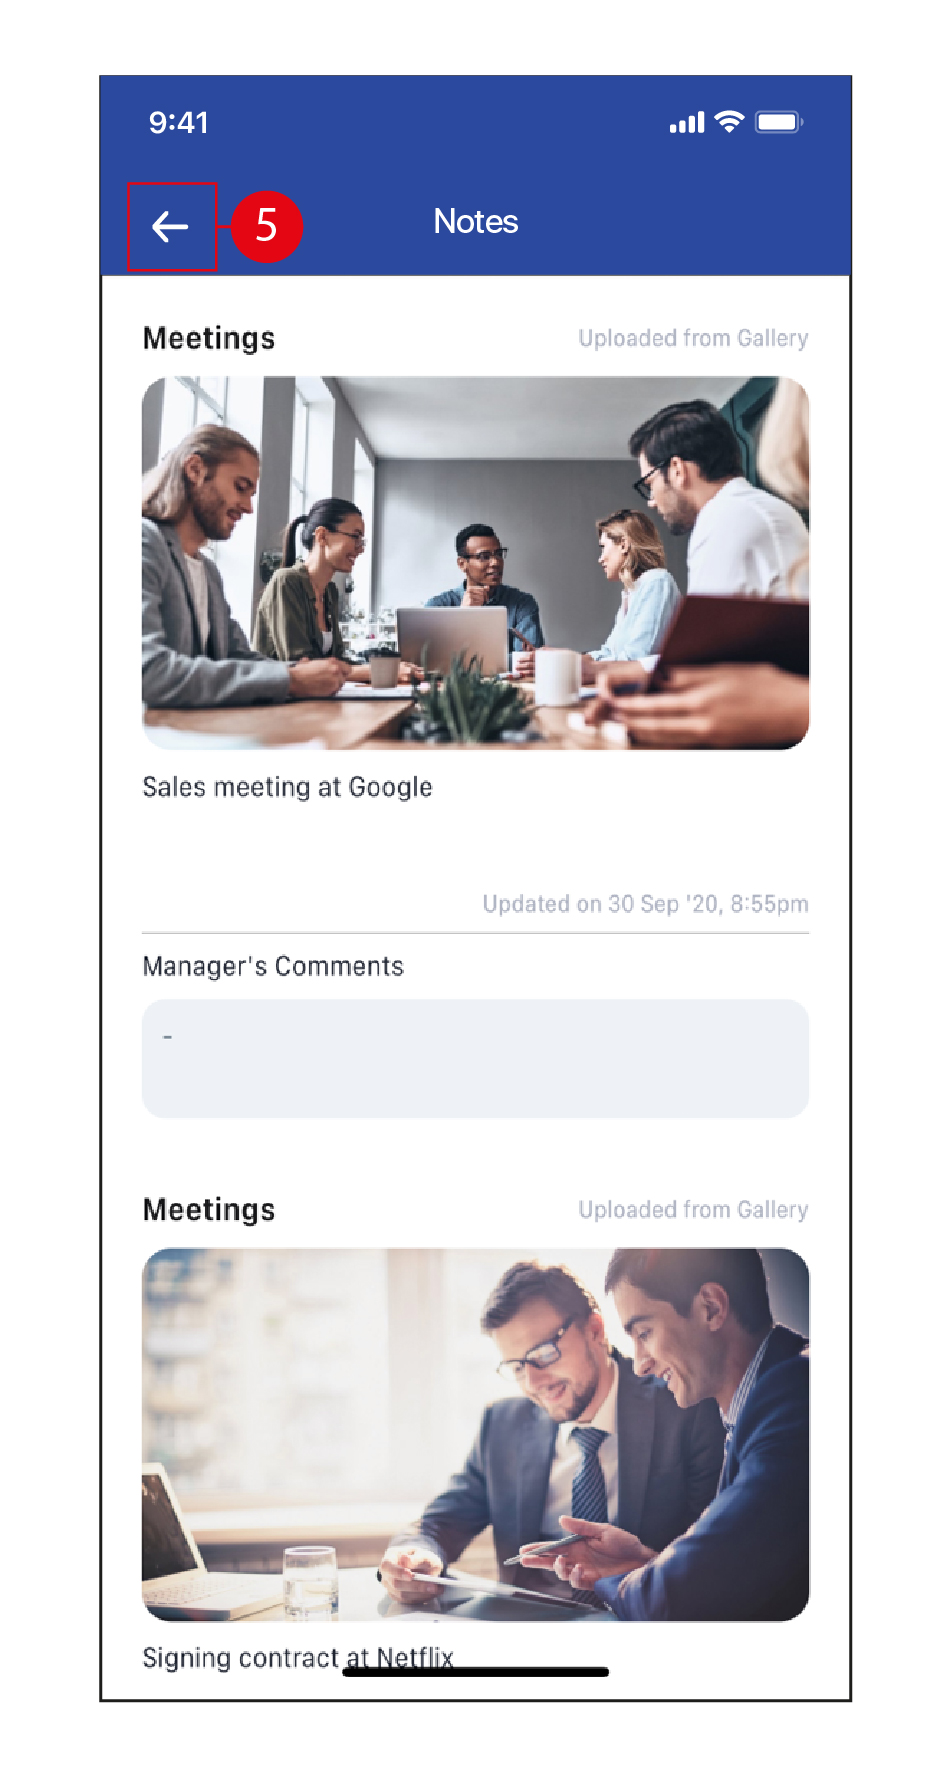
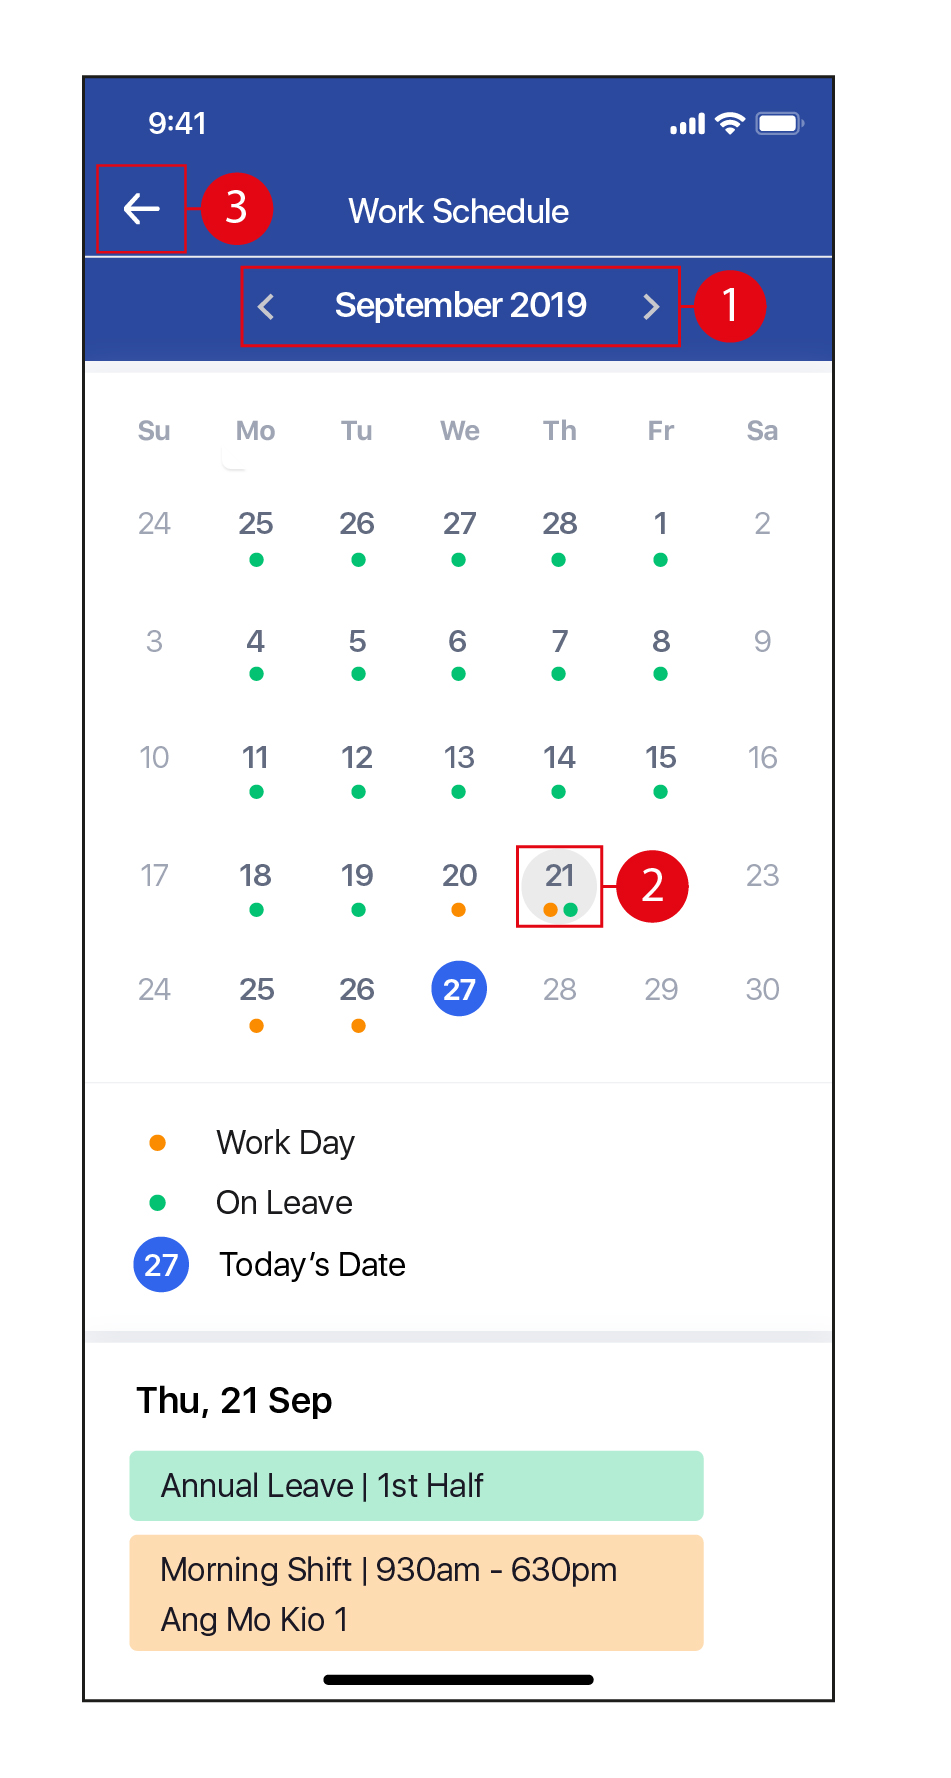
Work Schedule
- Tap on < and > to change the Month.
- Tap on any date to view the Work Schedule and / or Leave for that date.
- Once done, tap on the to return to the Home page.
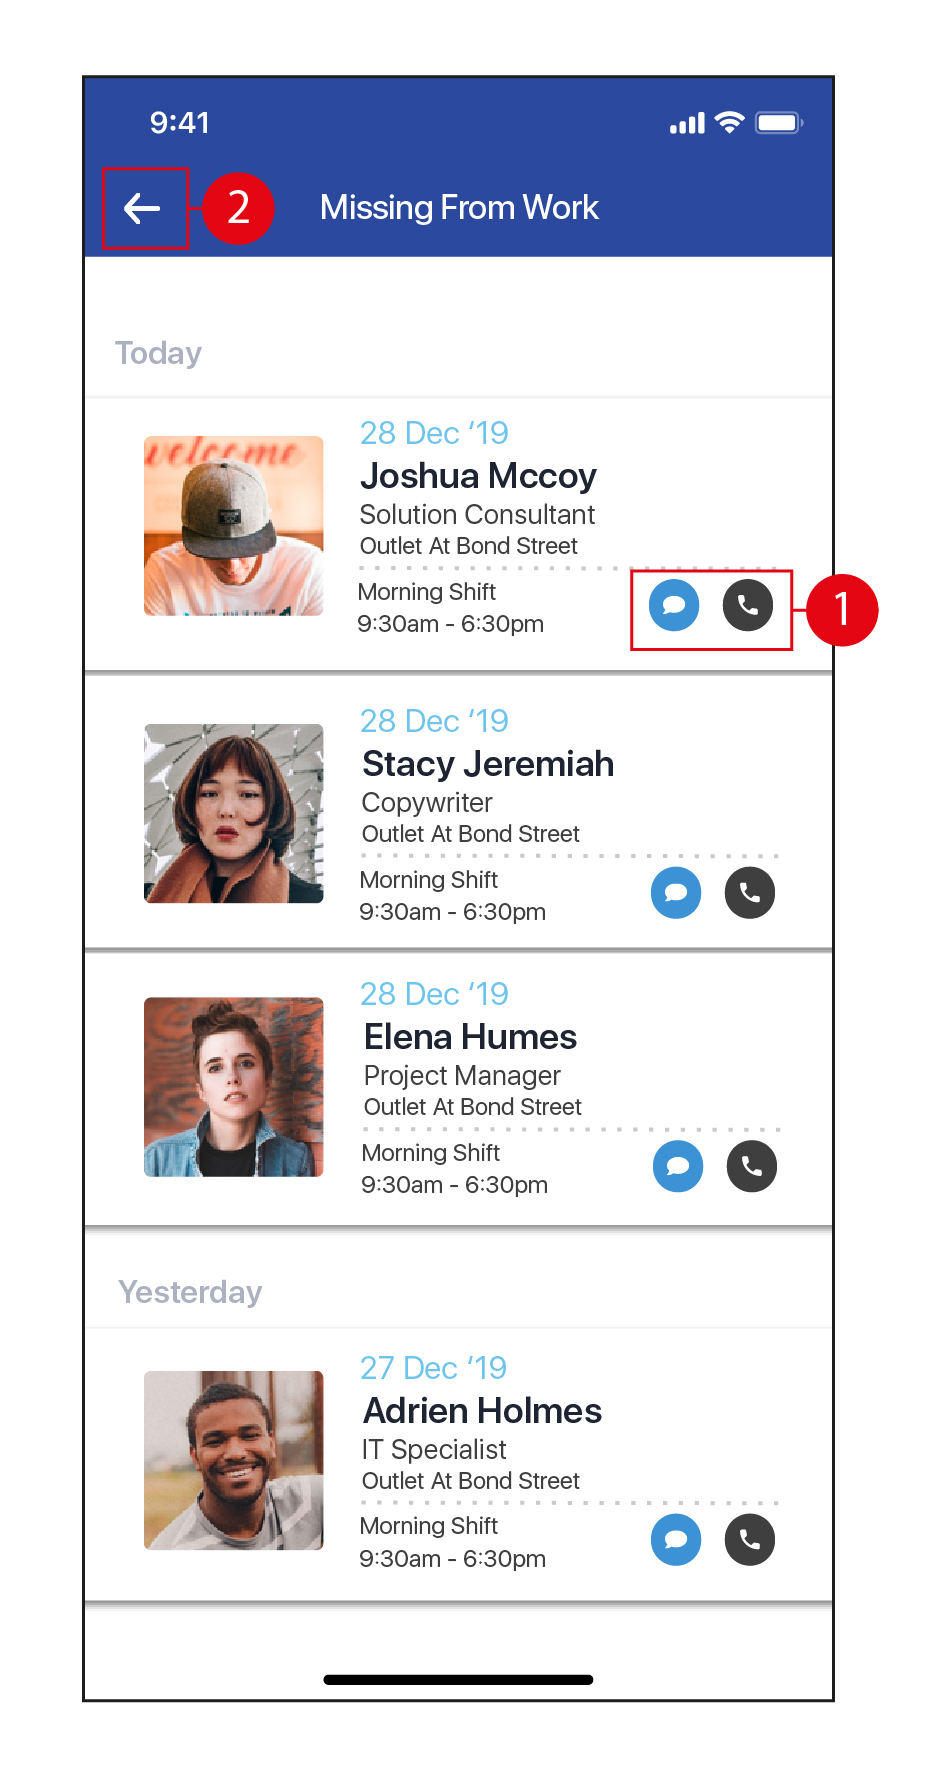
Missing from Work
- Tap on the
 icons to SMS / call Employees who have not turned up for work.
 - tap on the to return to the Home page.
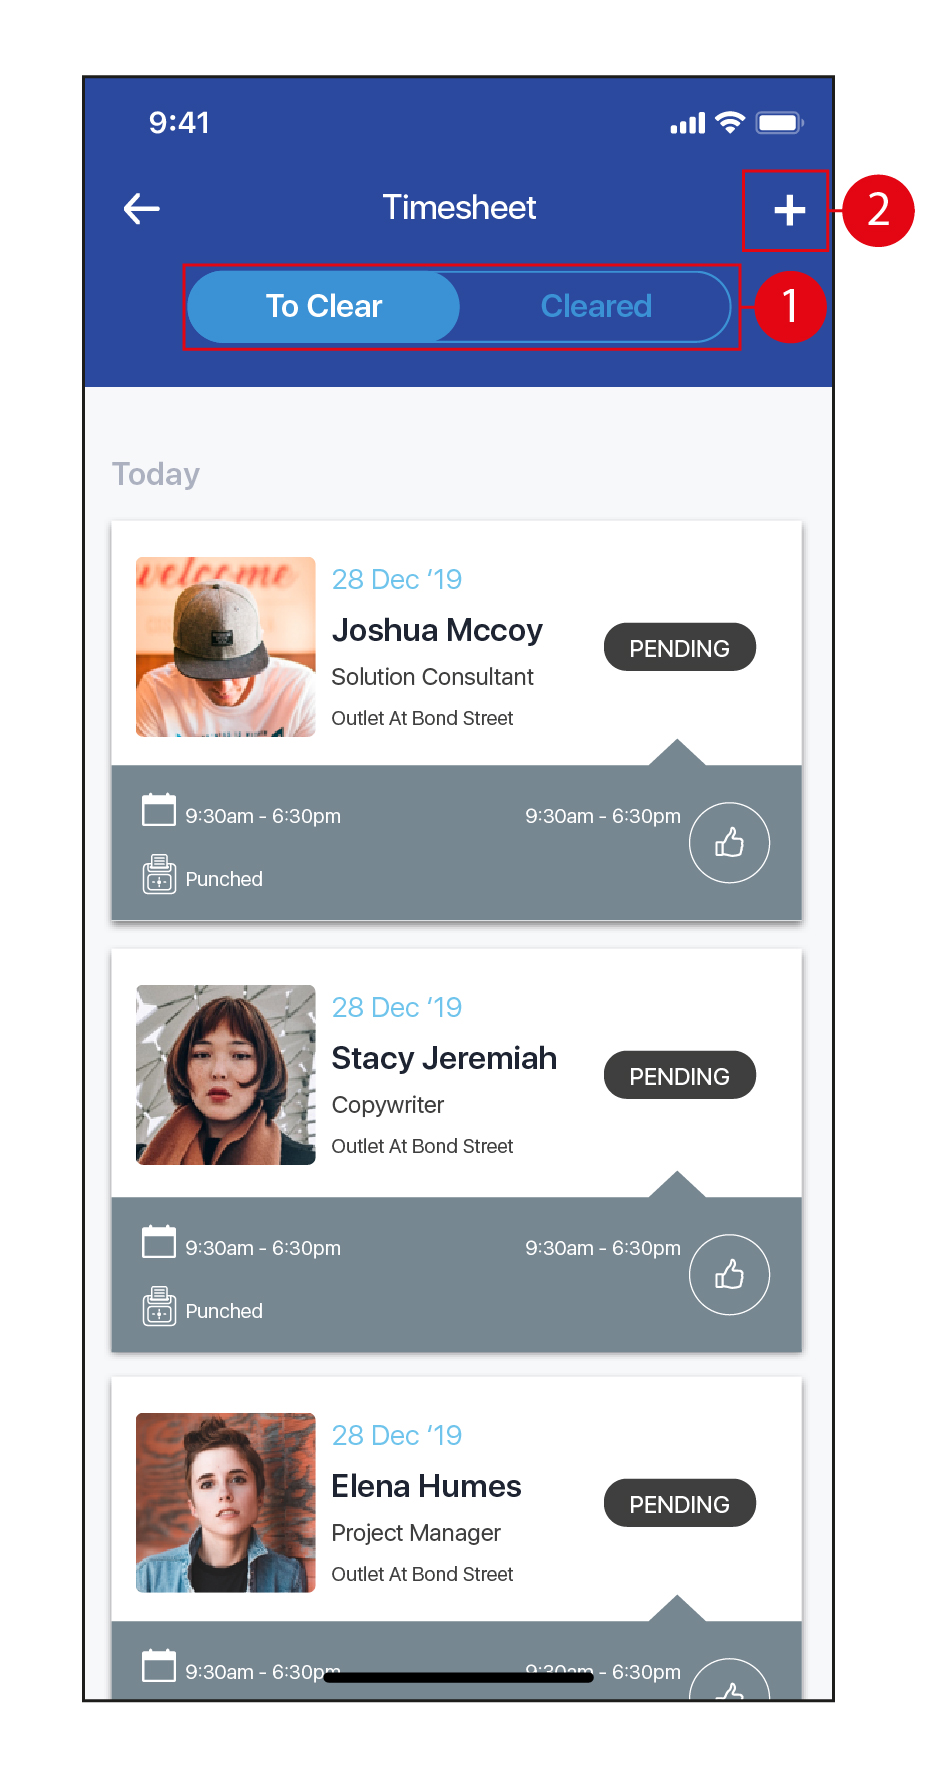
Timesheets
- Tap to view Timesheets To Clear / Timesheets that have been Cleared.
- Tap on the icon to Add a Timesheet for an Employee.
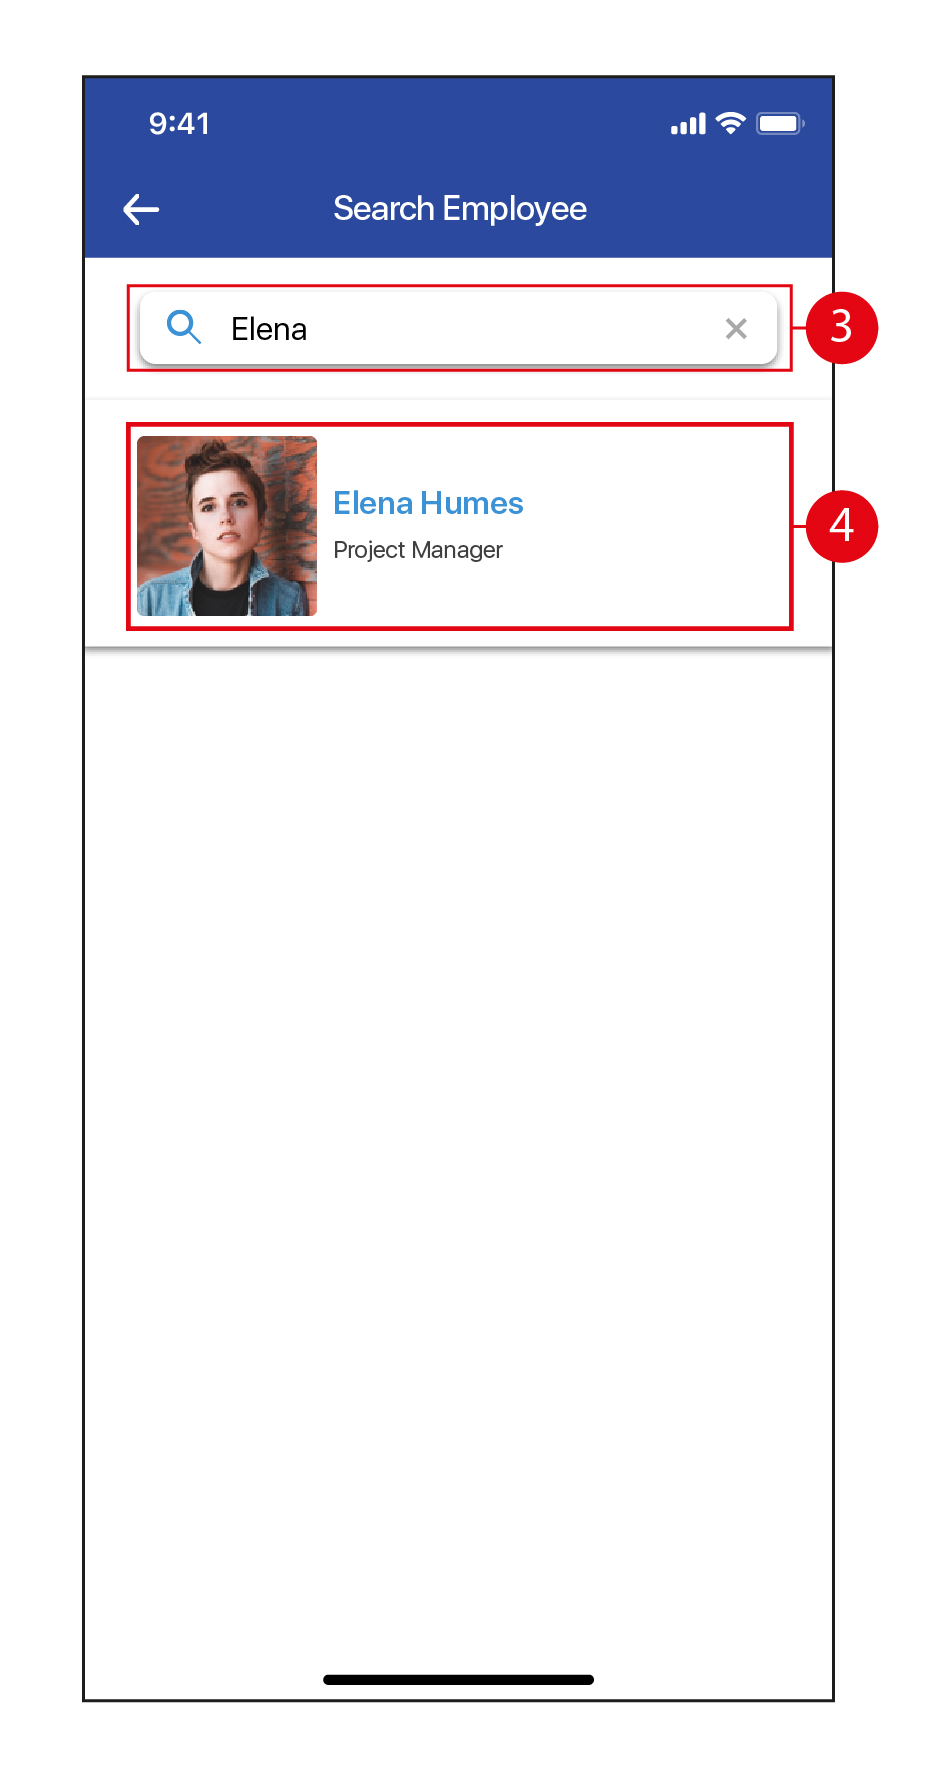
- Key in the Employee's name to search for them. (*Top Tip: Key in the first 3 letters of their name and tap Search, you do not need to key in their full name.)
- Tap to select the Employee to add a timesheet for them.
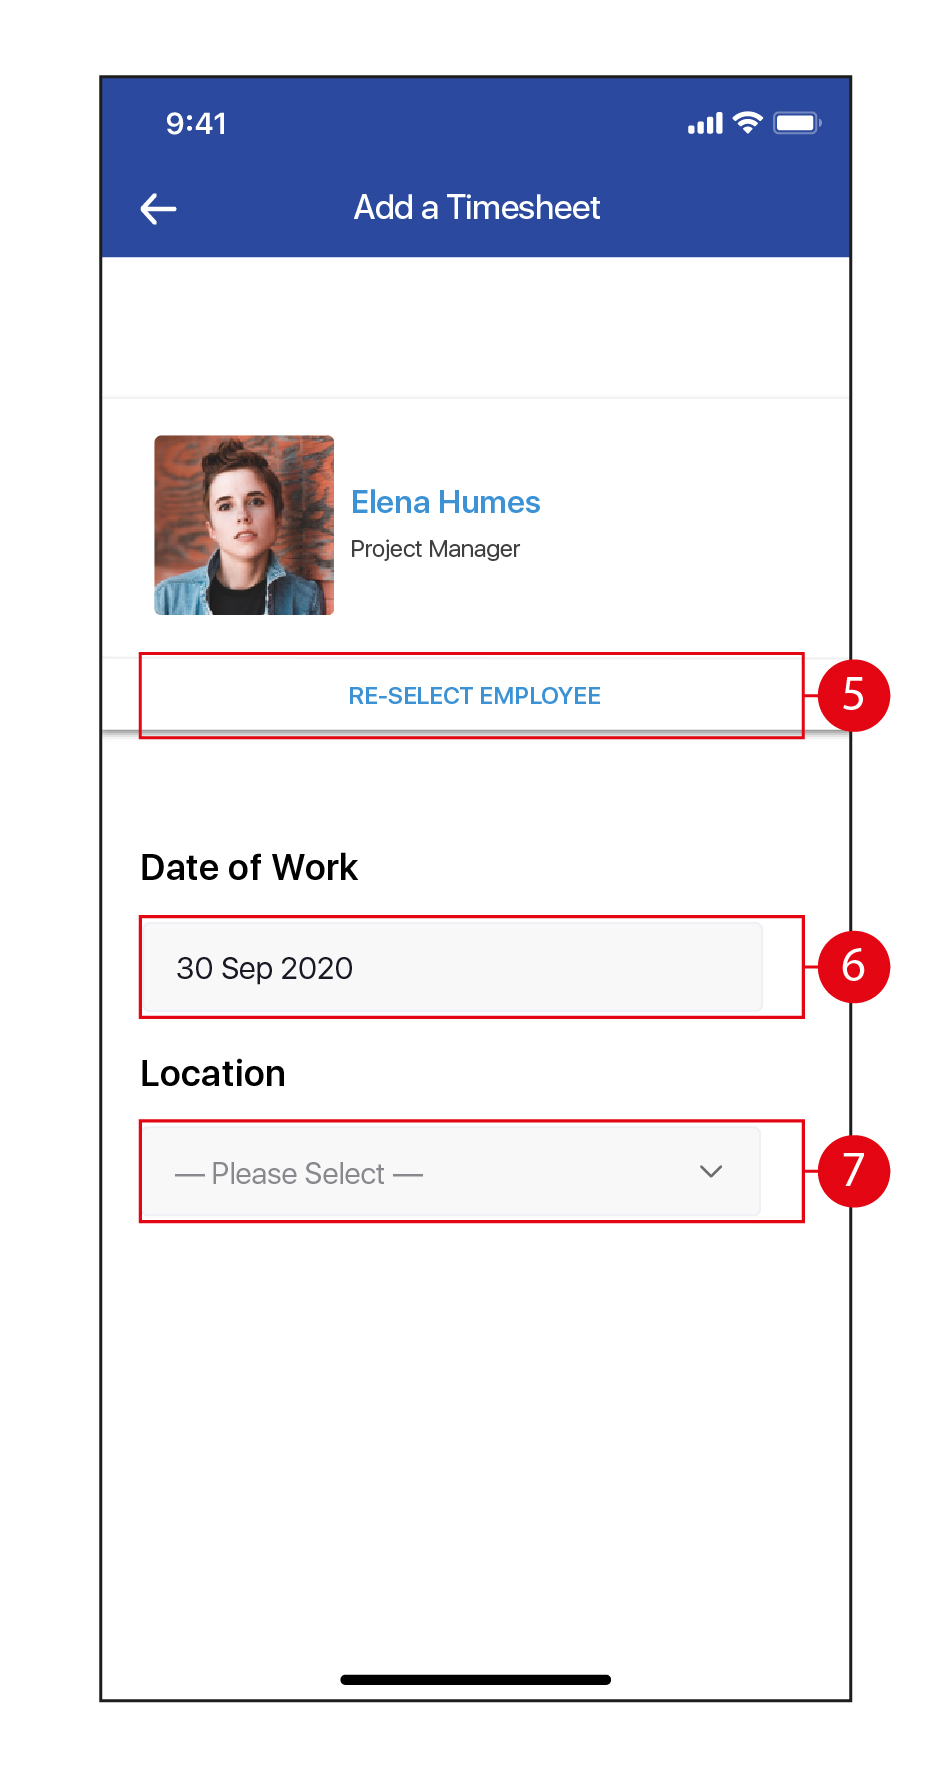
- Tap RE-SELECT EMPLOYEE to search for another Employee.
- Tap to select a different Date of Work.
- Tap to select the Location from the drop down list. Once done, tap NEXT to continue.
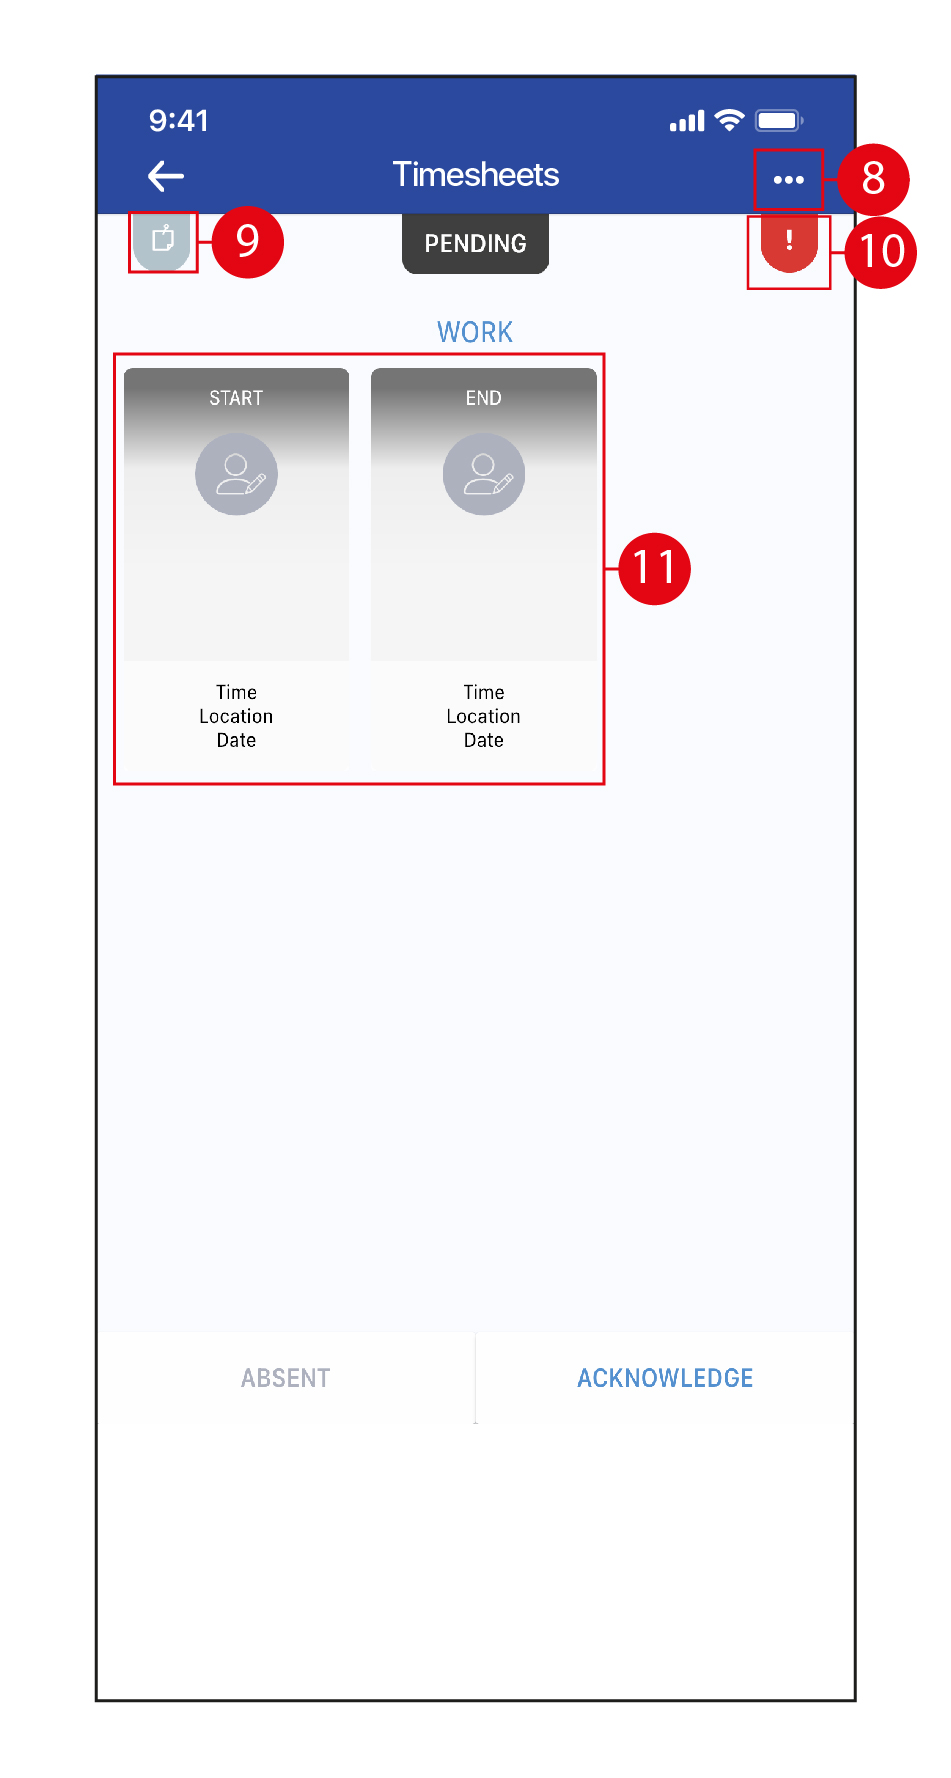
- Tap on the
 icon to access TIMESHEET INFO / ADD TIMING / DECLINE TIMESHEET.
 - Tap the
 icon to view Notes if any.
 - The
 icon indicates there is an error with this Timesheet. In this case, missing timings.
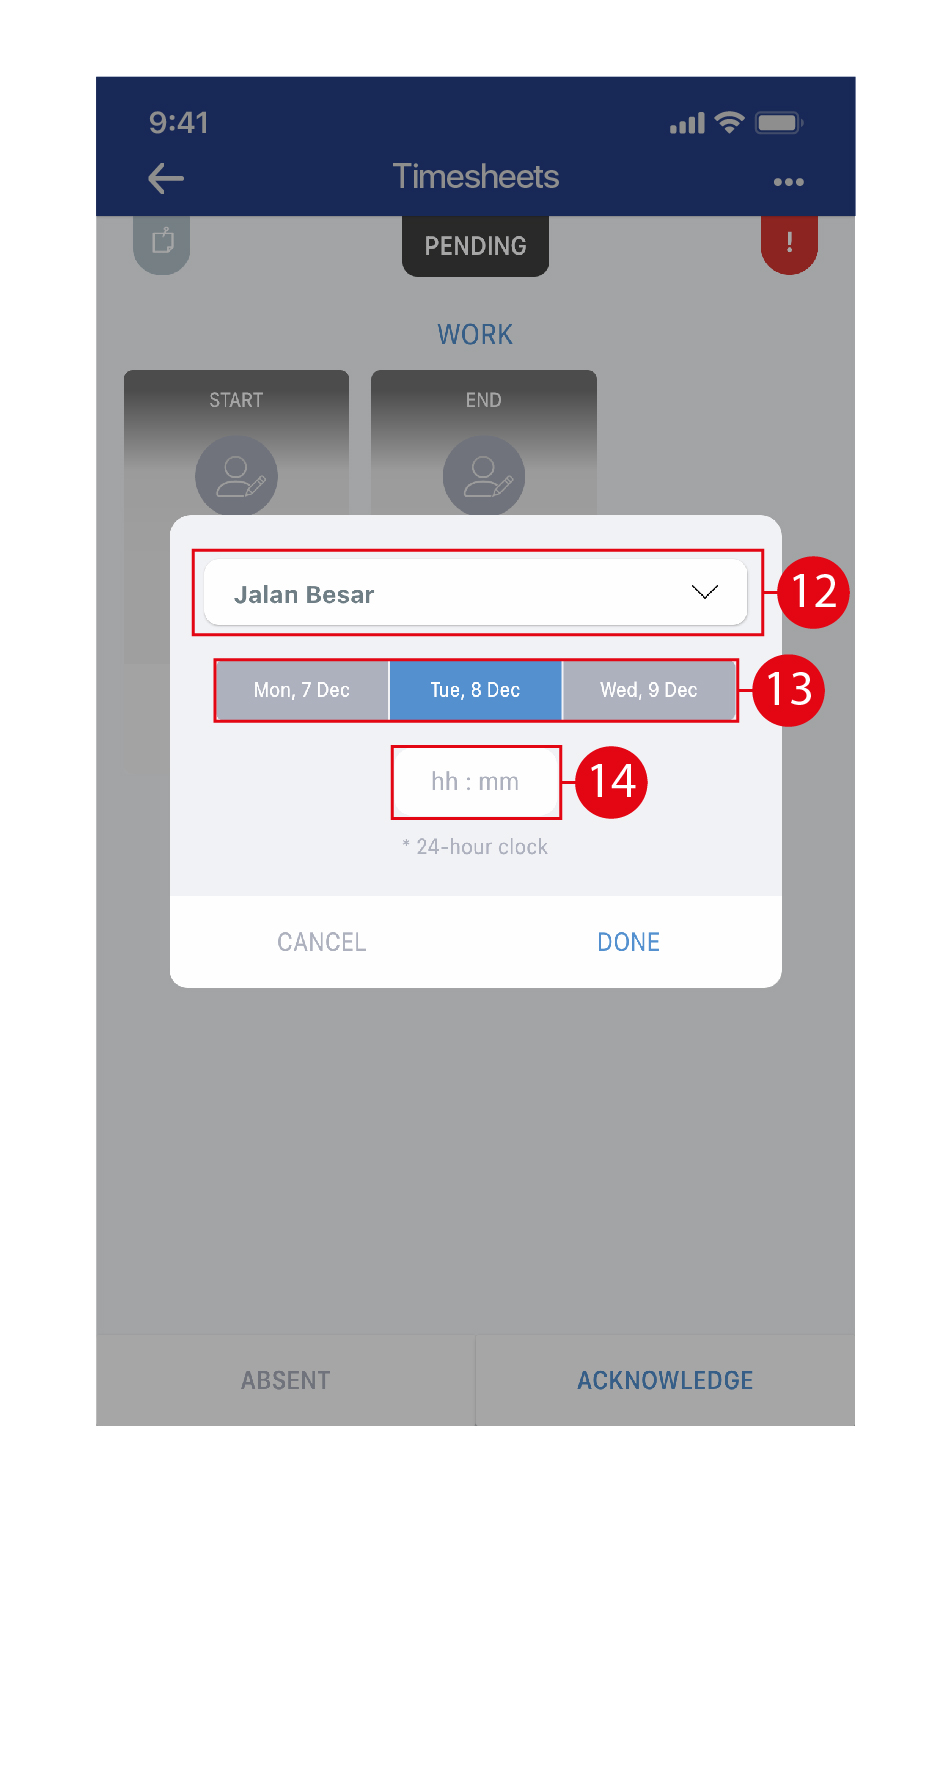
 - Tap on the START and END timings to input the timings.
- Select the Location from the drop down list.
- Select the date.
- Use the scroll selector to select the time. Do the same for both Start and End. To confirm, tap Done.
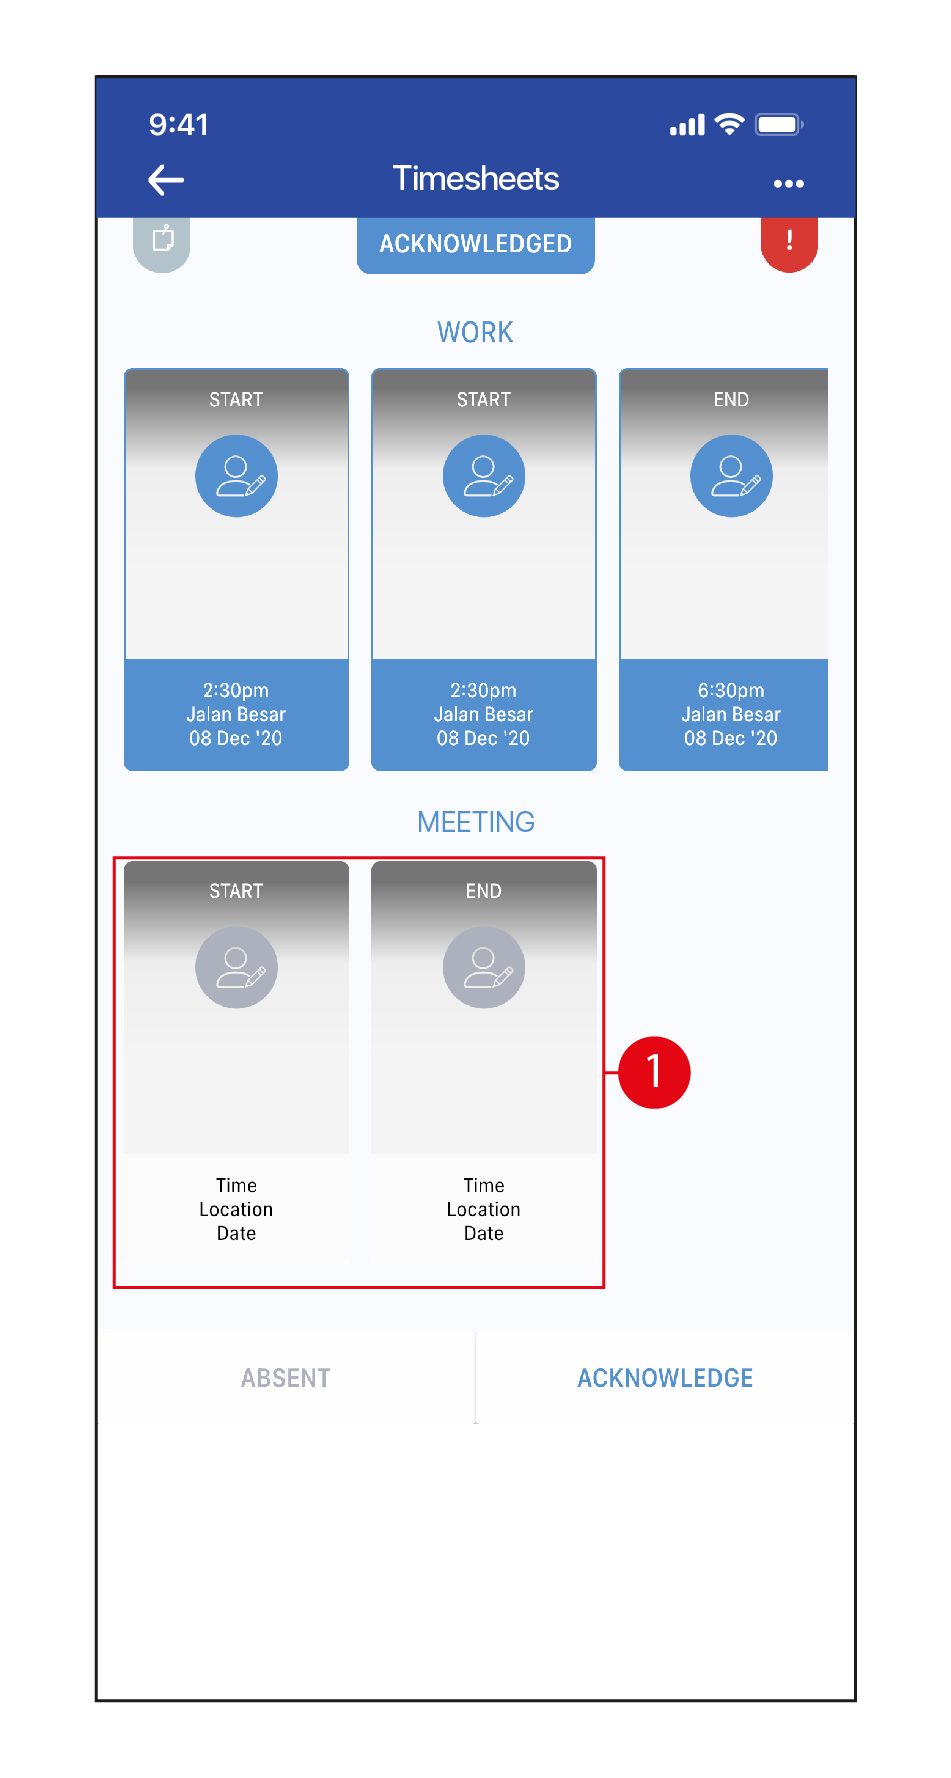
- Once the Start and End timings have been entered, the boxes will turn blue. Tap on the top section of the box to edit the Location / Date / Time again.
- Tap on the lower portion of the box to deselect the box, if required.
- Once done, tap ACKNOWLEDGE to acknowledge the timesheet. (*Note: Tap ABSENT to mark the Employee as absent for the day if that is the case. Then, it is not necessary to perform Steps 11-16.)
TIMESHEET INFO
- View the information of the timesheet here. Tap on the
 icons to SMS / call the Employee.
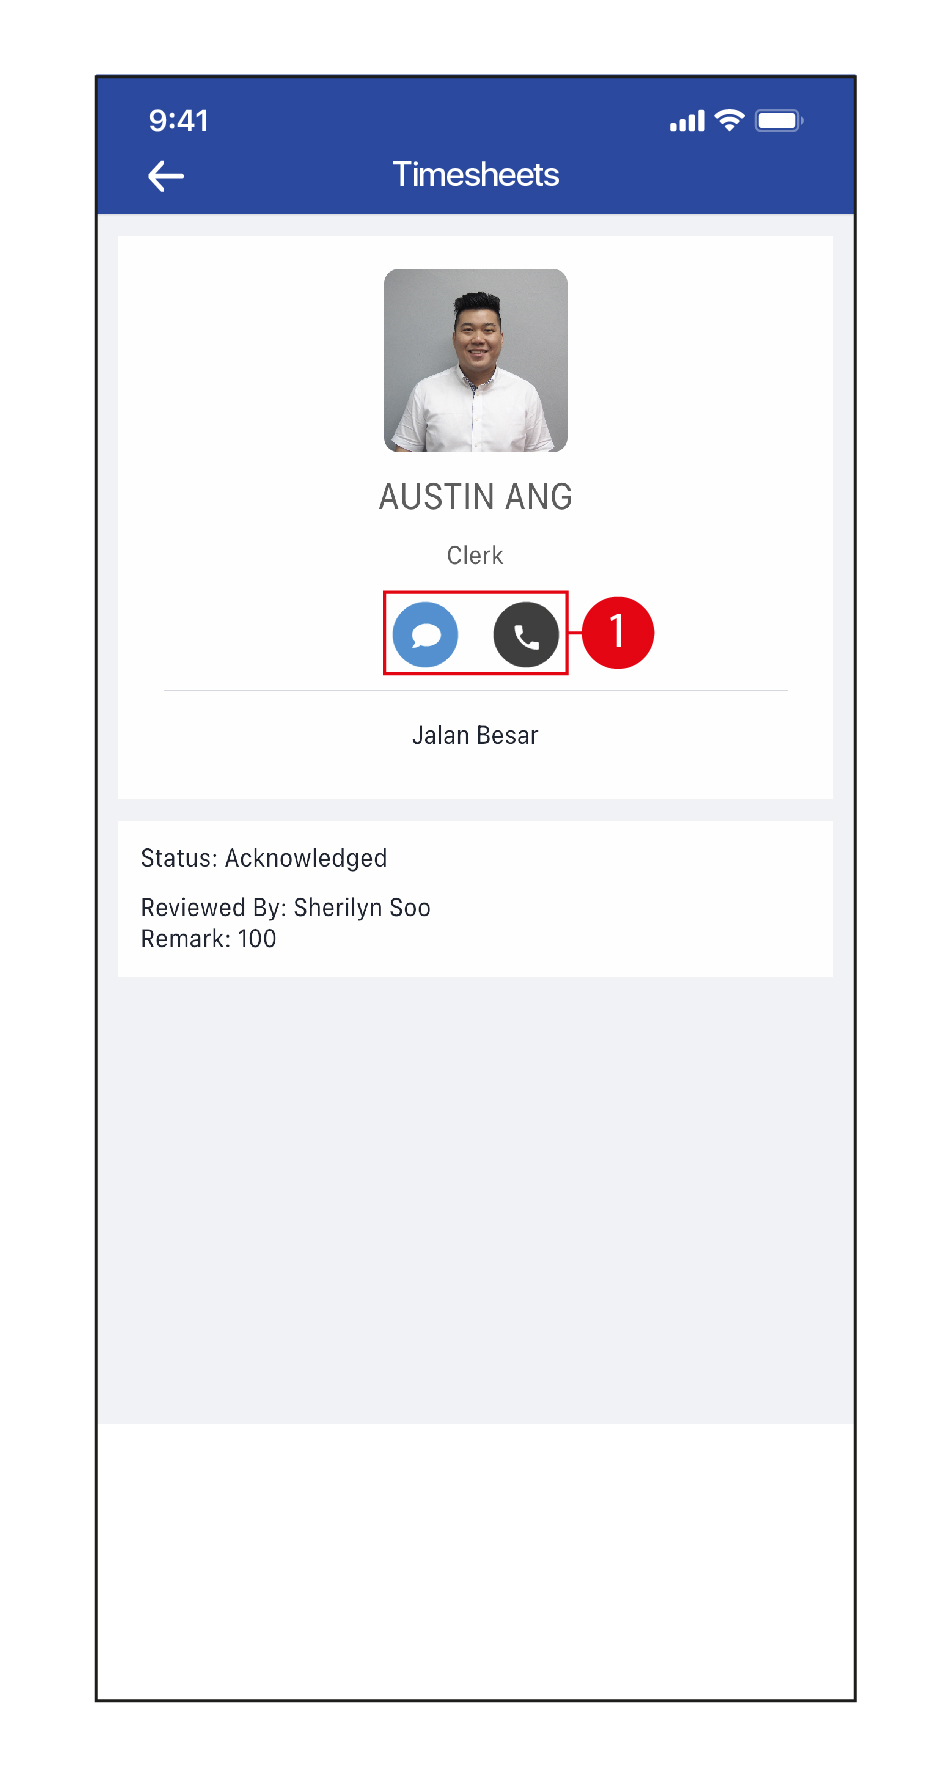
ADD TIMING
- Add another set of Start and End timings for Work / Break / Travel / Meeting.
DECLINE TIMESHEET
- Enter a Remark if required. Once done, tap Confirm.

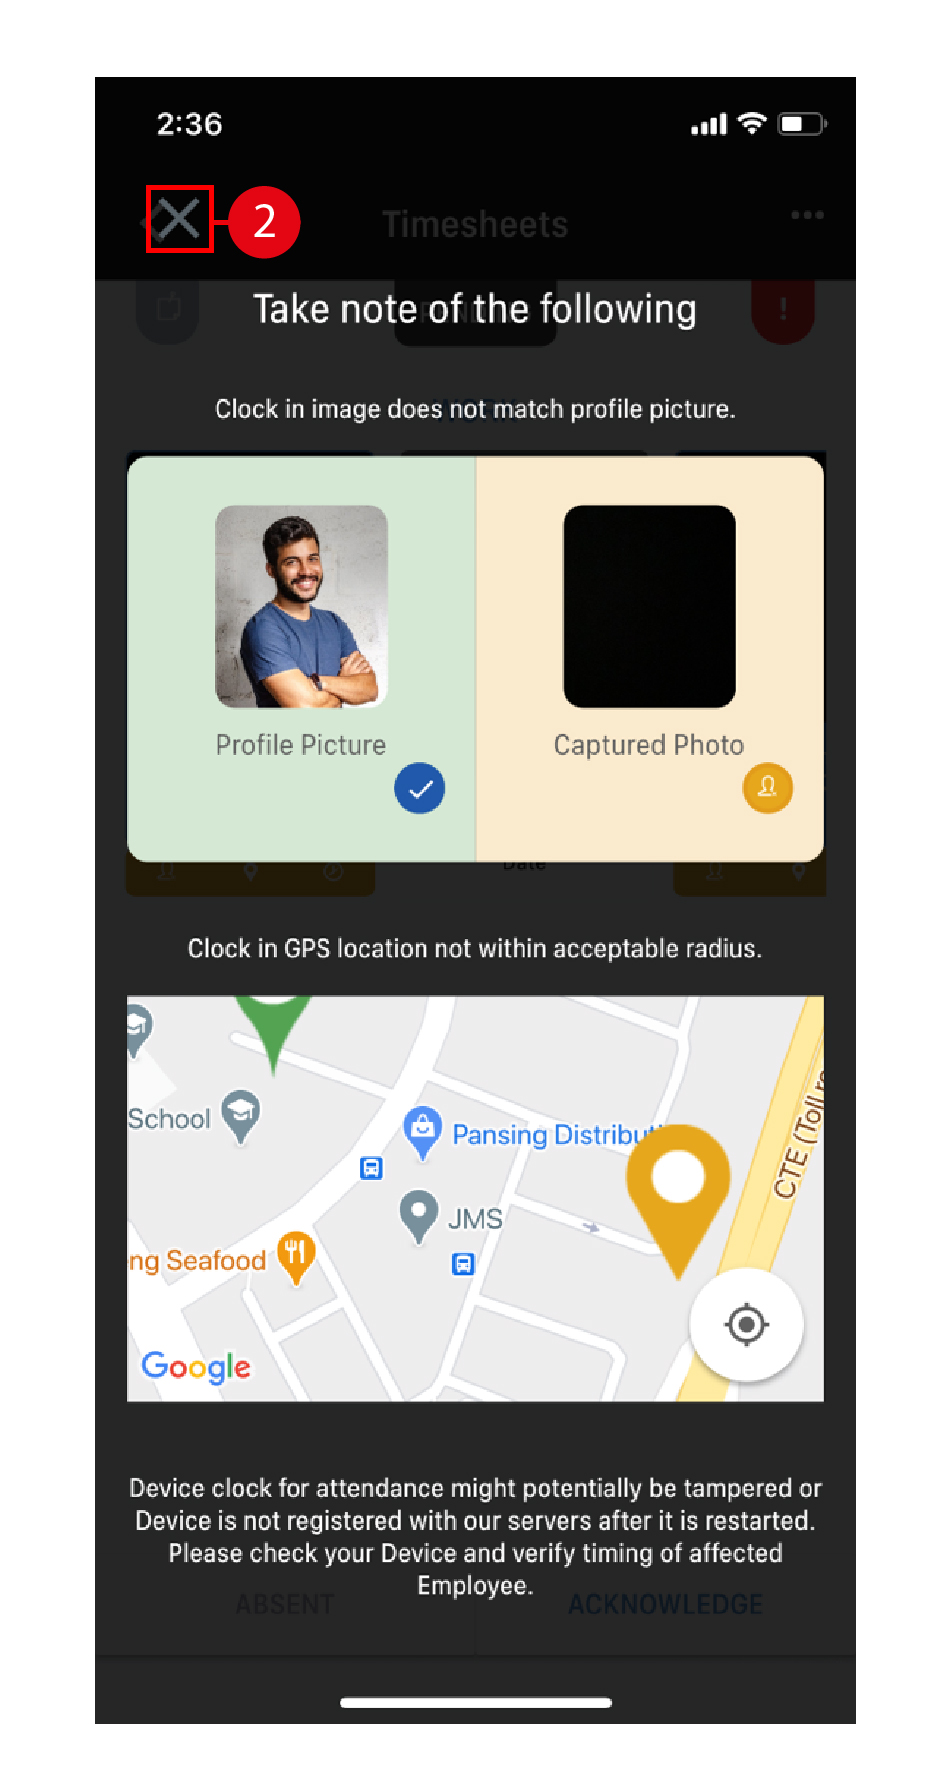
Timesheets with Errors
- Any errors to a timesheet will appear in yellow. Tap on the yellow bar to view the error details.
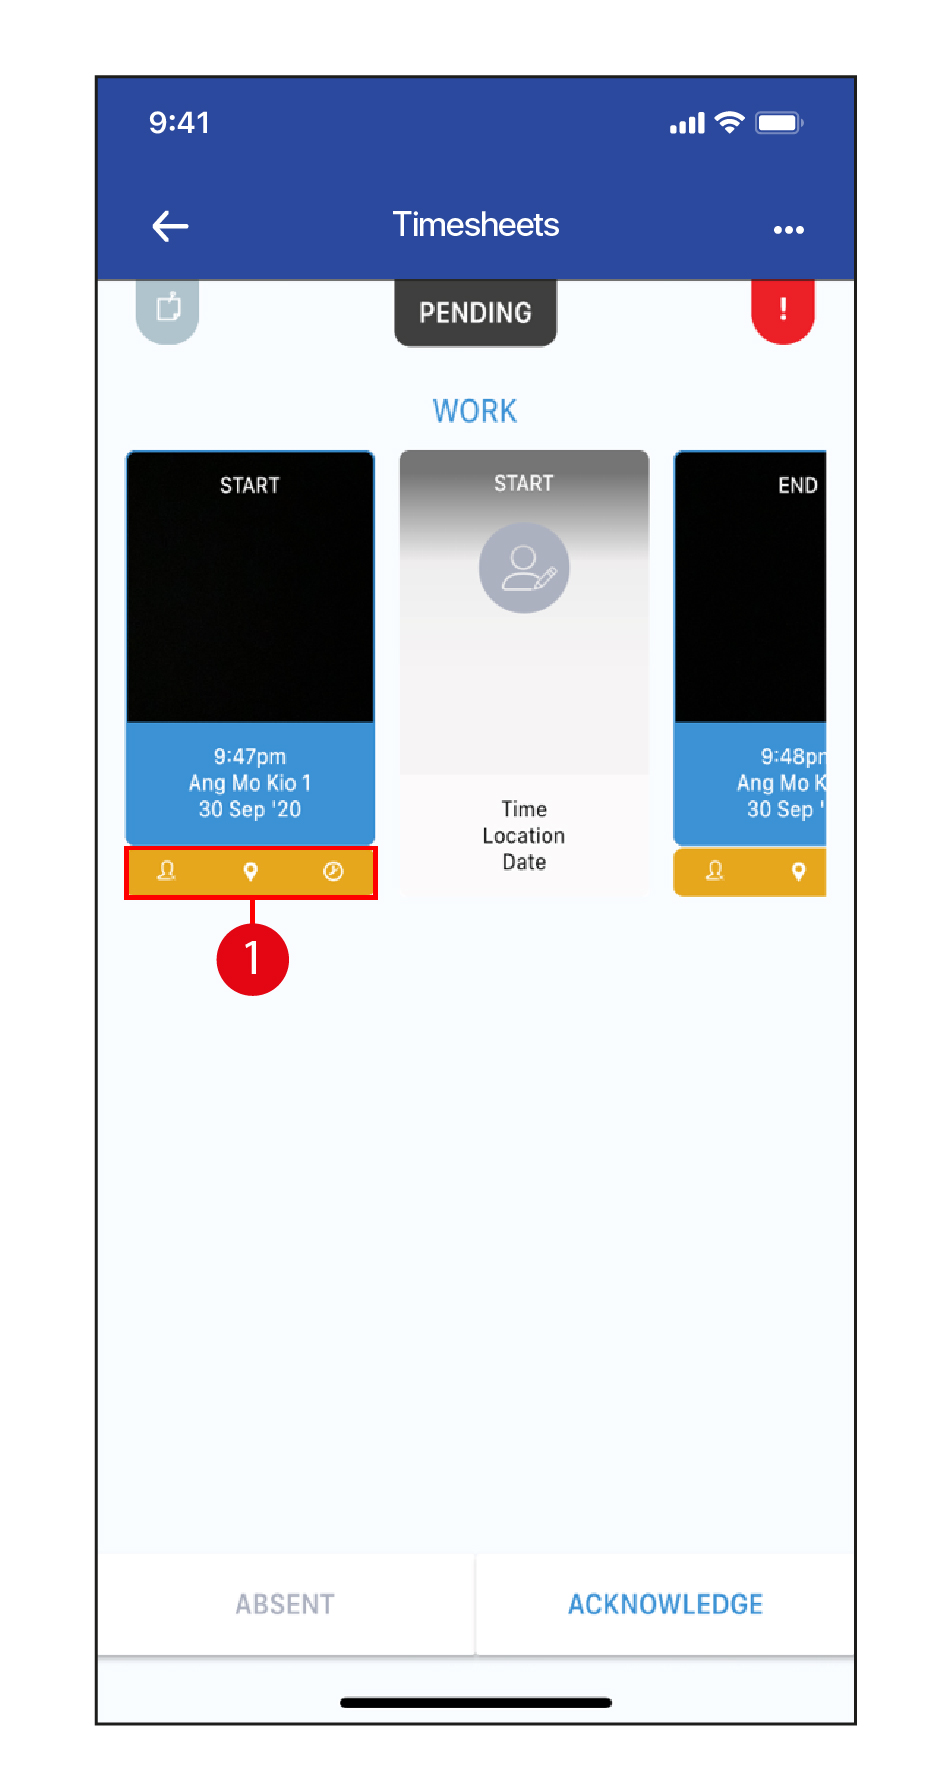
- These errors are for information only, and will not prevent you from acknowledging the timesheet of the Employee. Tap on the "X" to close this page, then acknowledge / decline the timesheet.
Unclassified Timesheet
- Unclassified Timesheets occur when a new Employee clocks in without having a profile created in the system on Herd Web. Clear them by accessing the Herd Web portal to create a new profile or merge the timesheet to an existing profile. Tap on the
 icon to return to the Home page.
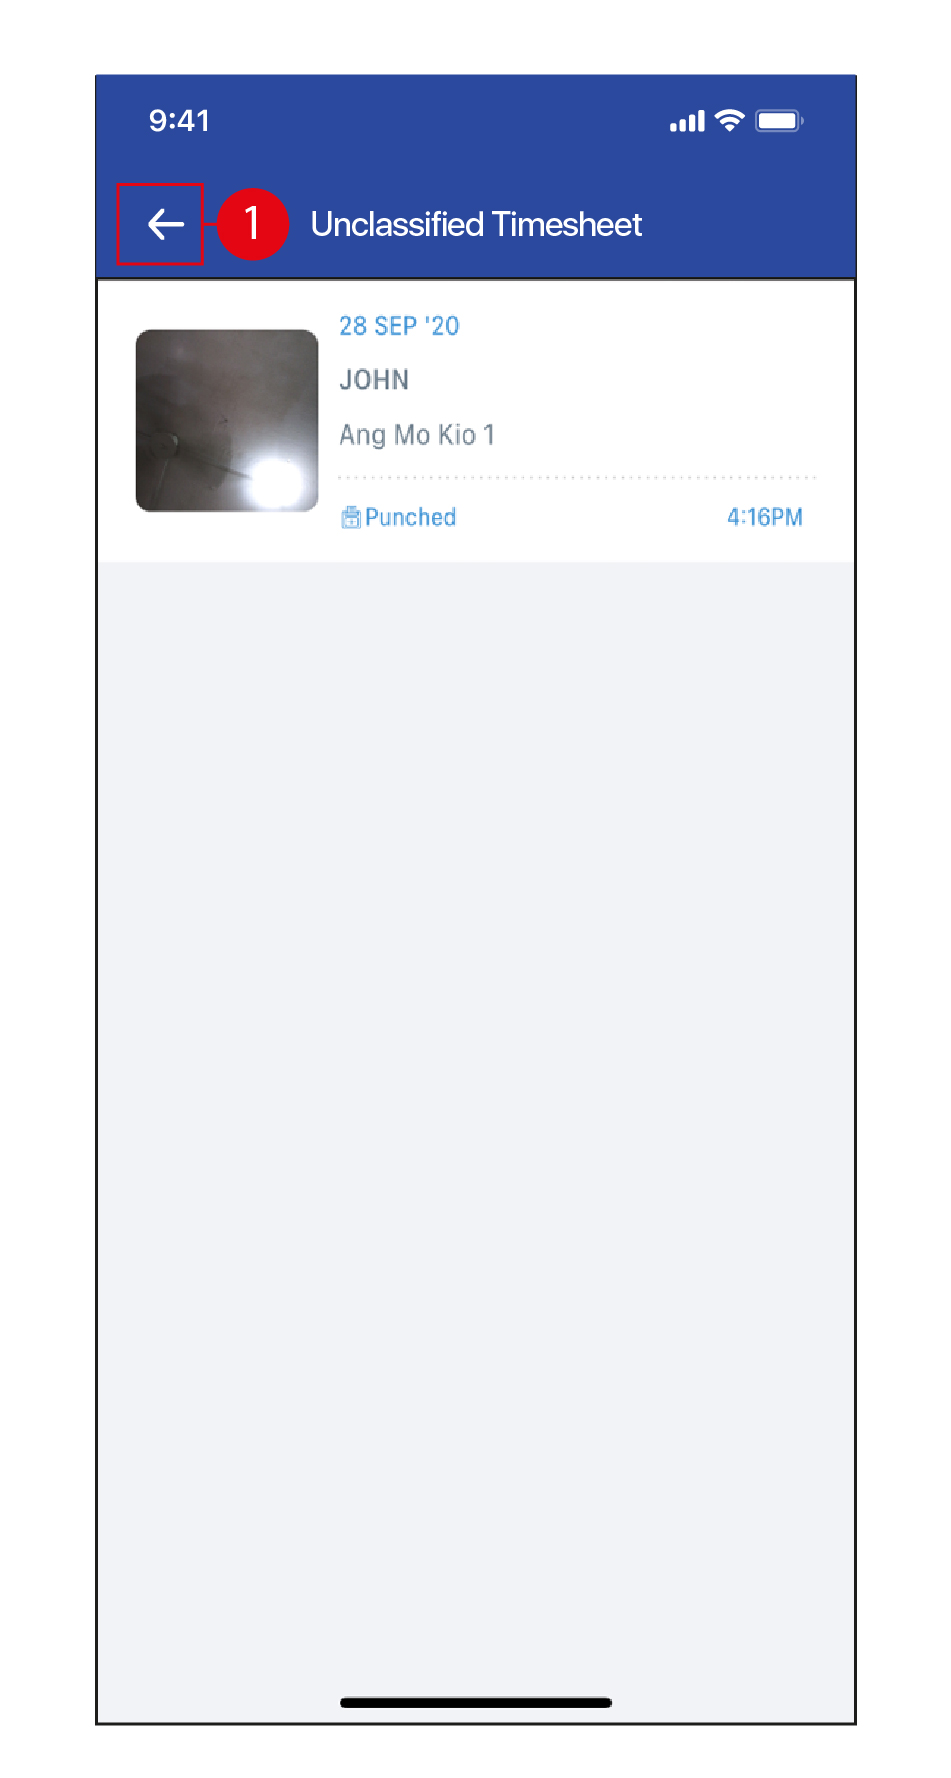
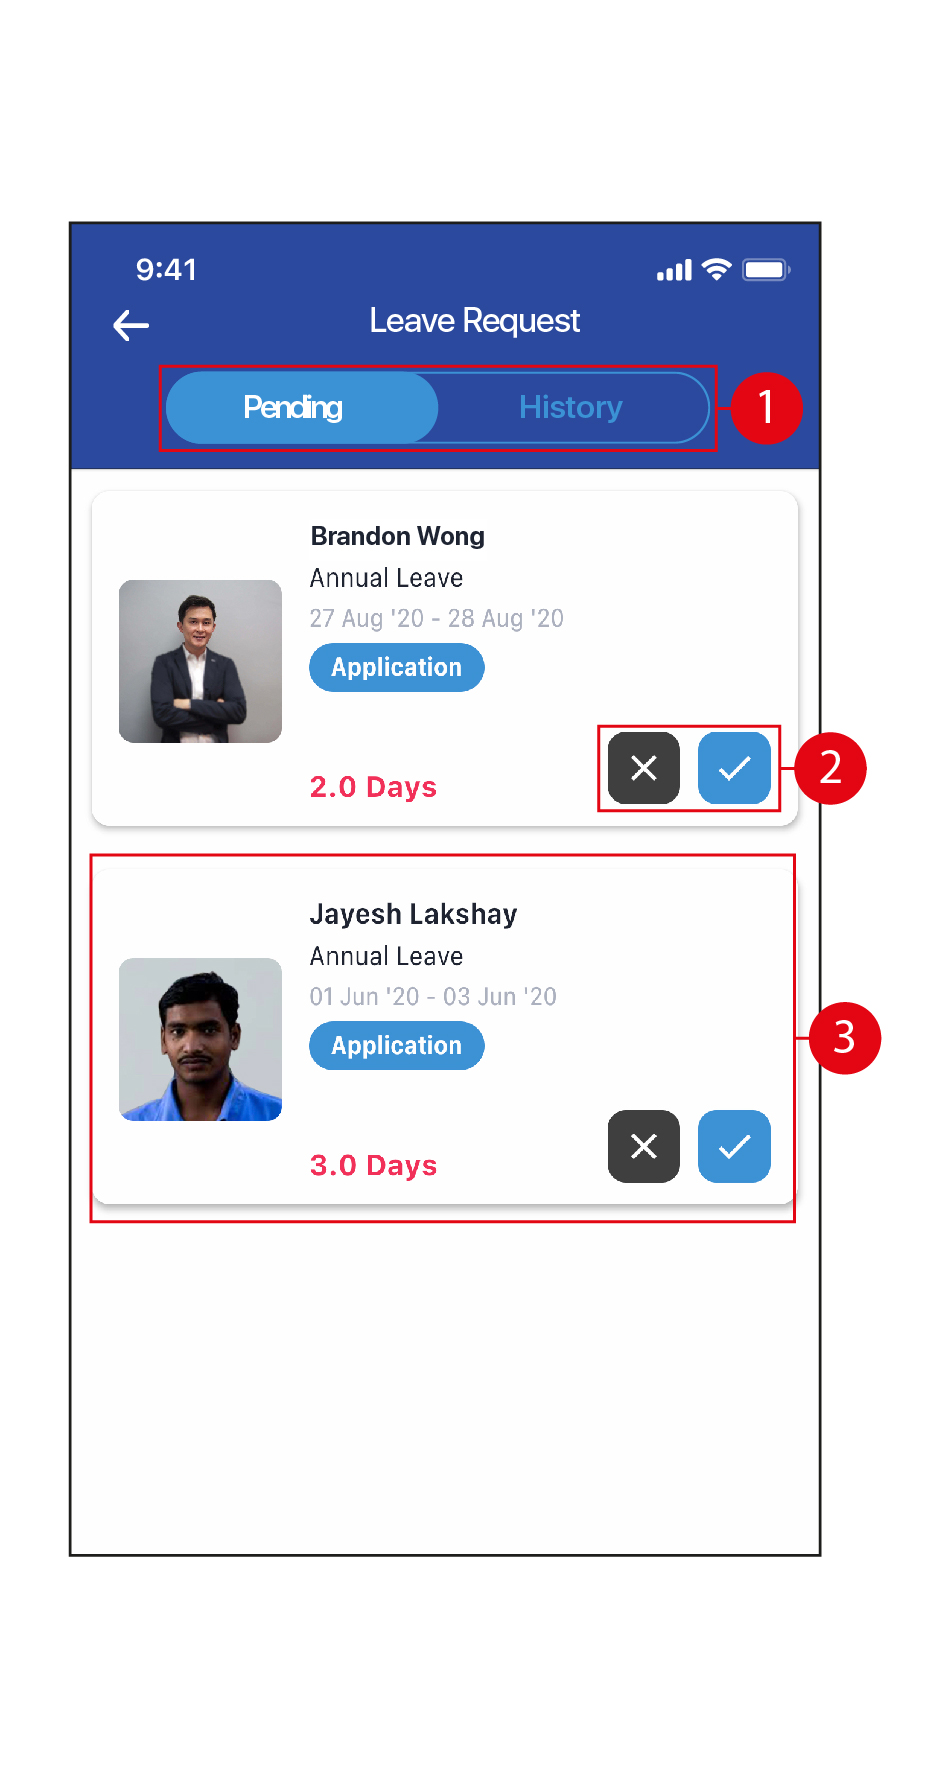
Leave Requests
- Tap to view Pending / History of Leave Requests.
- Tap on the
 icons to instantly reject / approve Leave Requests.
 - Alternatively, tap on a request to view more details.
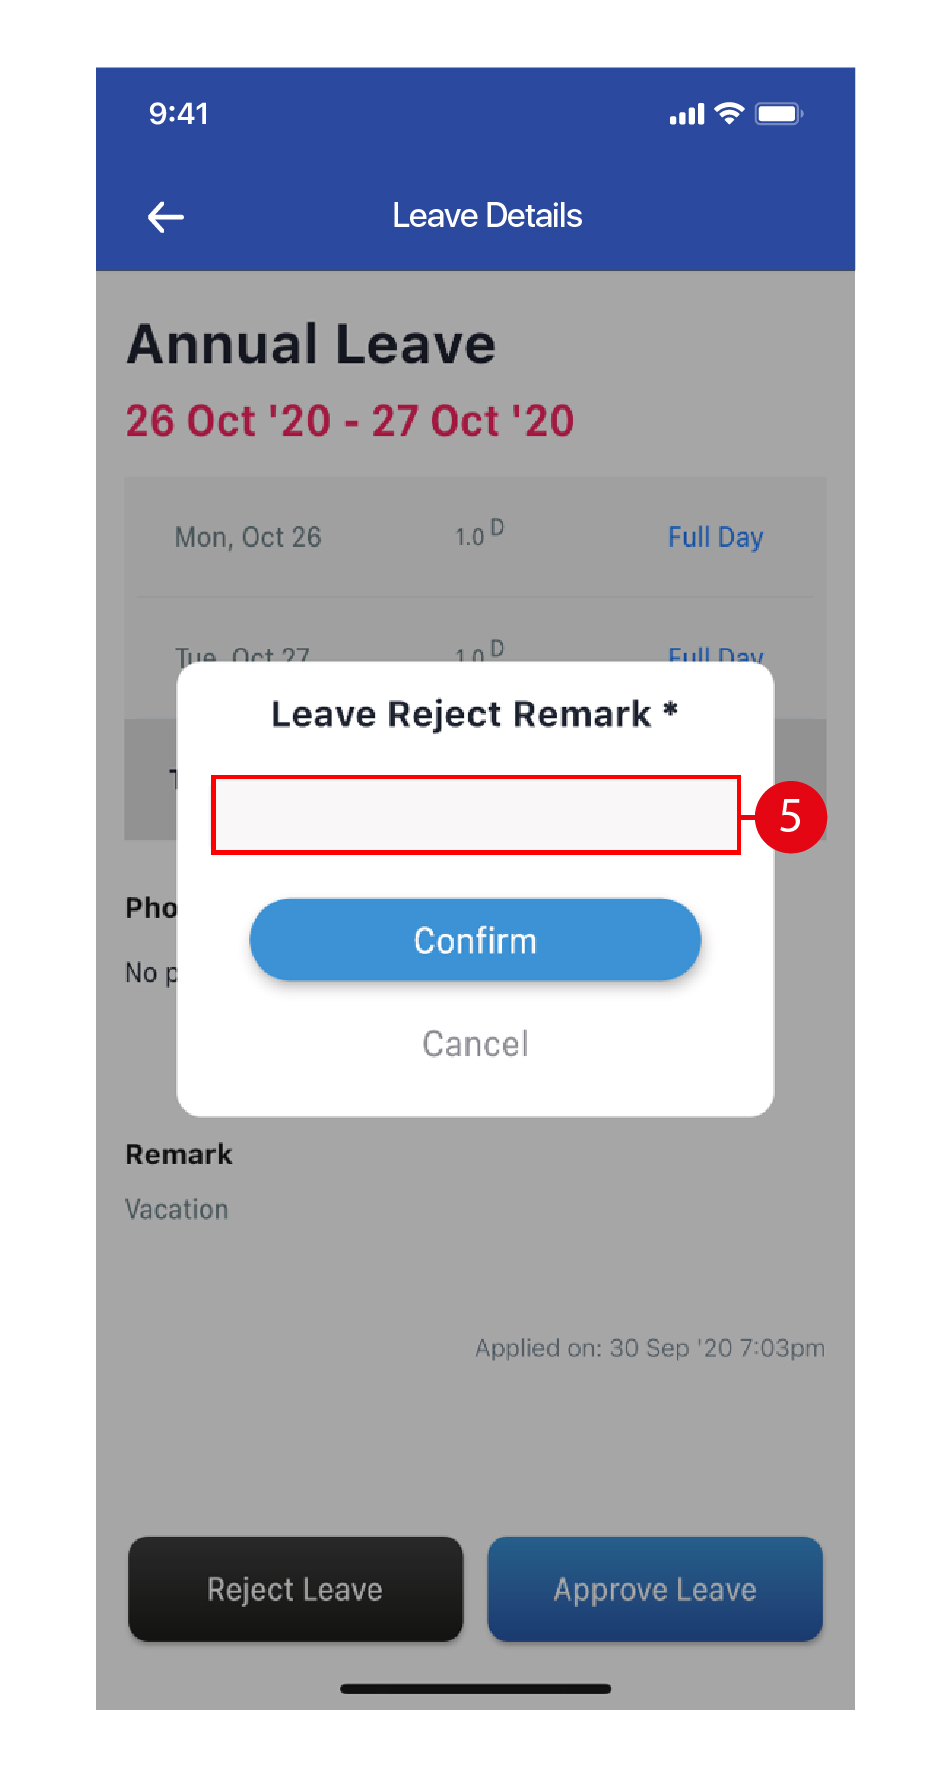
- Tap to Reject / Approve Leave applications.
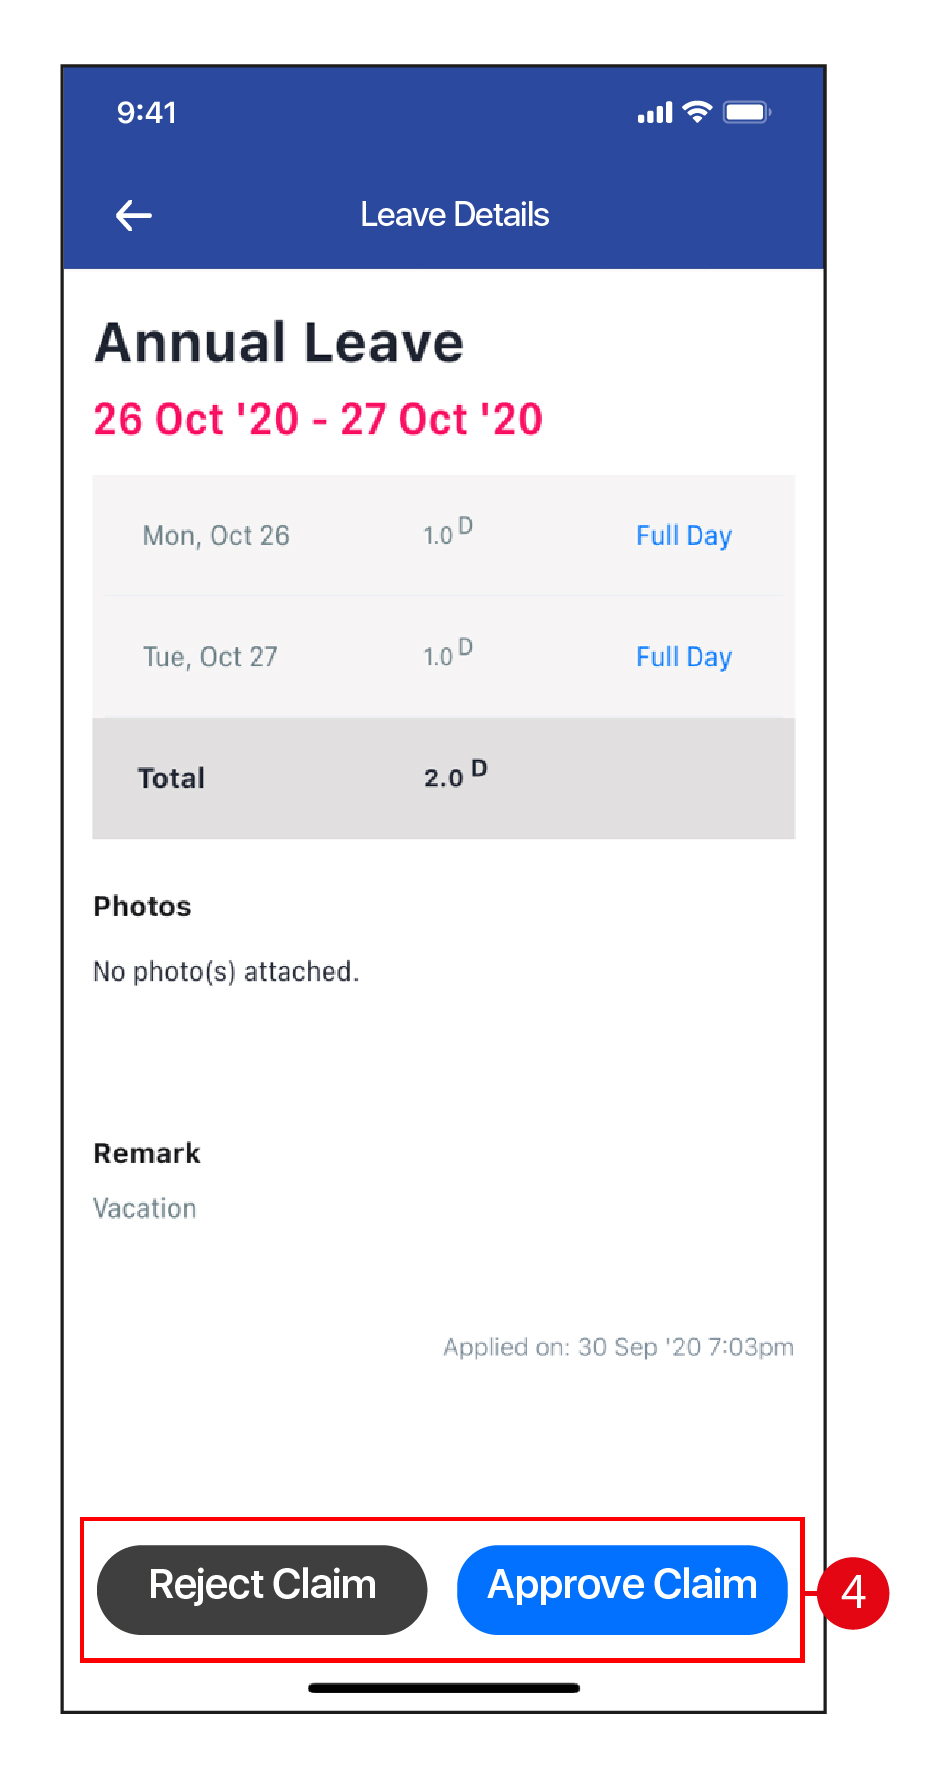
- Enter a Leave Rejection remark. Once done, tap Confirm, then tap Okay.
- Enter a Leave Approval remark, if required. Once done, tap Confirm, then tap Okay.

Claim Requests
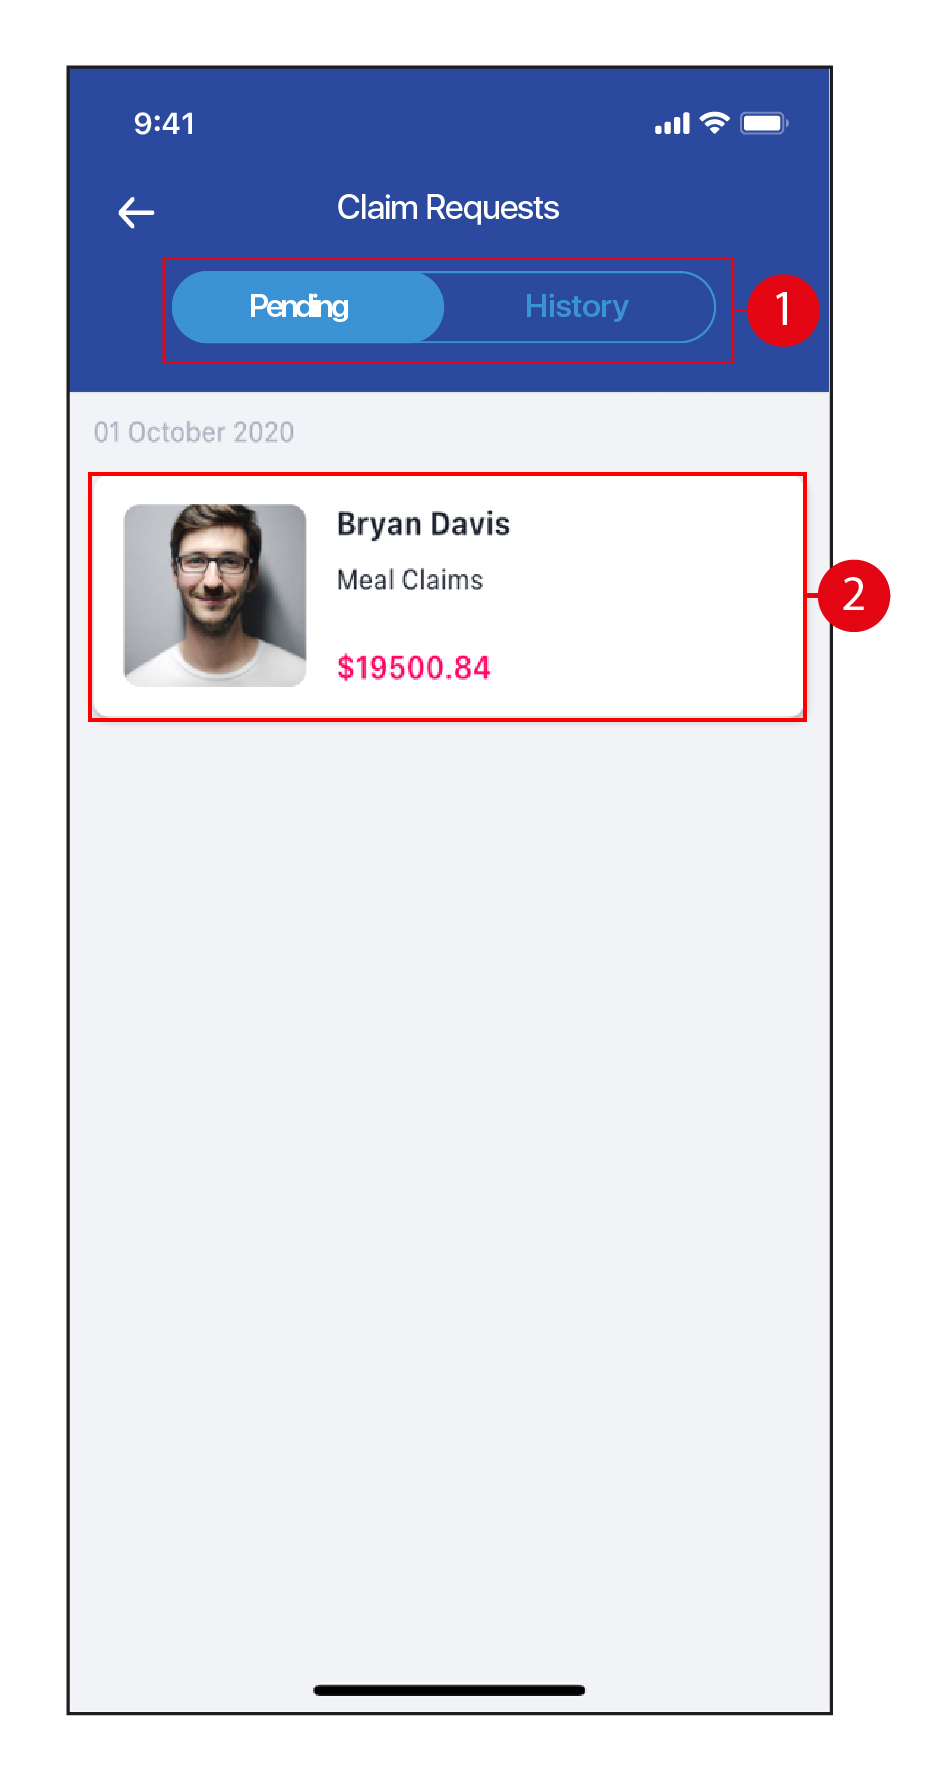
- Tap to view Pending / History of Claim Requests.
- Alternatively, tap on a request to view more details.
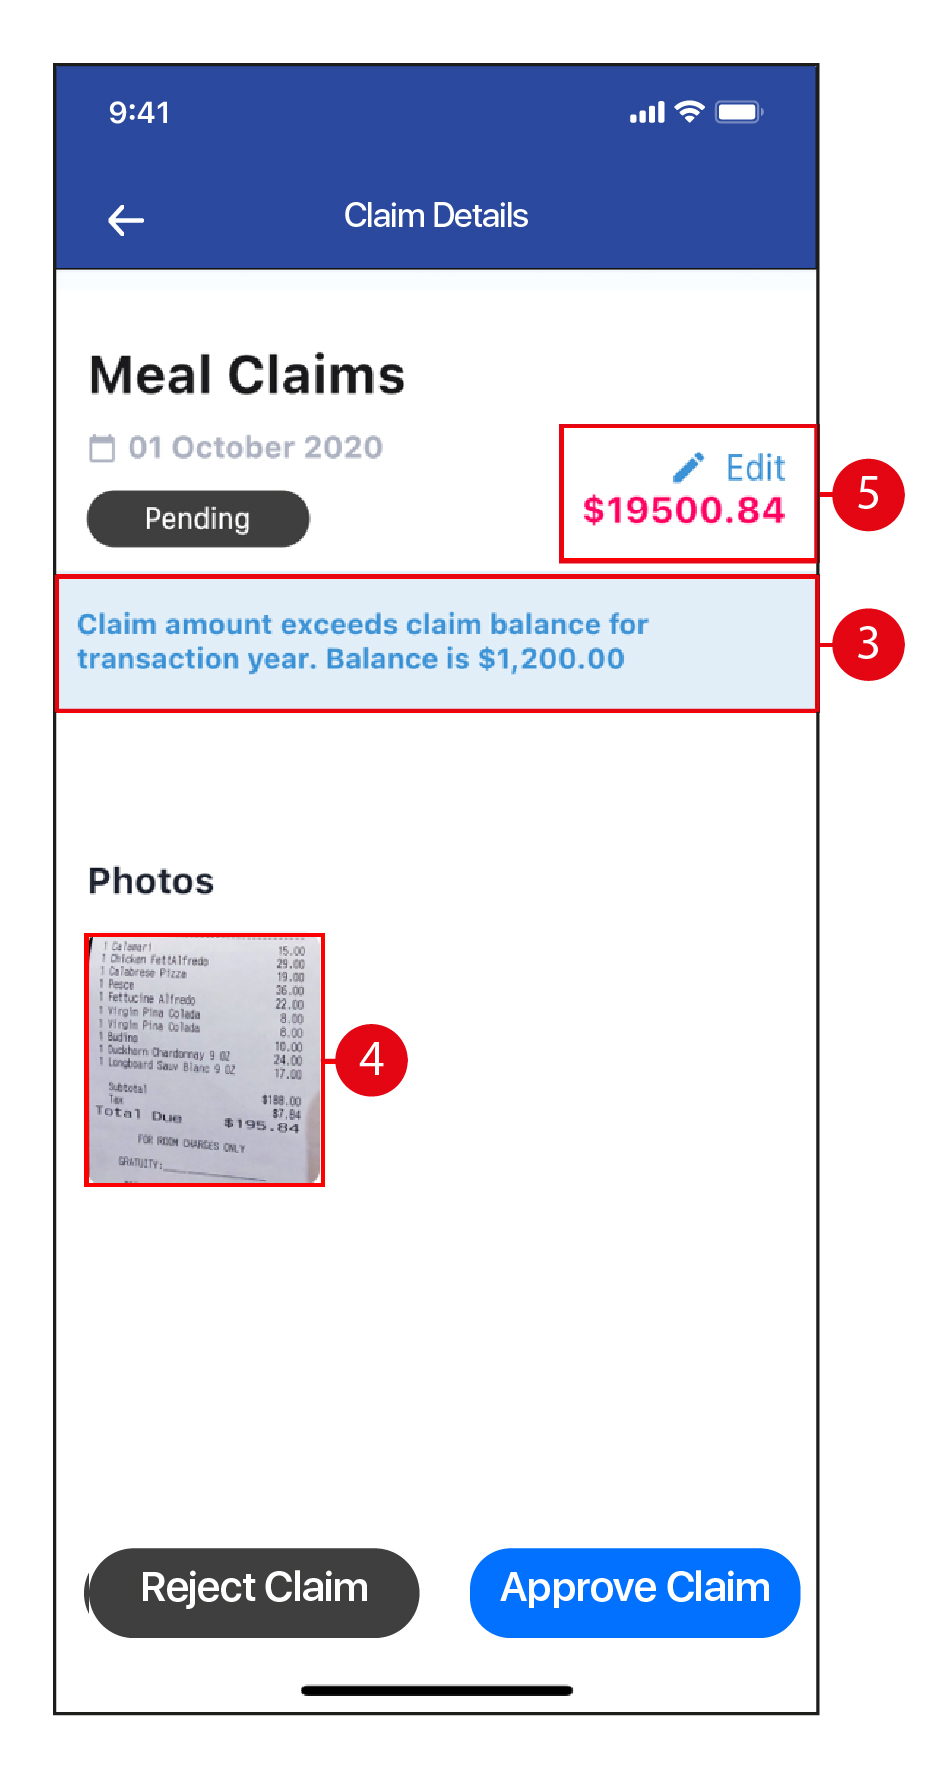
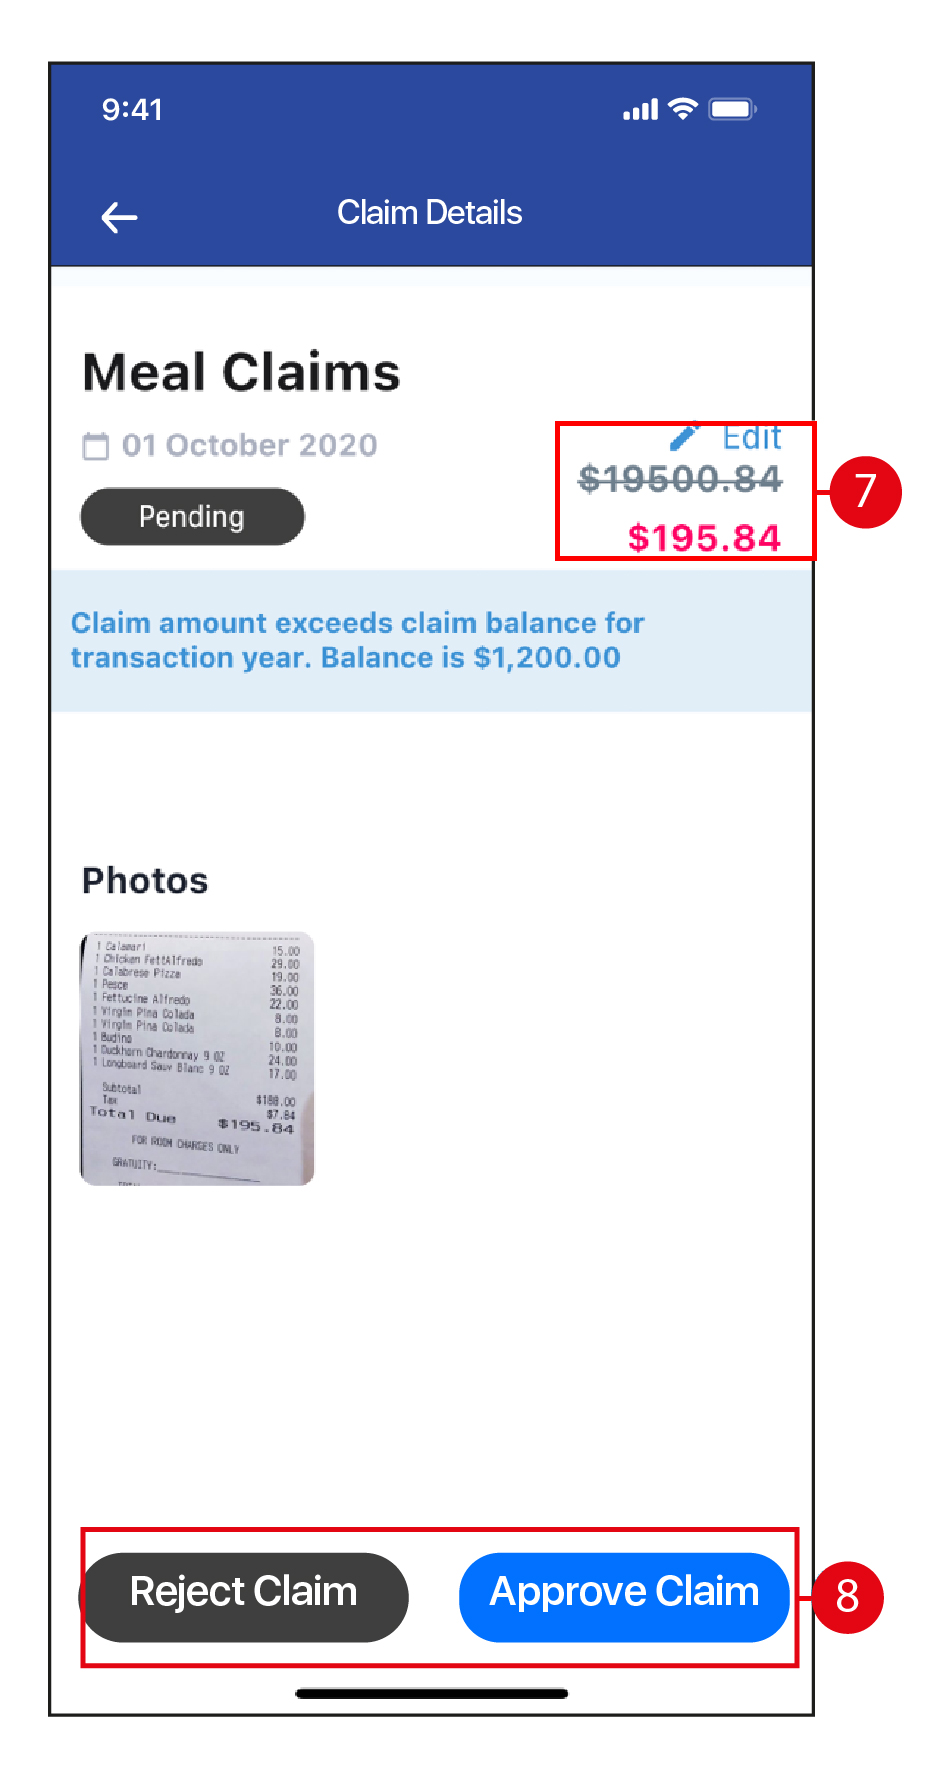
- Any error in the Claims application will be reflected here.
- Tap to view the attachment.
- Tap on Edit to edit the Claim amount, if required.
- Key in the updated Claim amount. Once done, tap Update.
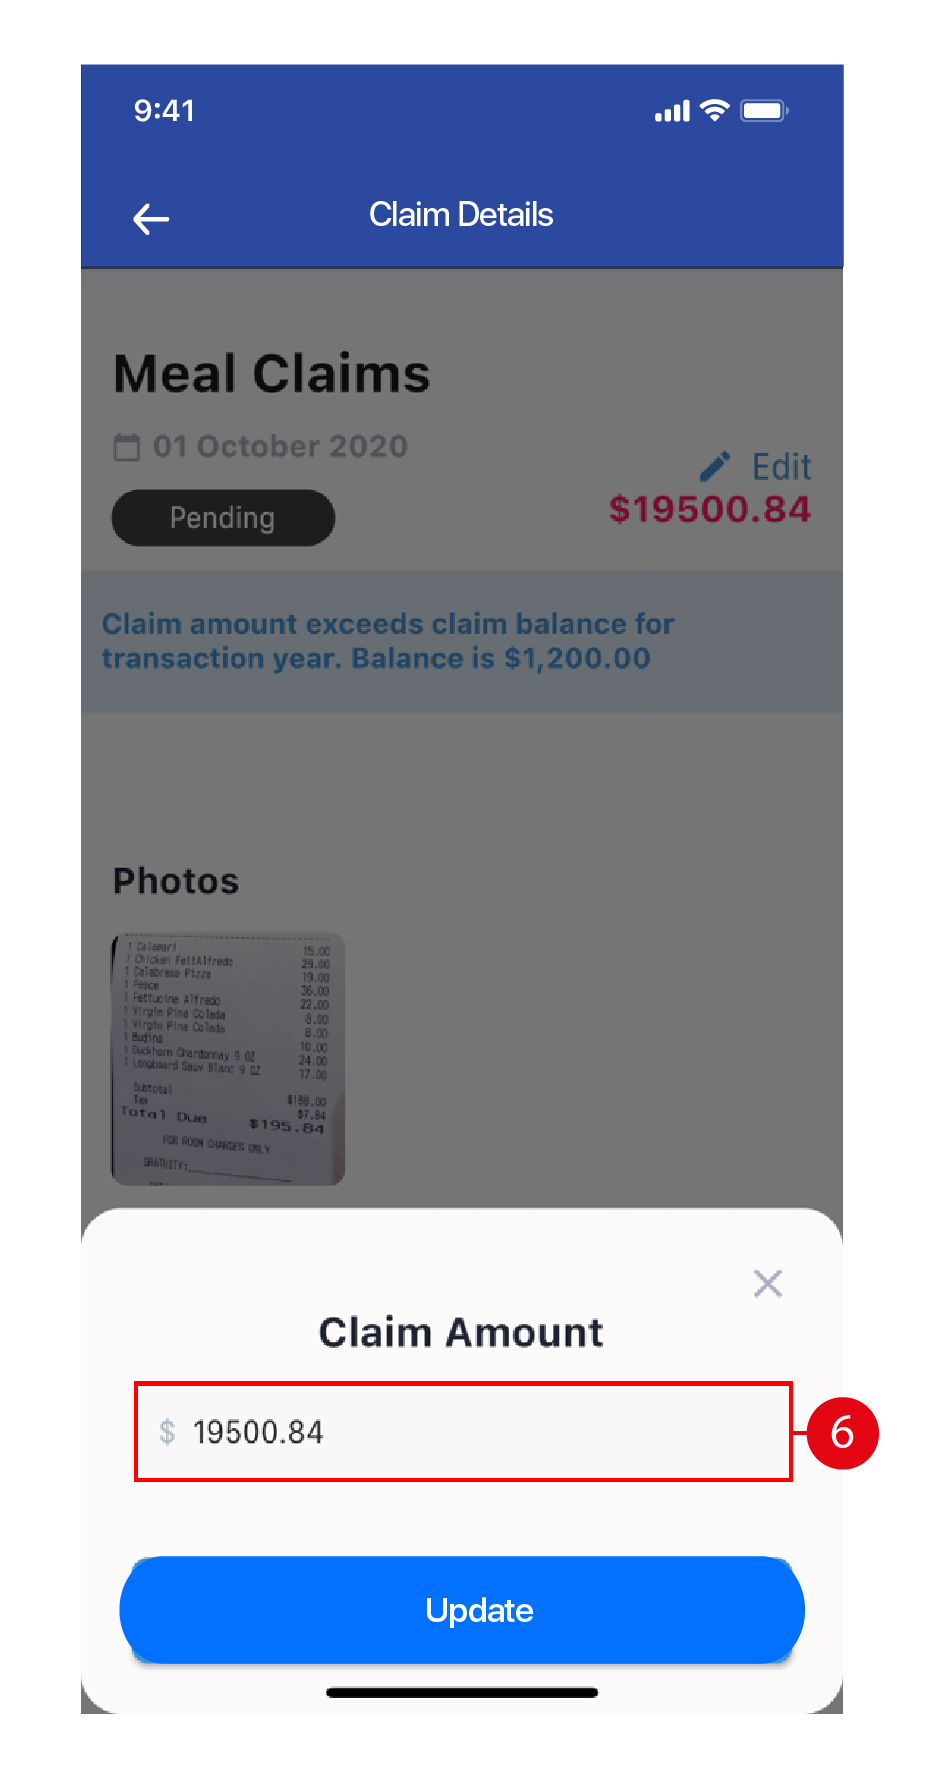
- The updated Claim amount will be reflected here.
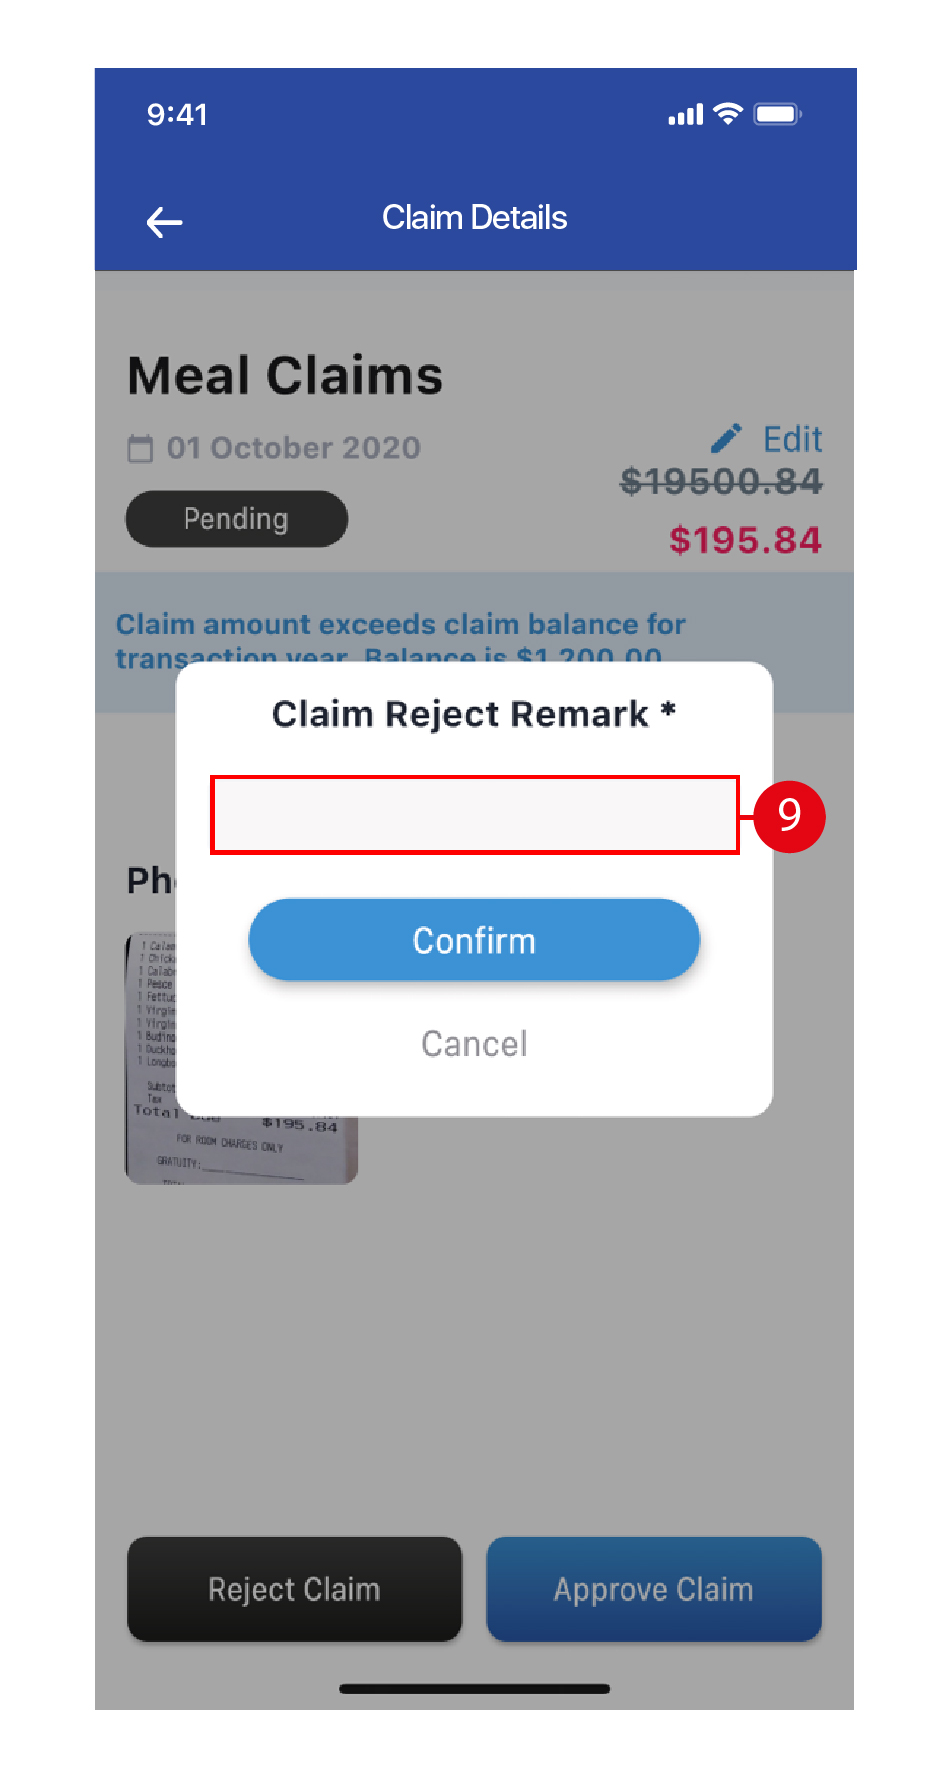
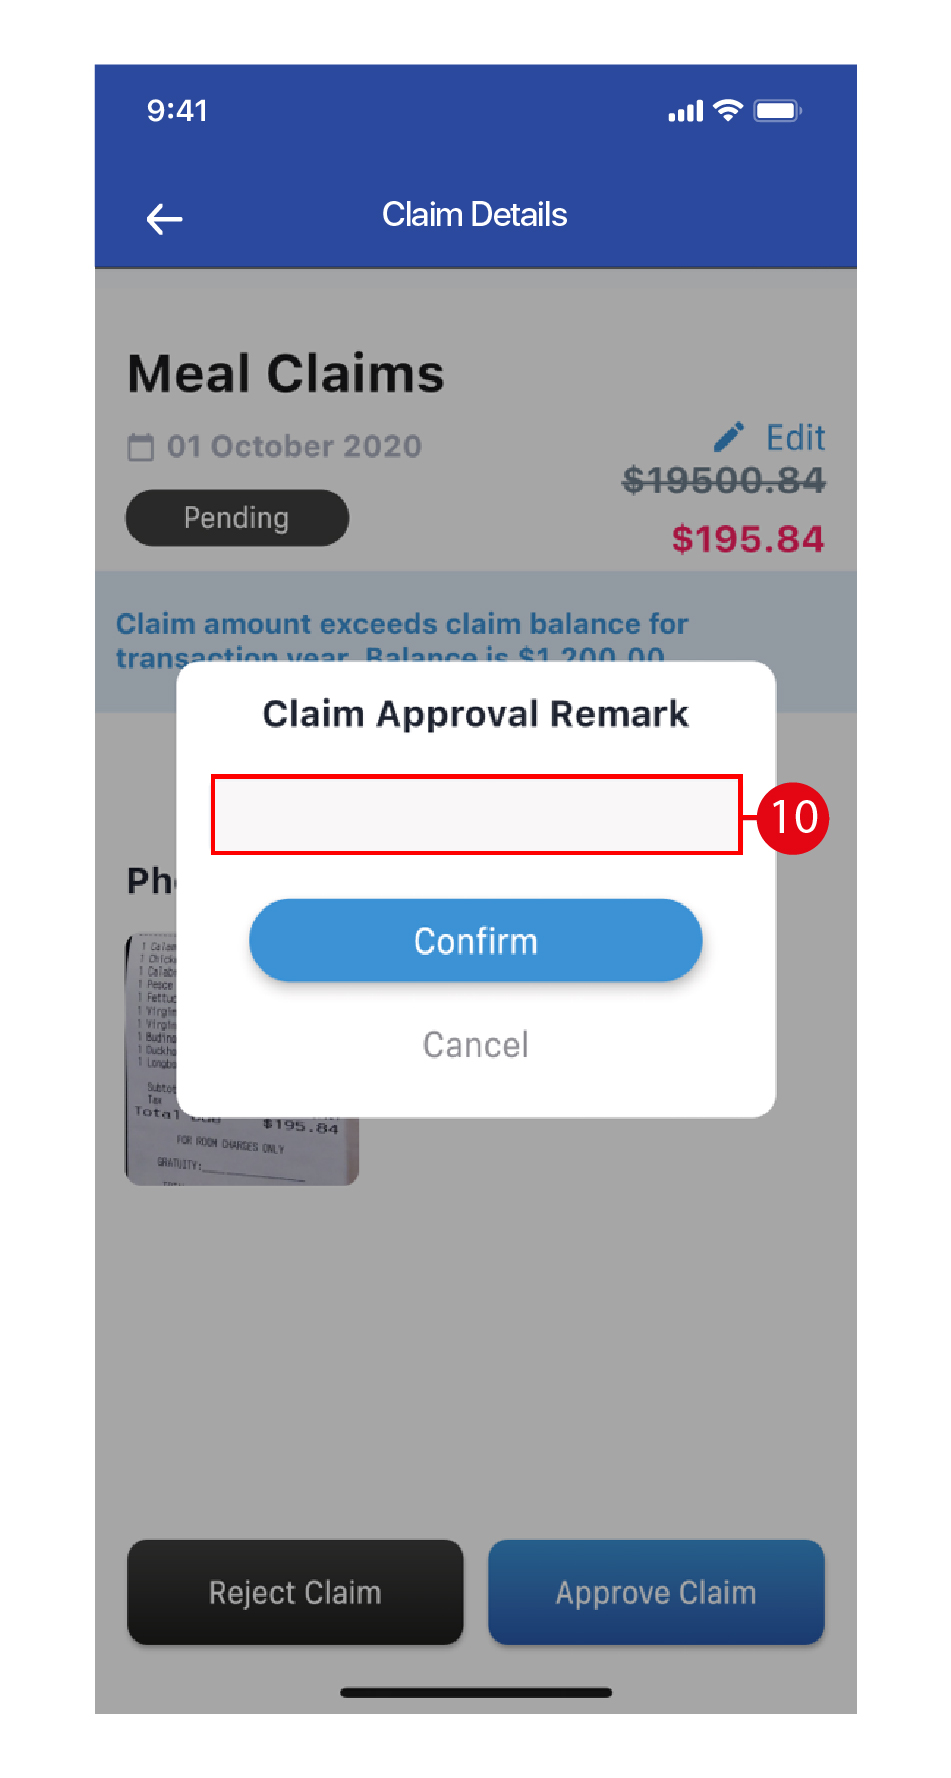
- Tap to Reject / Approve the Claim application.
- Enter a Claim Rejection remark. Once done, tap Confirm, then tap Okay.
- Enter a Leave Approval remark, if required. Once done, tap Confirm, then tap Okay.
Leave Balance
- Tap on the icon to apply for Leave.
- Alternatively, swipe left or right and tap on a Leave type (with the number of days of entitlement left) to apply for Leave. For a recap on how to apply for Leave, click here.

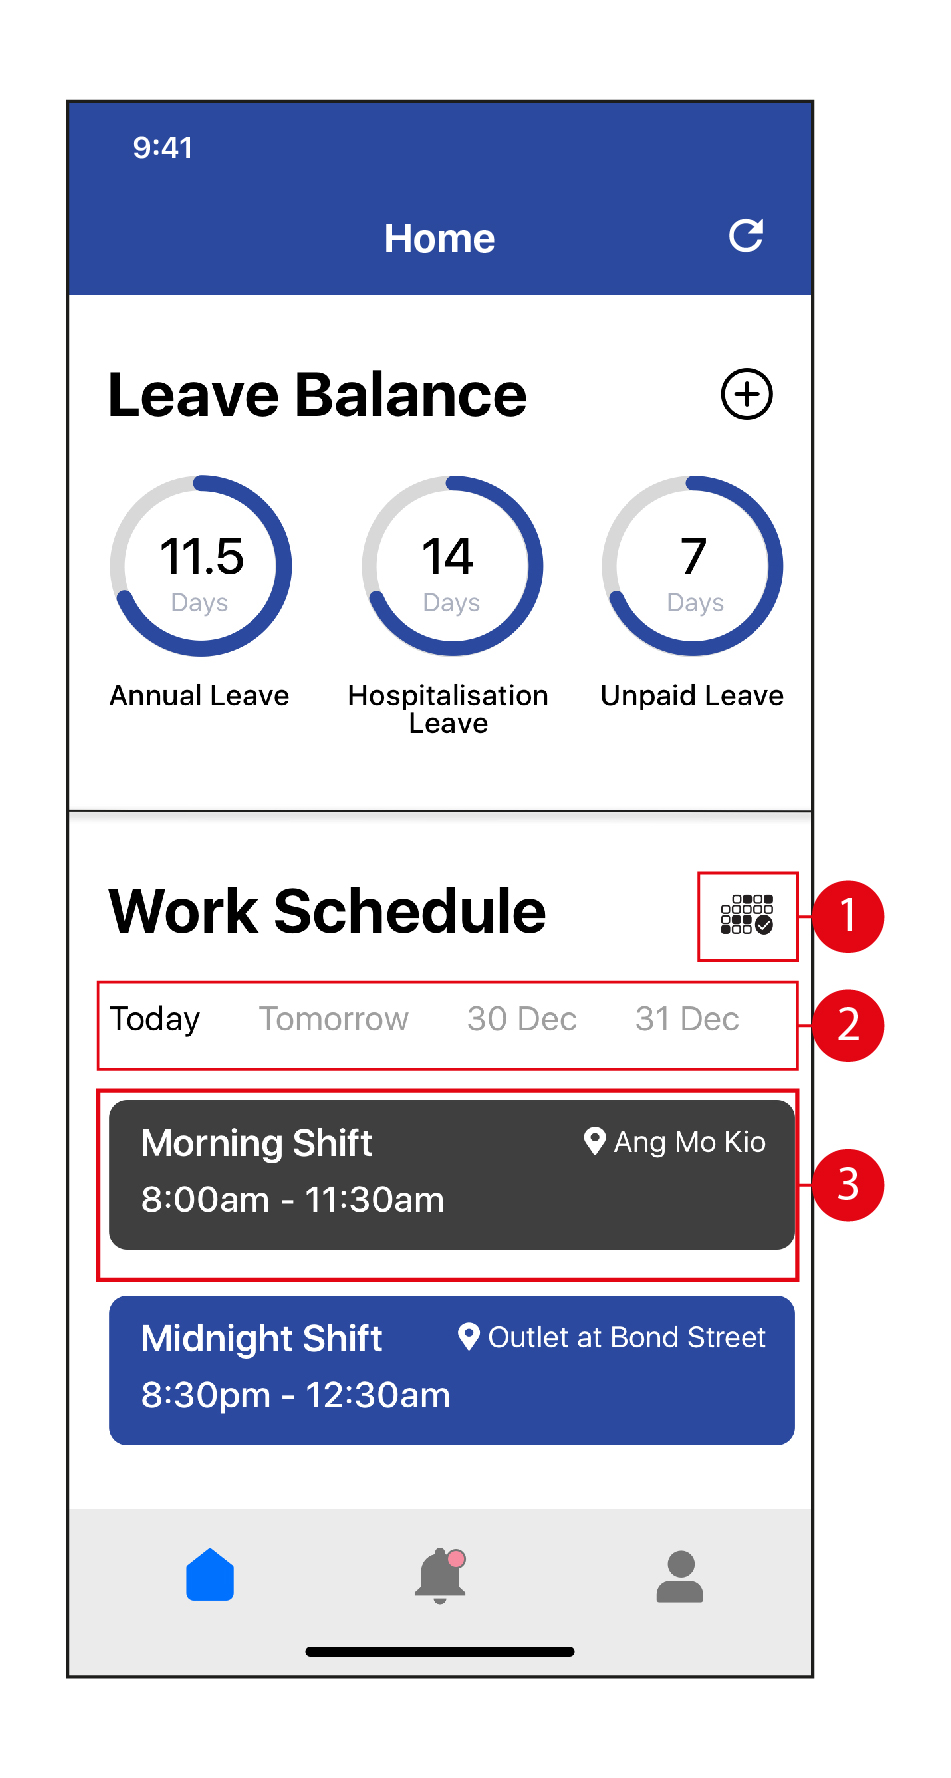
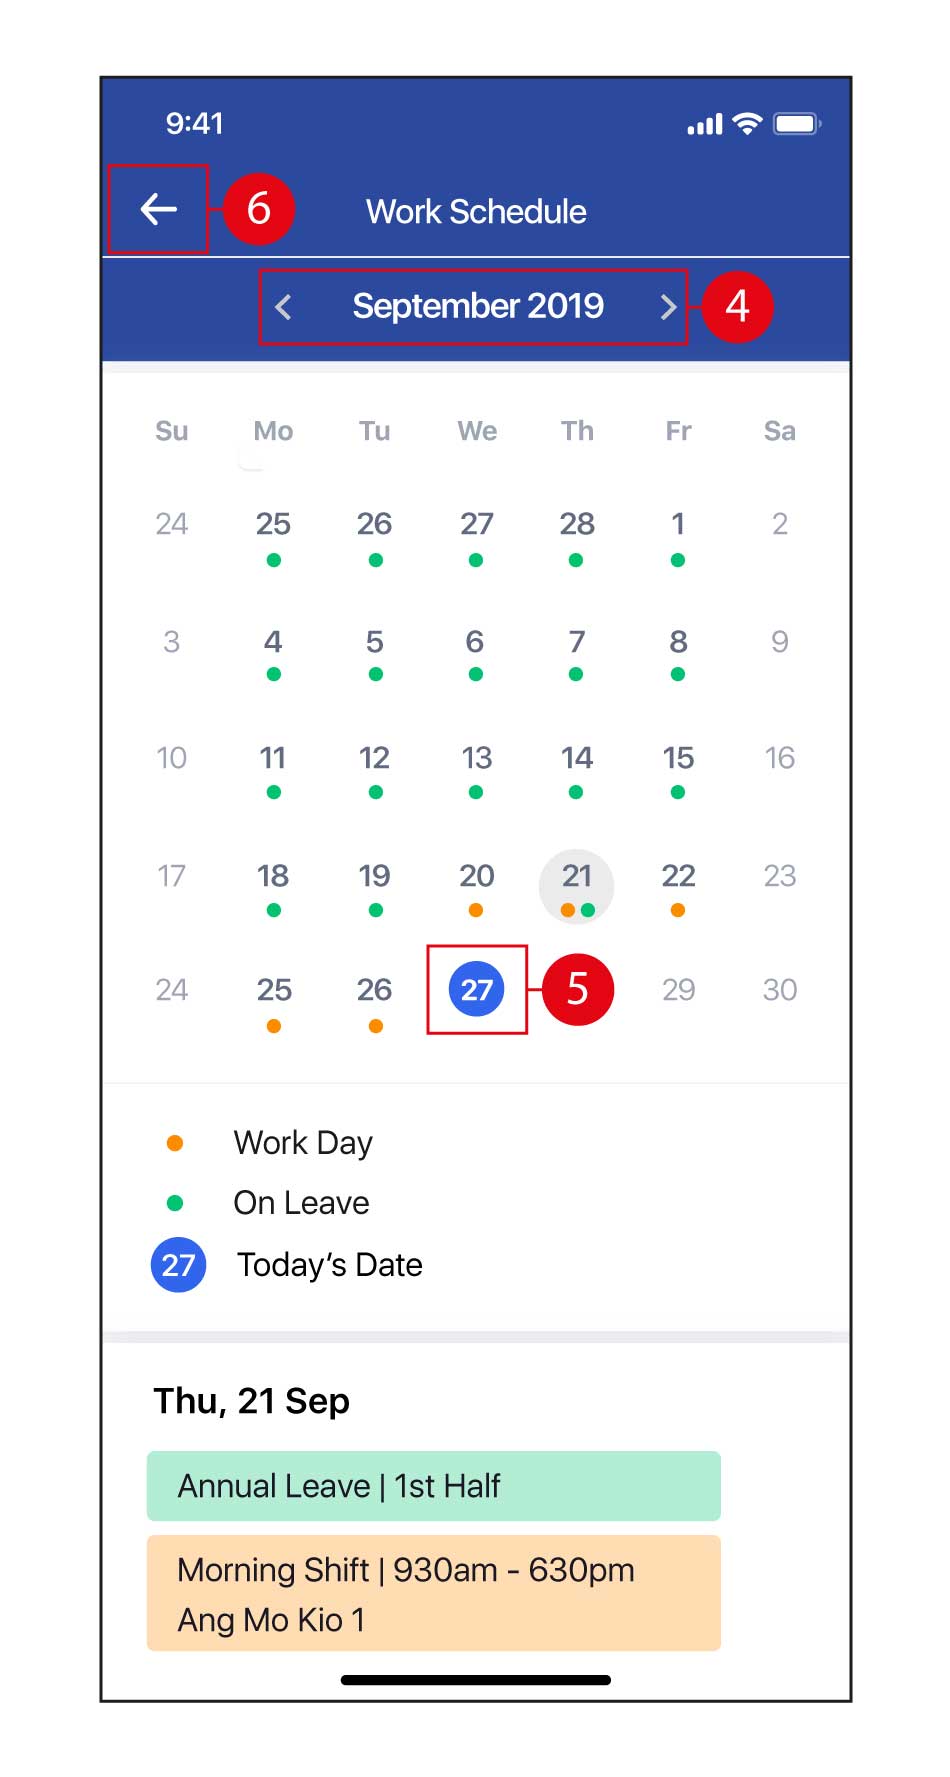
Work Schedule
- Tap on the icon to view your Work Schedule in Calendar view.
- Swipe left or right and tap on the day / date to view your Work Schedule.
- Your Work Schedule and Work Location will appear here in blue.
- Tap on < and > to change the Month.
- Tap on any date to view the Work Schedule and / or Leave for that date.
- Once done, tap on the to return to the Home page.
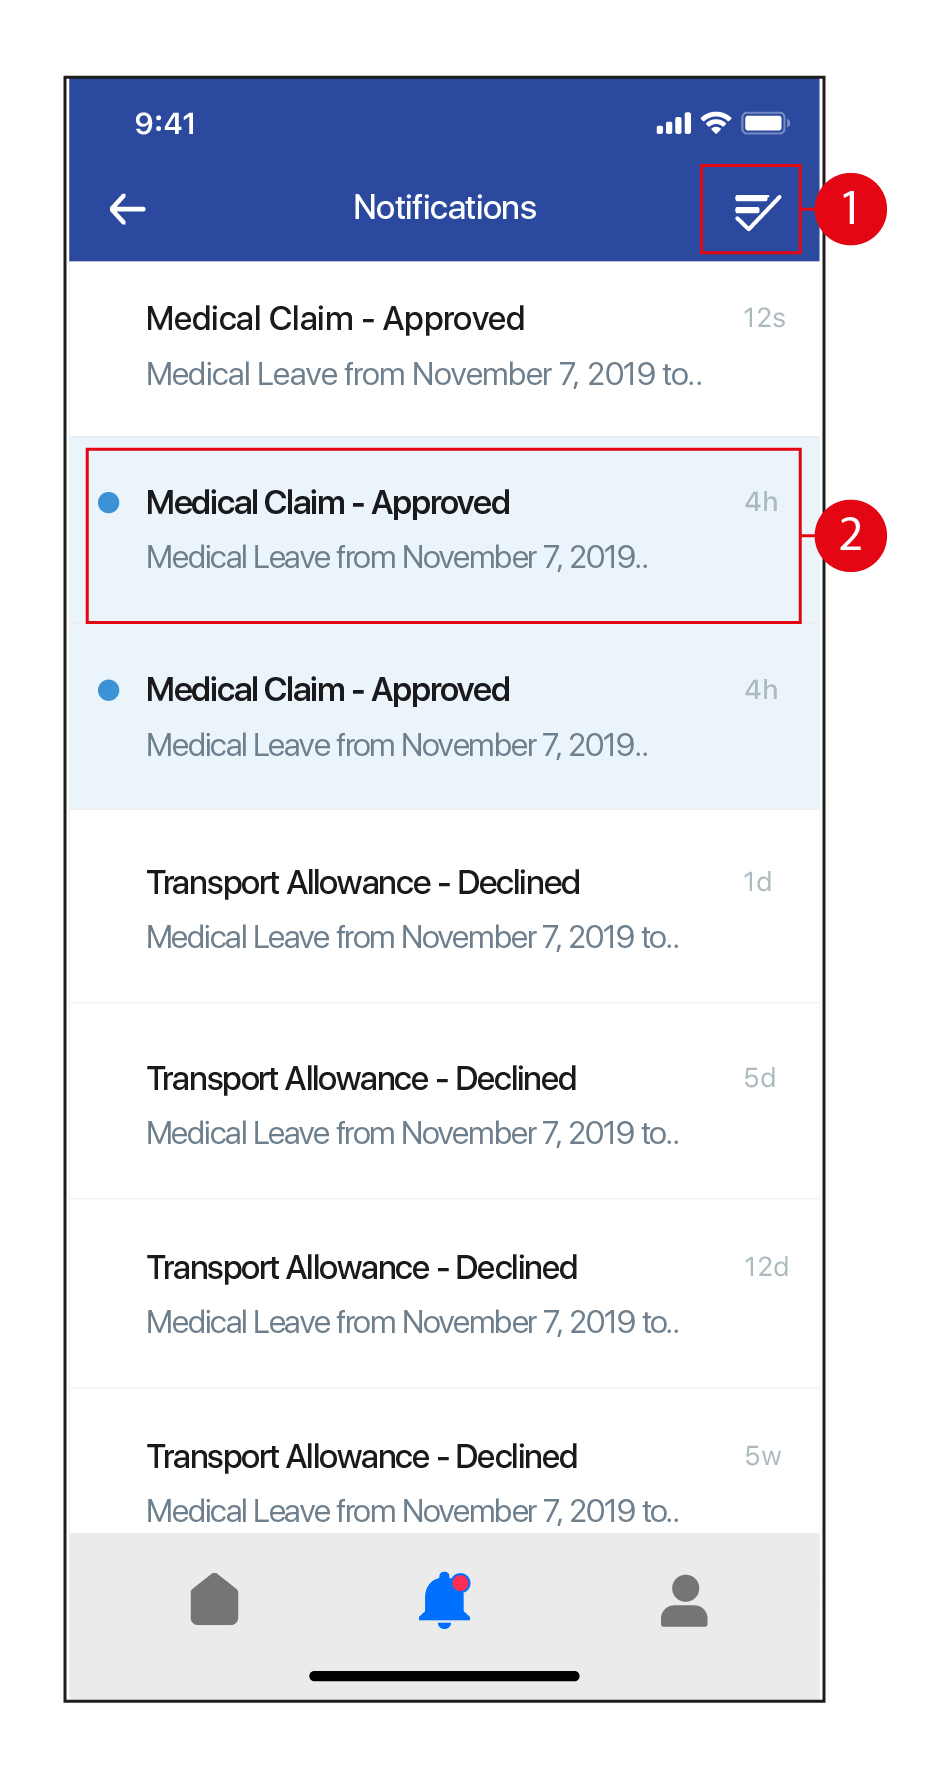
Notifications
- Tap on the
 icon to mark all Notifications as 'Read'.
 - Tap to view Notification details. (*Note: This is for your information only. No action required.)
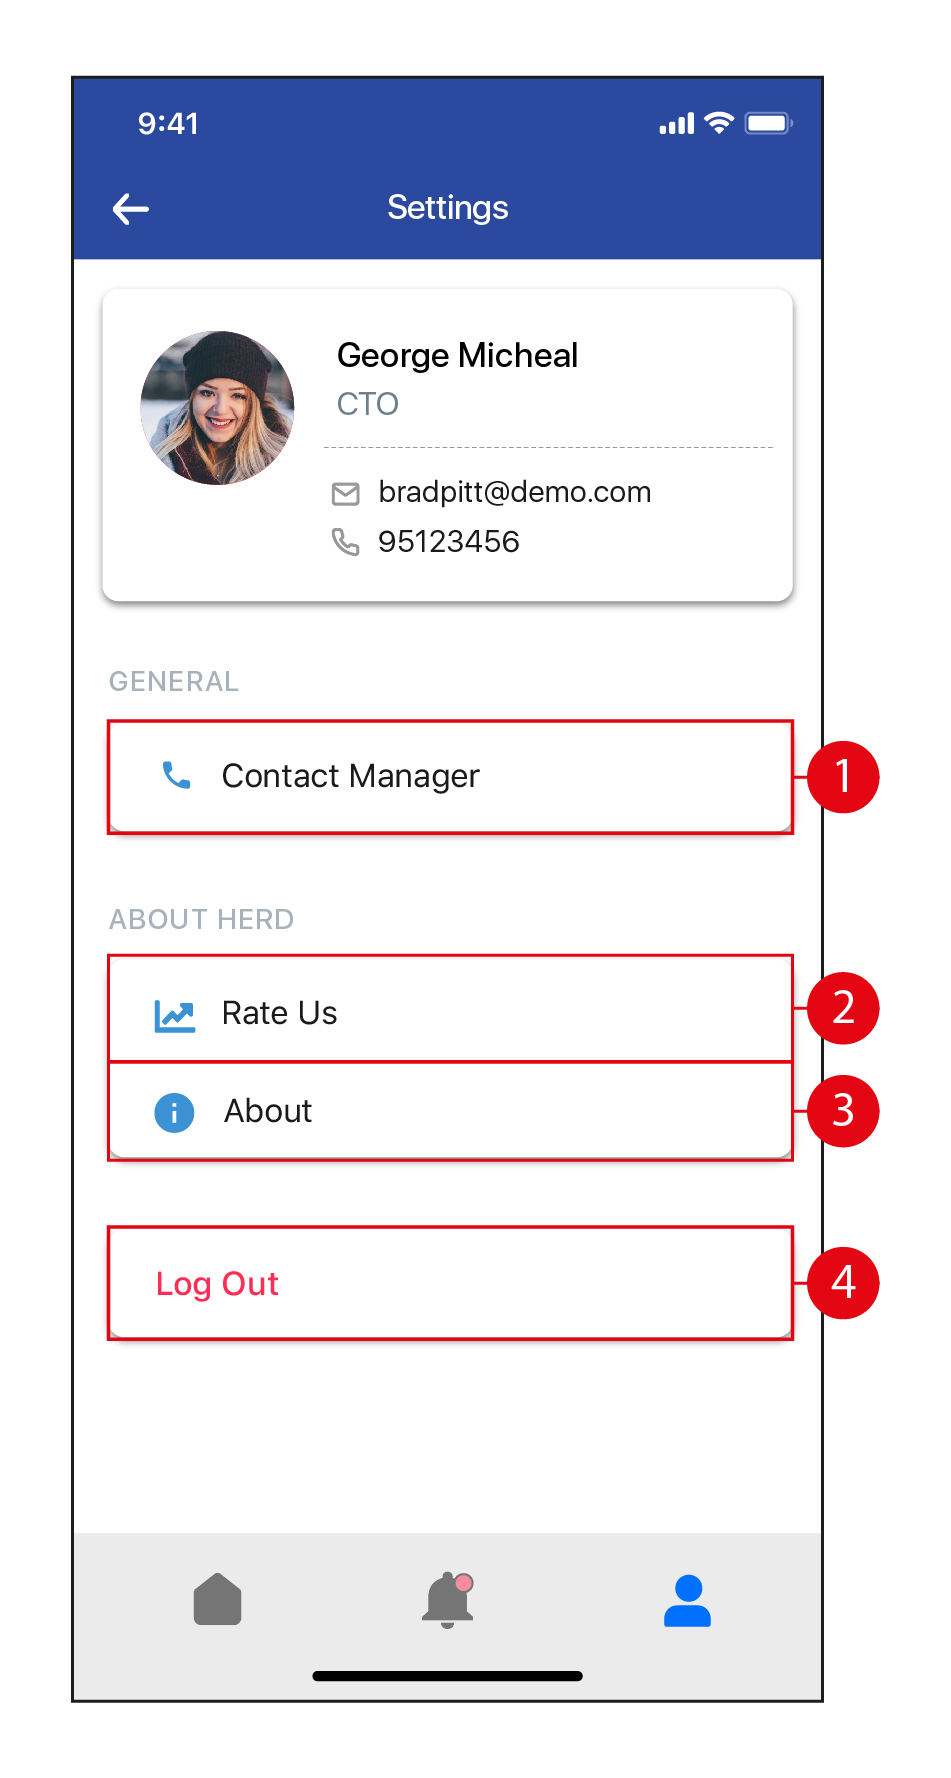
Settings
- Tap to contact your Manager / Reporting Officer. Tap on the icons to SMS / call the Manager.
- Tap to Rate Us.
- Tap to find out more about HerdHR.
- Tap to logout. Once you log out, you will need your Hostname, Email and Password to log back in.