Using Herd+:
- Download Herd+
- Generate QR Code
- Screensaver Mode
- Orientate to Homepage
- Main Menu
- Add Profile
- Clock In / Out
- Apply Leave
- Employee List
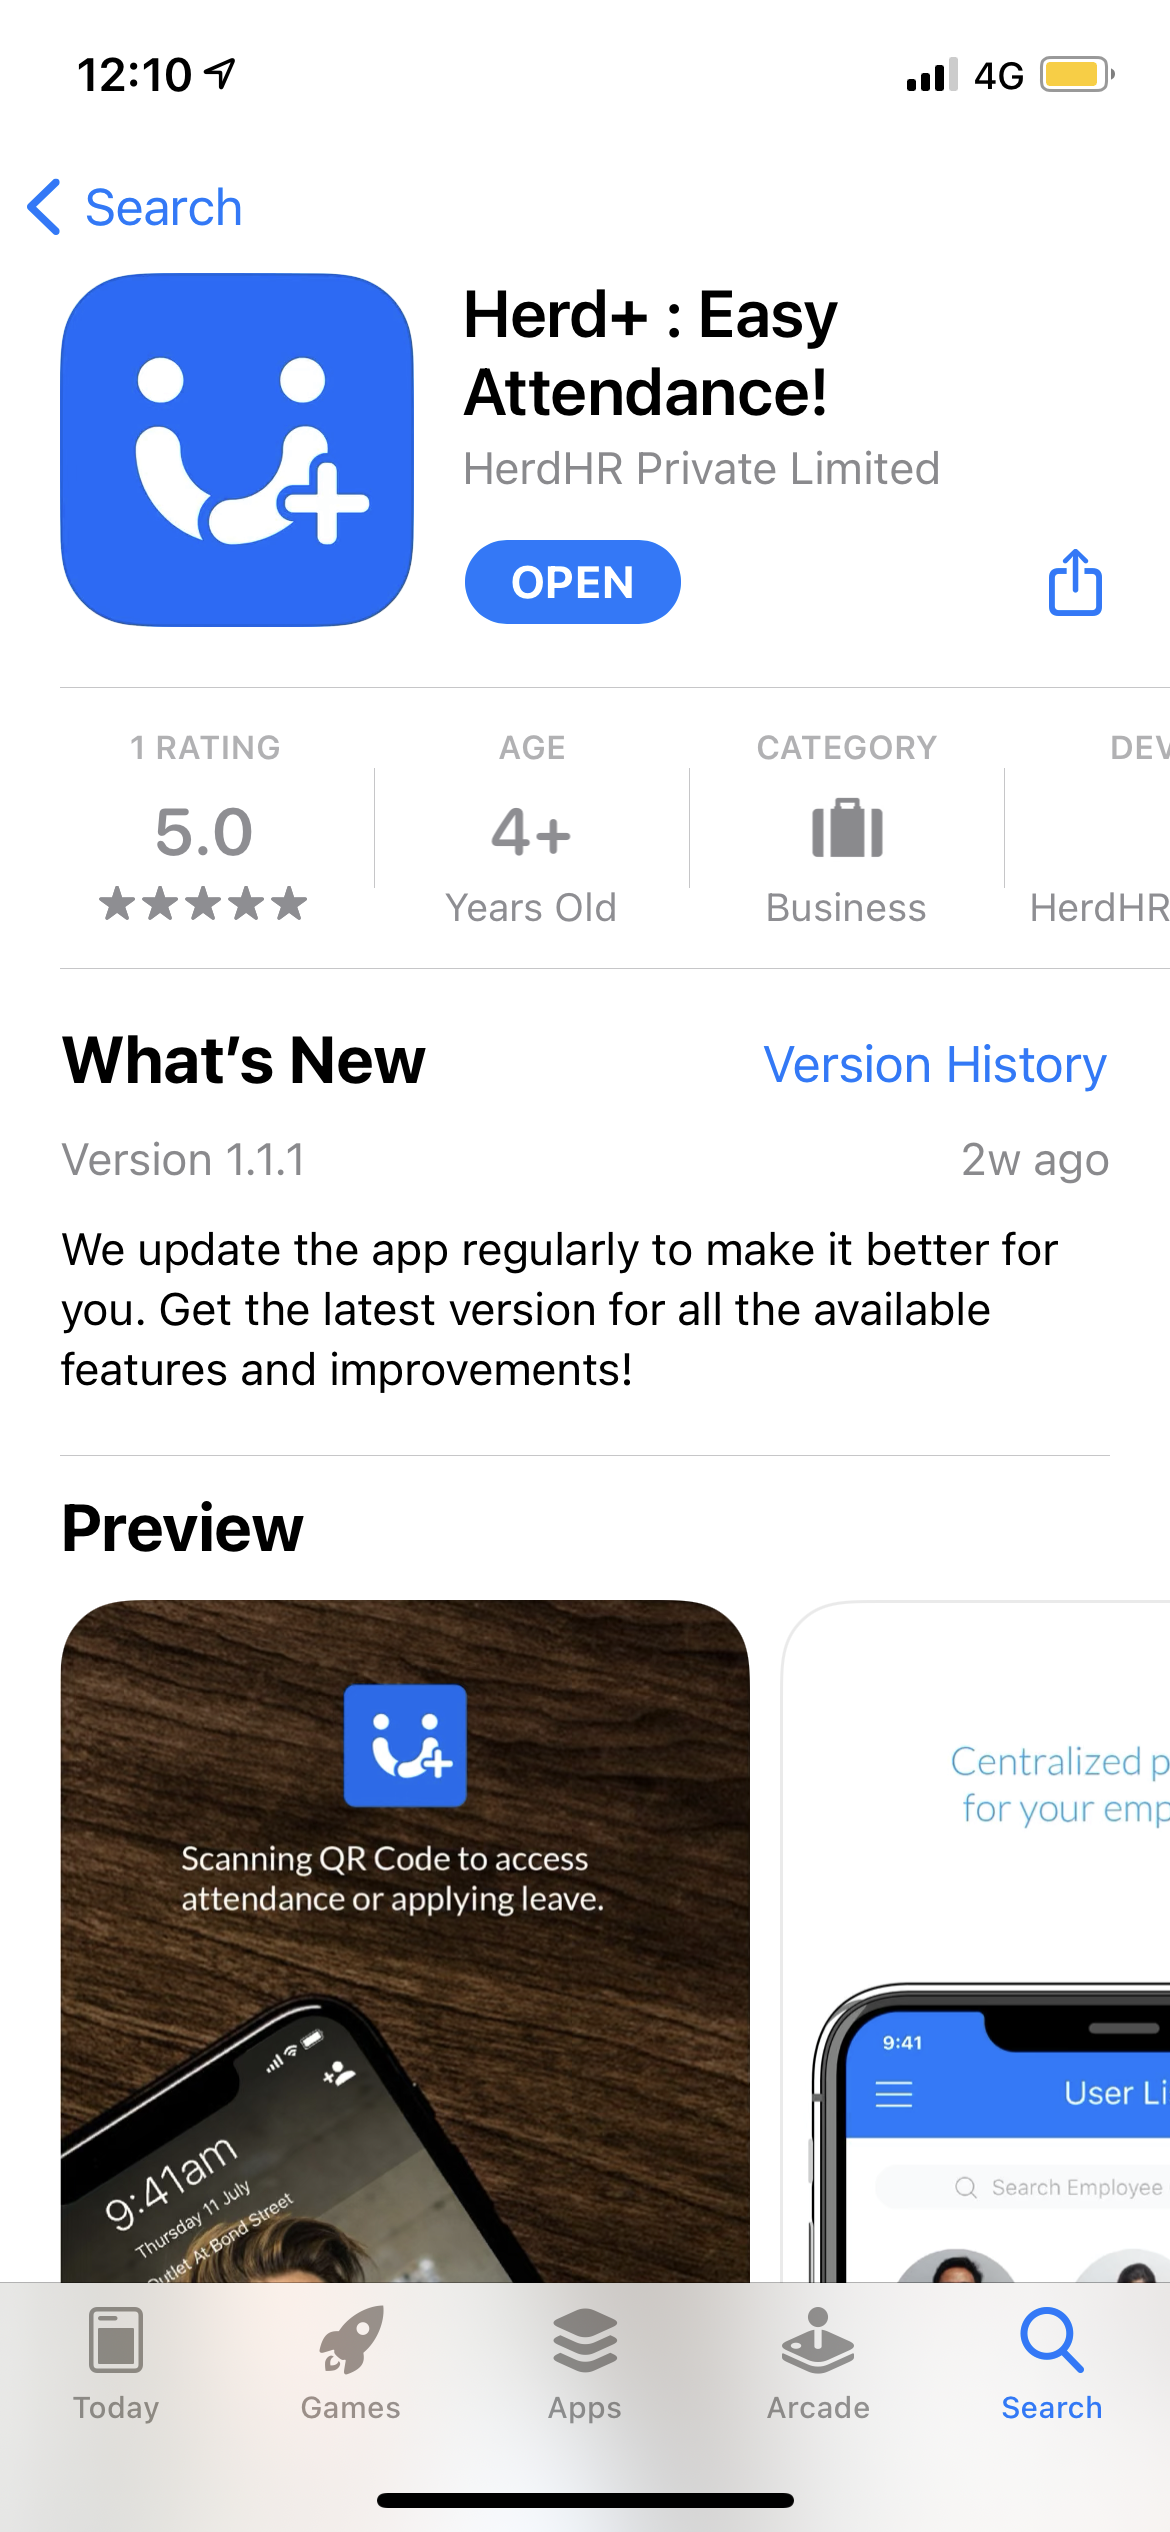
Download Herd+
- Download Herd+ from the Apple App Store / Google Play Store / Huawei AppGallery.
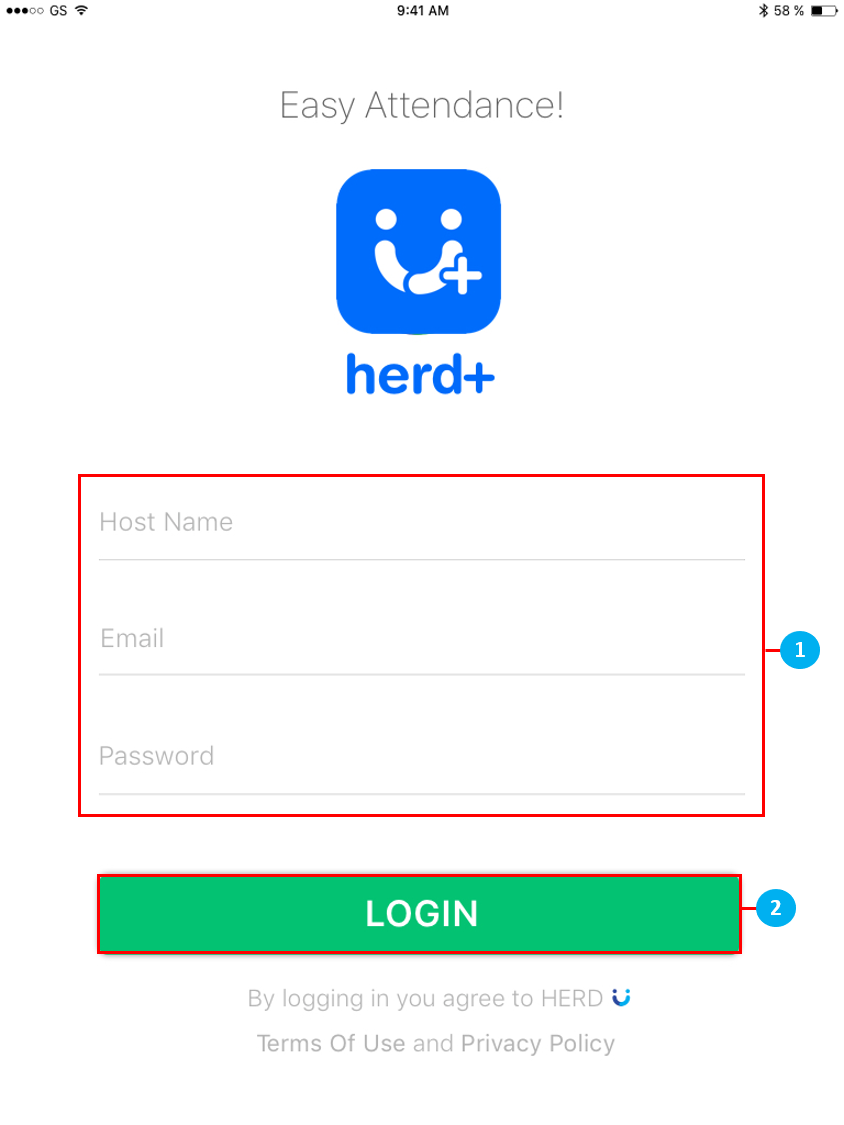
Getting Started
-
Sign in using your Herd account credentials which will be sent to you via email.
Hostname: herdhr <- Tenant Name (Not required when accessing Herd by clicking on the URL below.)
Email: sample@gmail.com <- Your working email address.
Password: G@H#H$JF <- Change this to something easy to remember once you log in.
- Tap on LOGIN at the bottom of the screen.
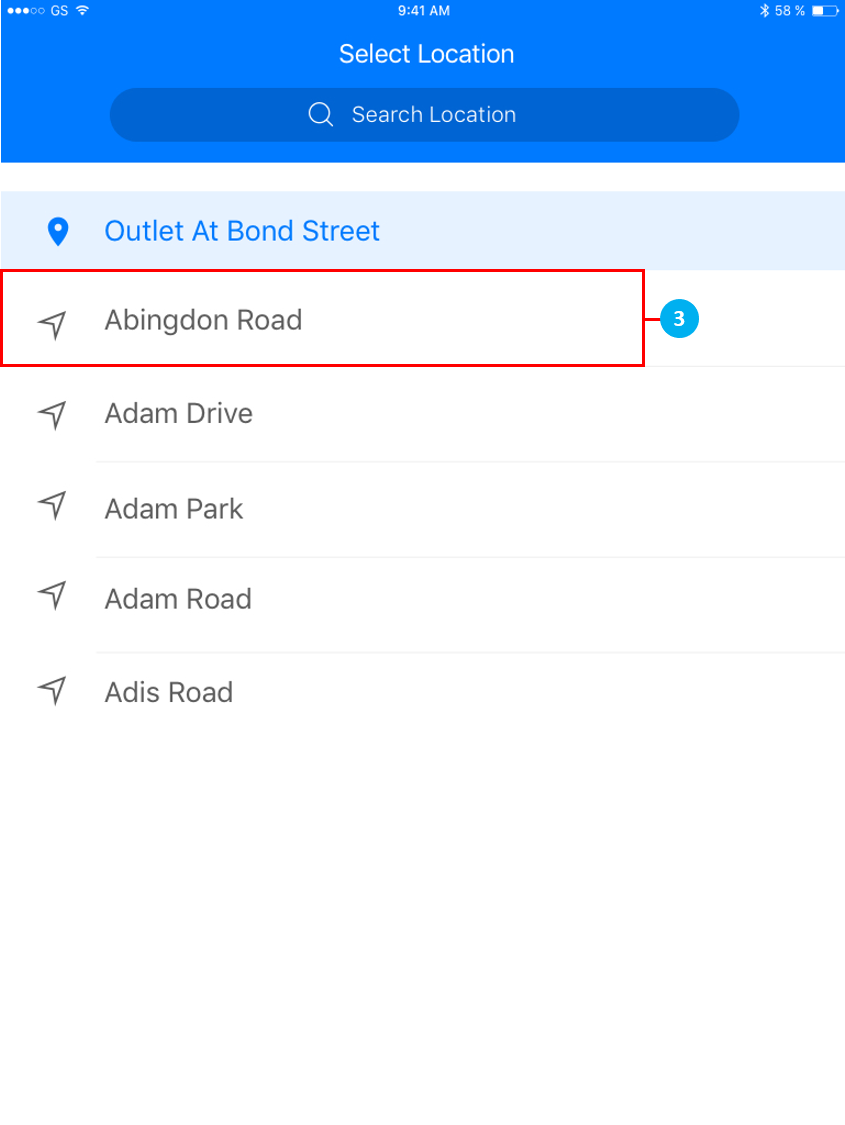
- Once you have signed in, you will be prompted to select your current location where your Employees will use Herd+ for Attendance taking.
Generate QR Code
- To generate your unique QR code, in Herd Web click on Employee > Profile.
- Select desired Employee
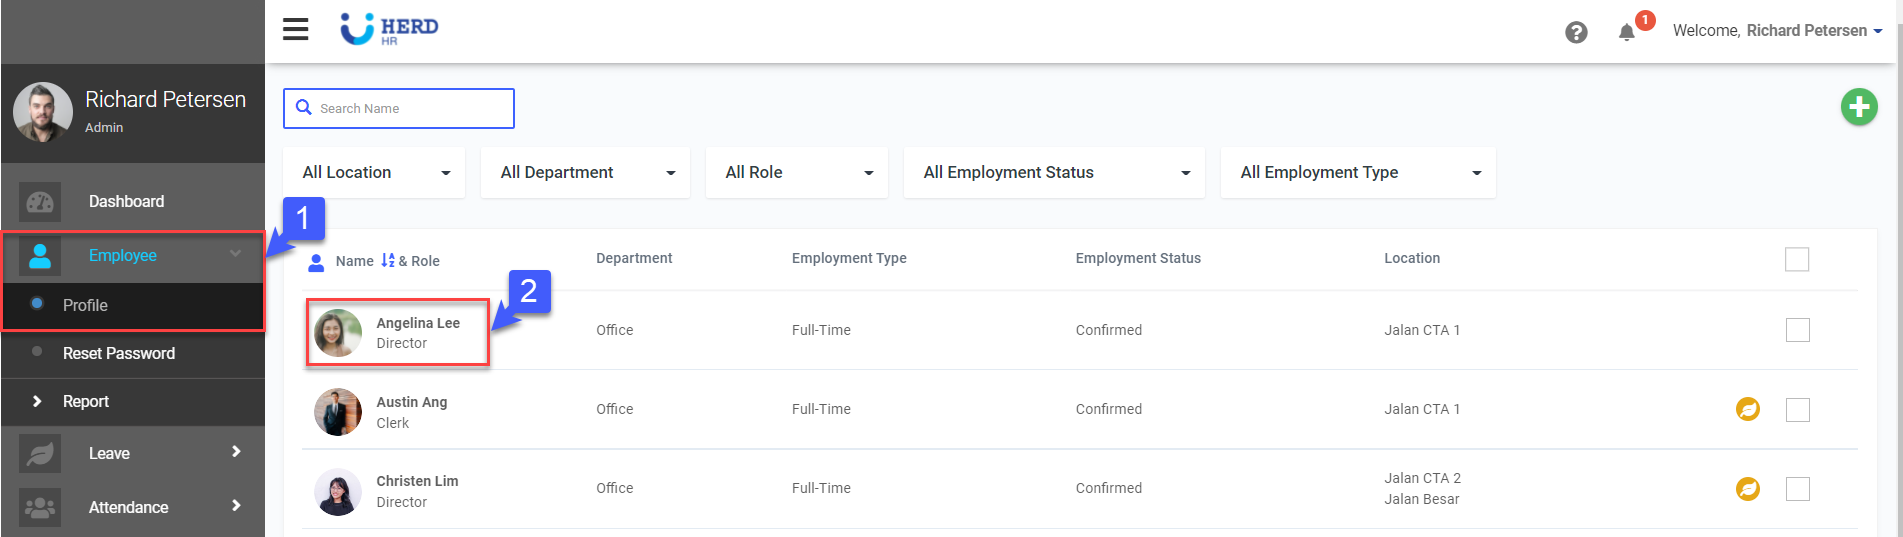
- Click Action
- Click Generate QR
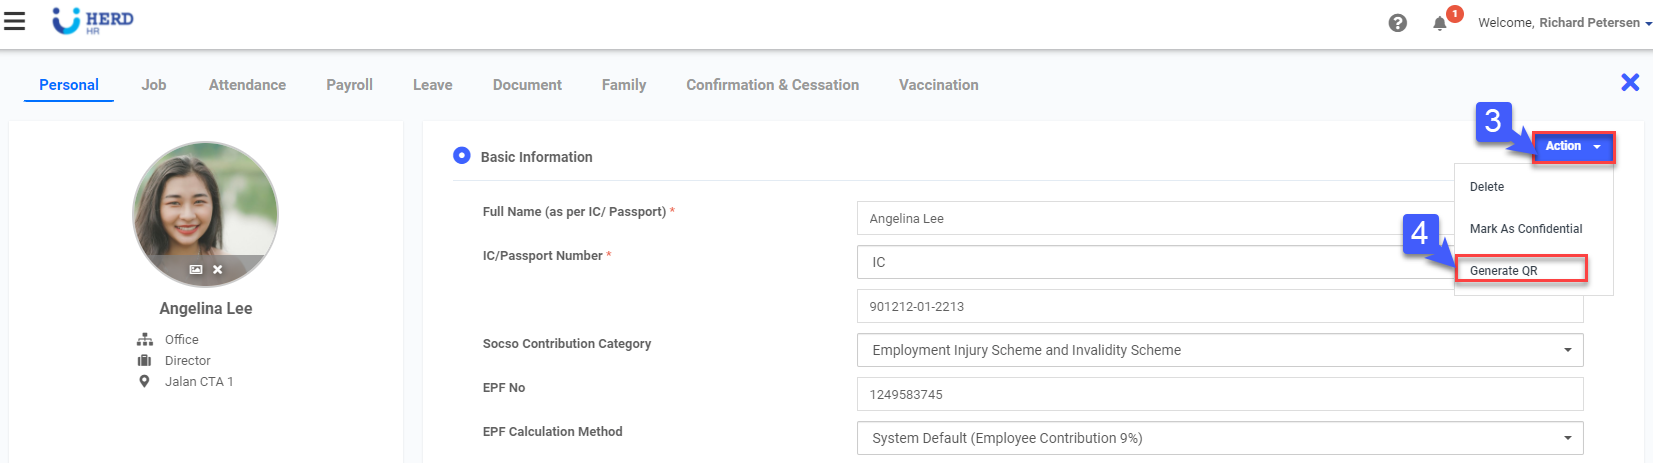
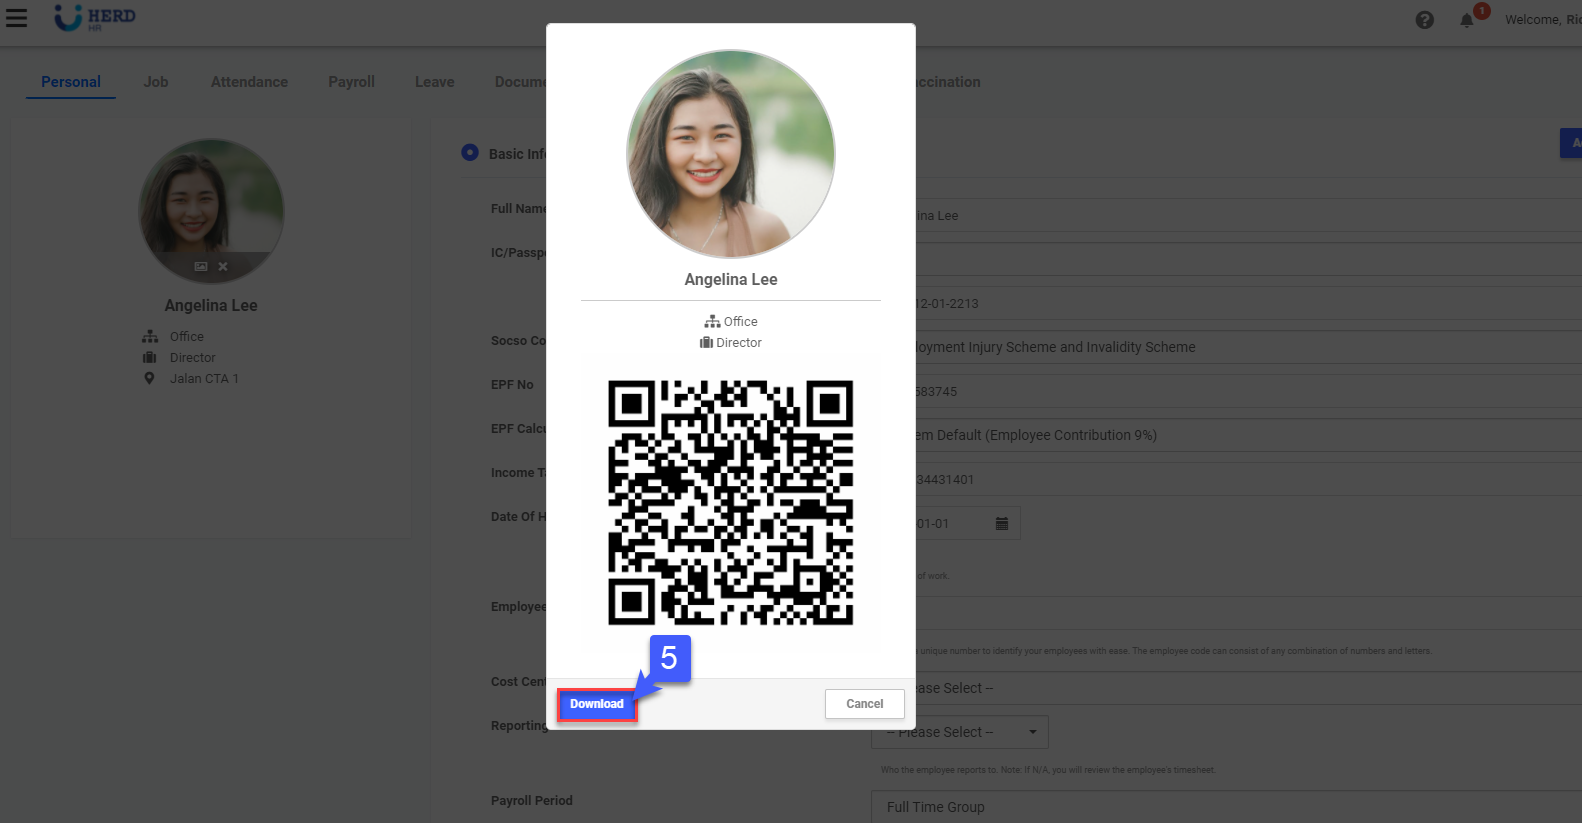
- Click Download to download QR code
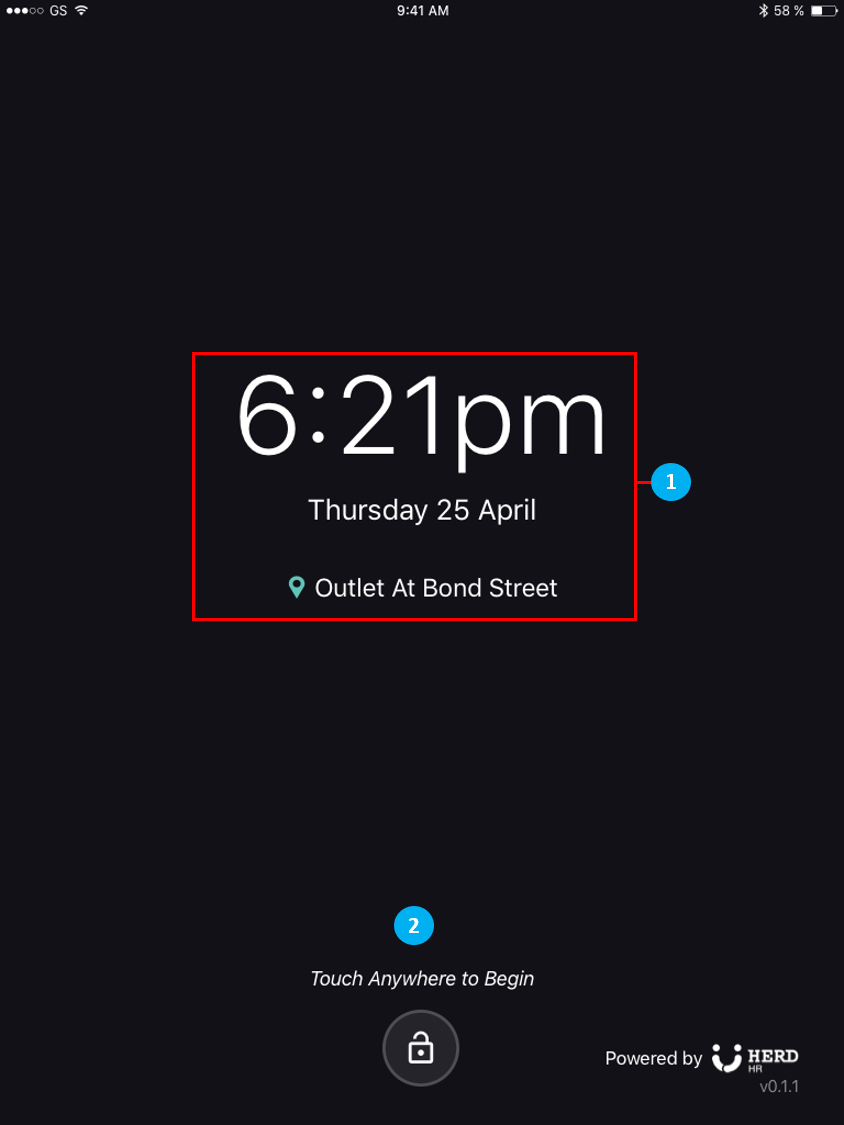
Screensaver Mode
- When Herd+ is in Idle Mode or has been idle for 20 secs, Herd+ will return to this page which
places it in screensaver mode. - To begin to use the Attendance function or to apply for Leave, touch anywhere to begin.
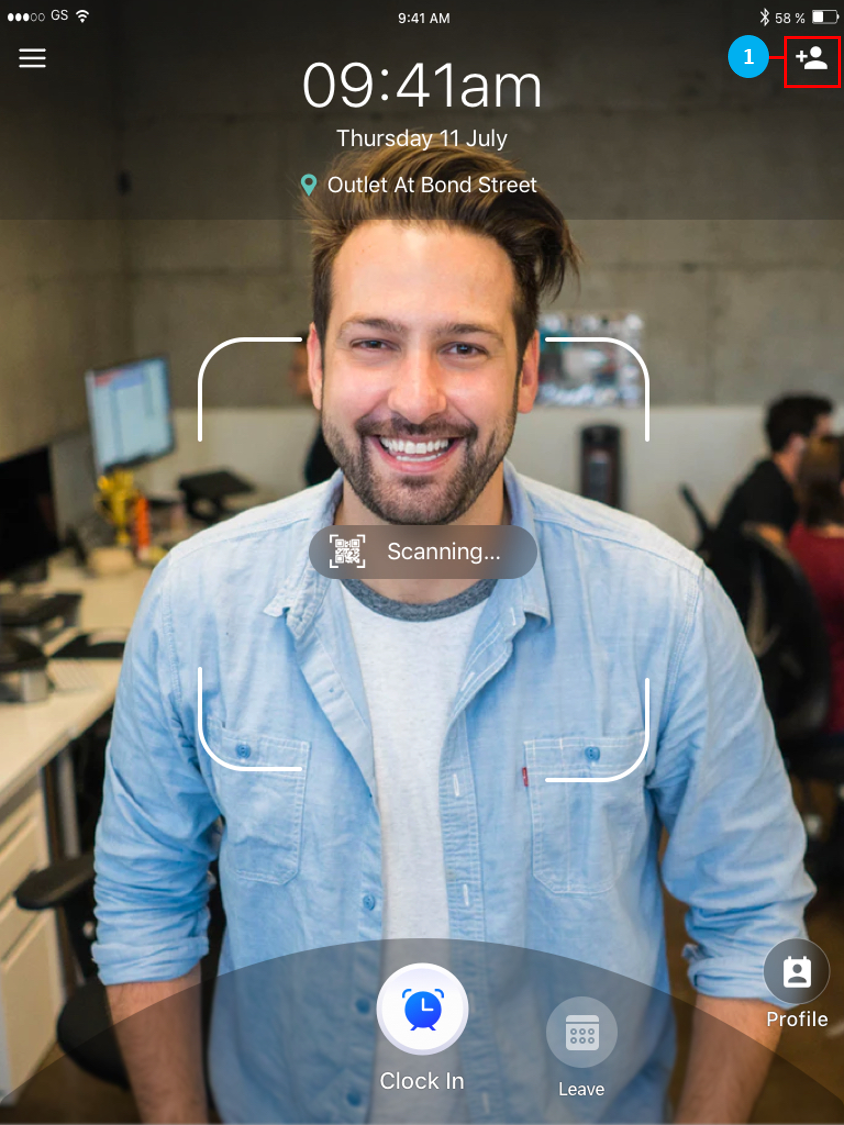
Orientate to Homepage
- Tap
 to access the main menu.
 - Tap
 to add a new profile. This is used for new joiners who’s profiles have not yet been
added in Herd Web. - The homepage of Herd+ has a QR code scanner activated by default. To clock in, scan your QR
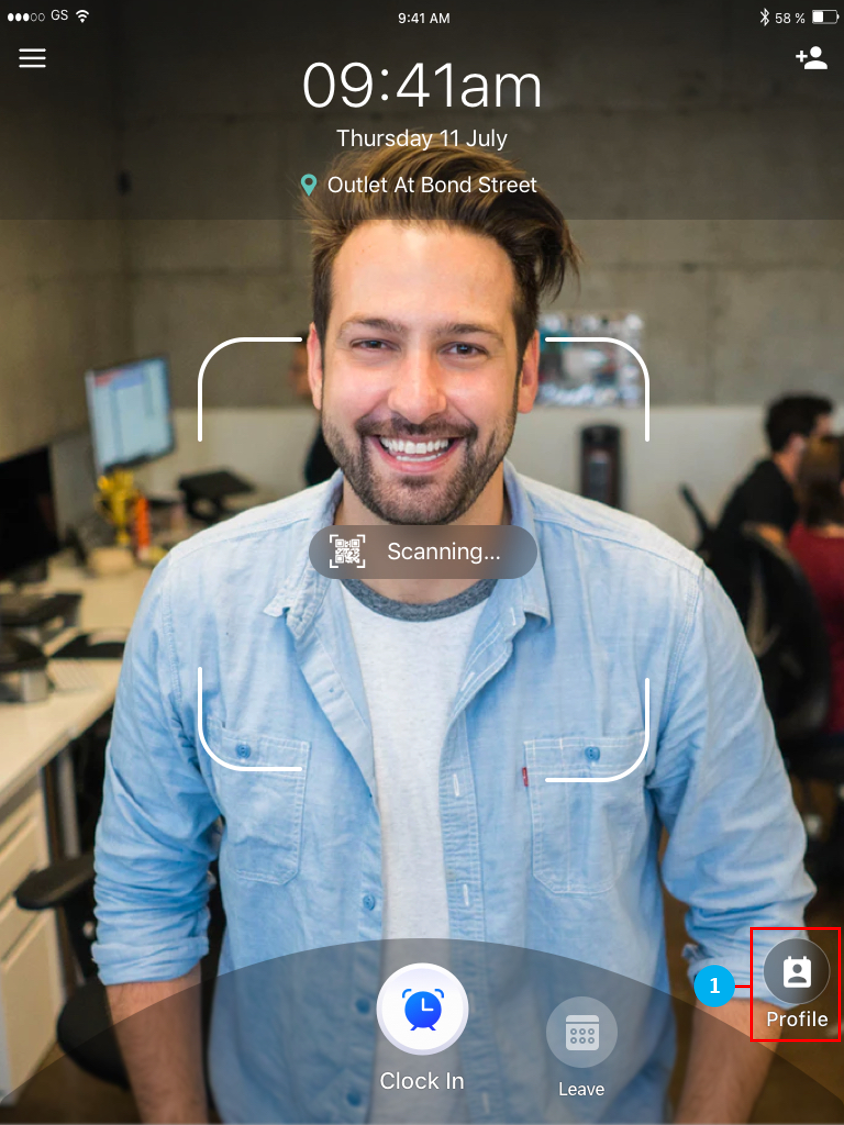
code within the square in the middle of the screen. - The default page of Herd+ is the Clock In page as shown.
- Tap
 to switch to the Leave application portal.
 - Tap
 to switch to the view to view all the profiles of the employees working in this location.
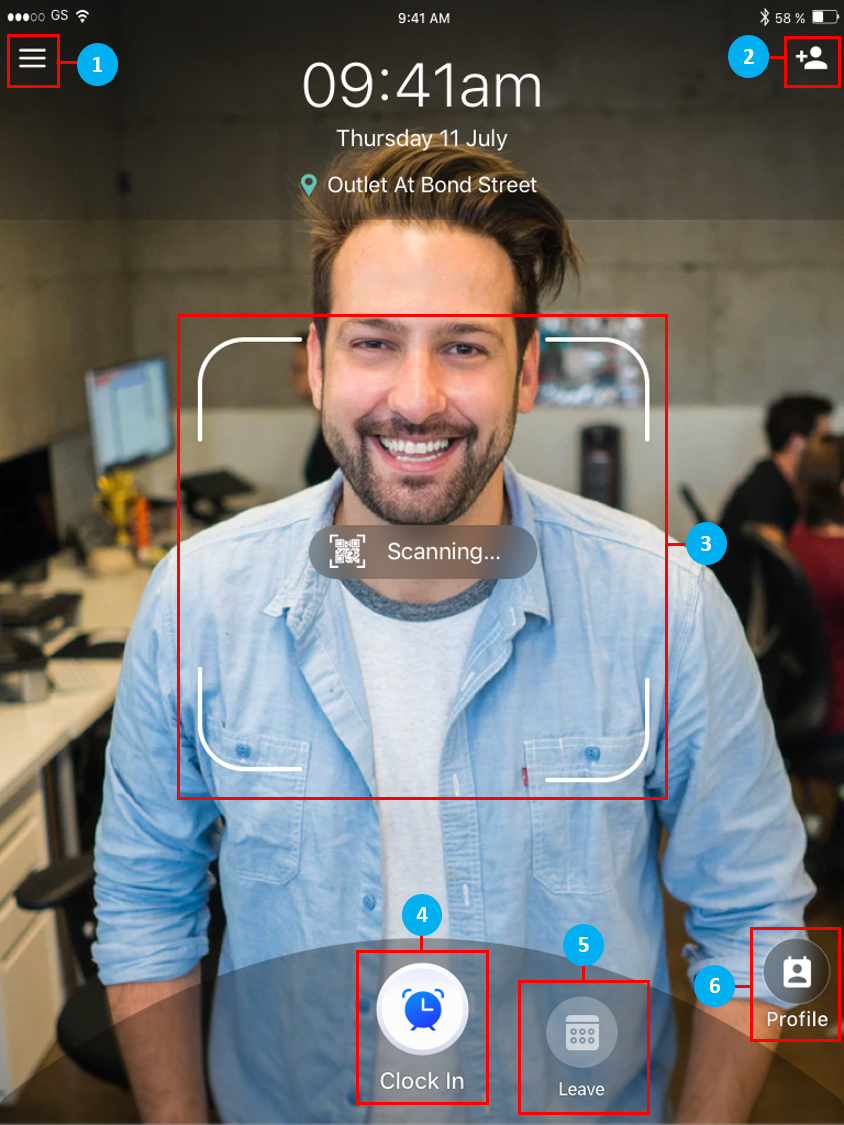
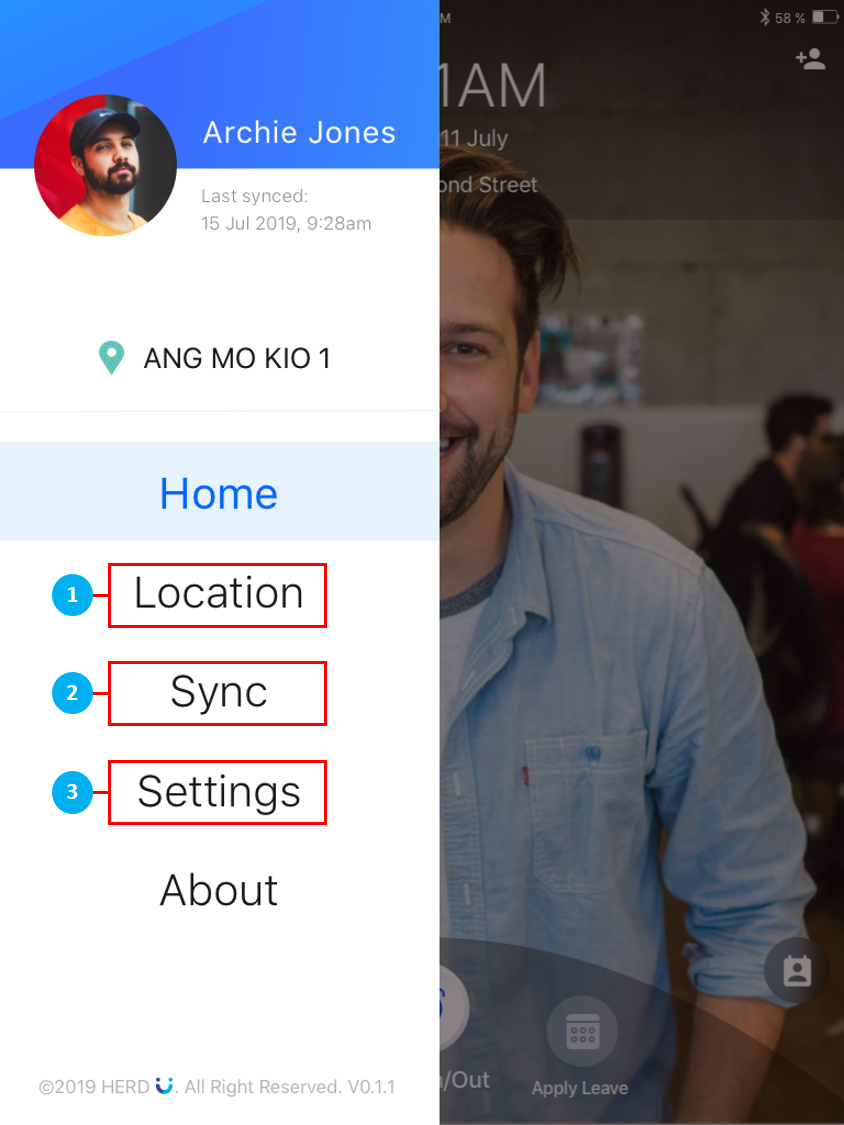
Main Menu
- Tap Location to change your location.
- Tap on the Sync icon to refresh the page and to ensure all data is up to date.
- Tap settings to access the Settings page.
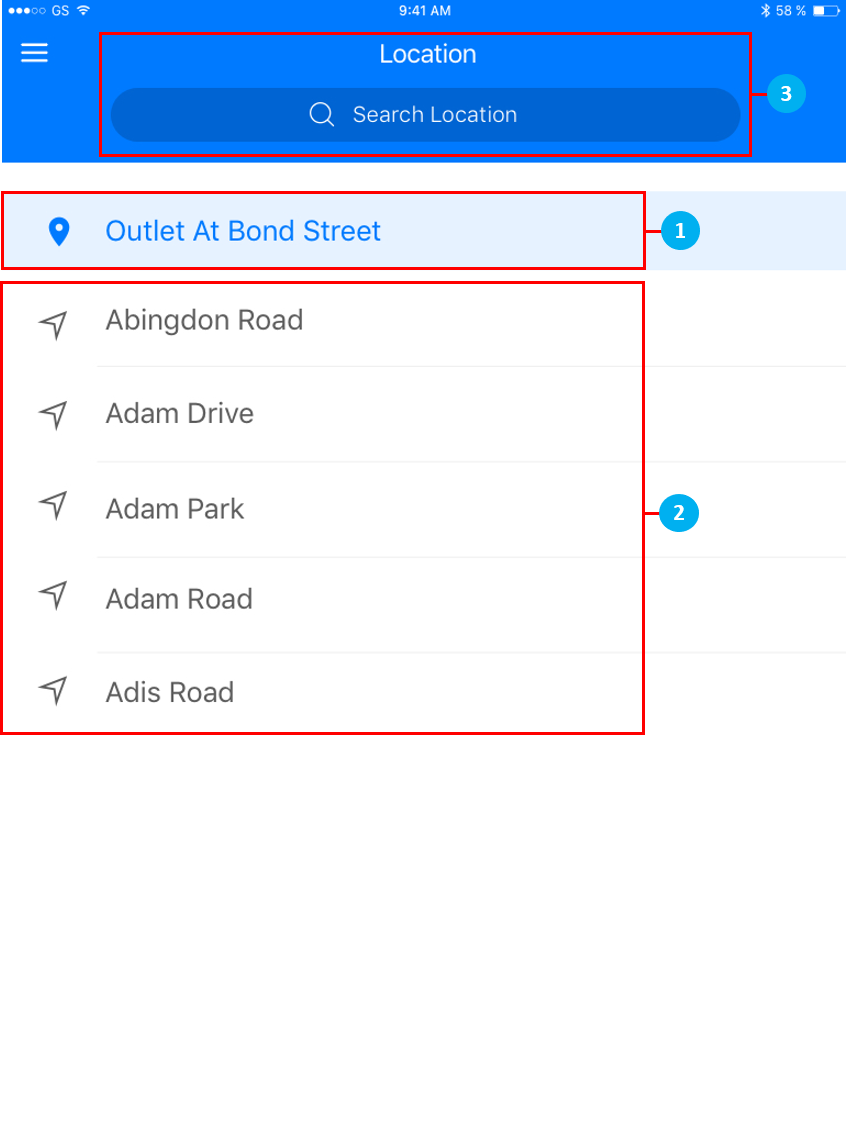
Location
- The first row is your current work location on the app.
- Change location by selecting other available locations shown.
- If there are too many locations, you can do a quick search for the location search bar.
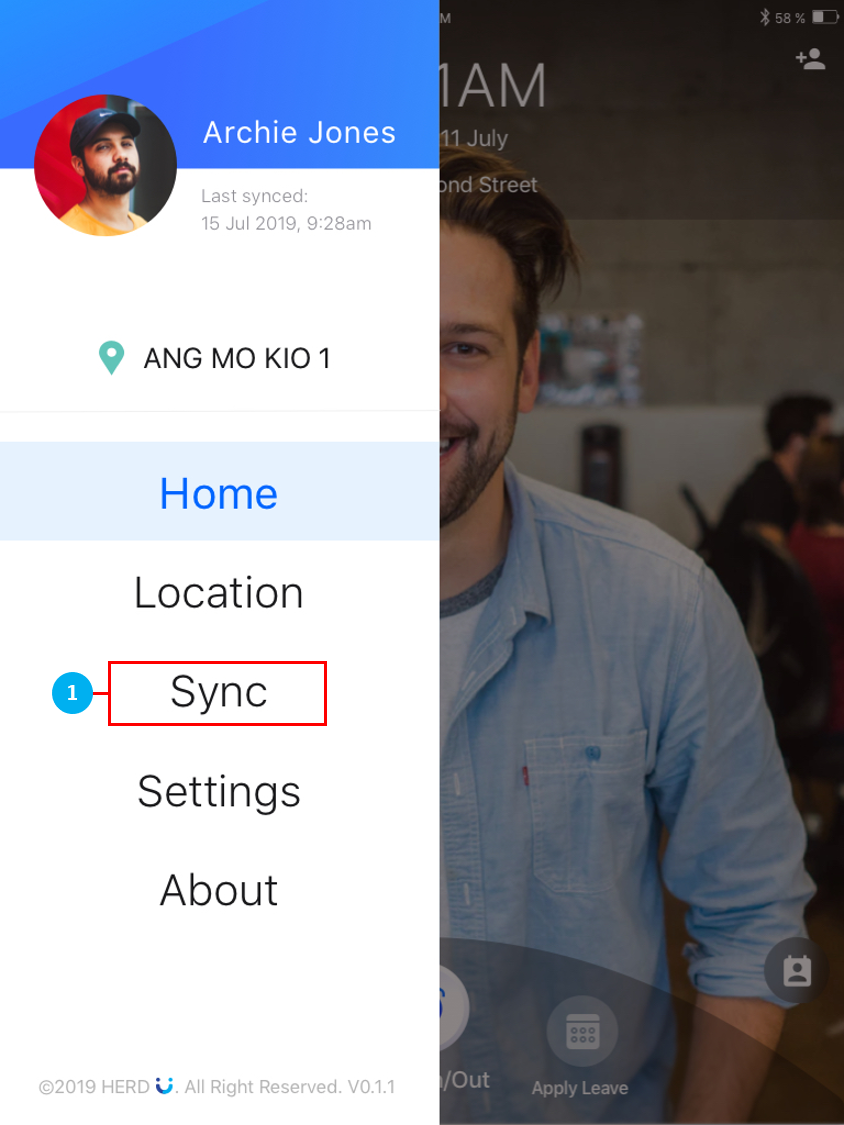
Sync
- Tap on the Sync icon to refresh the page. You can check your last synced status next to your profile picture at the top left of the screen.
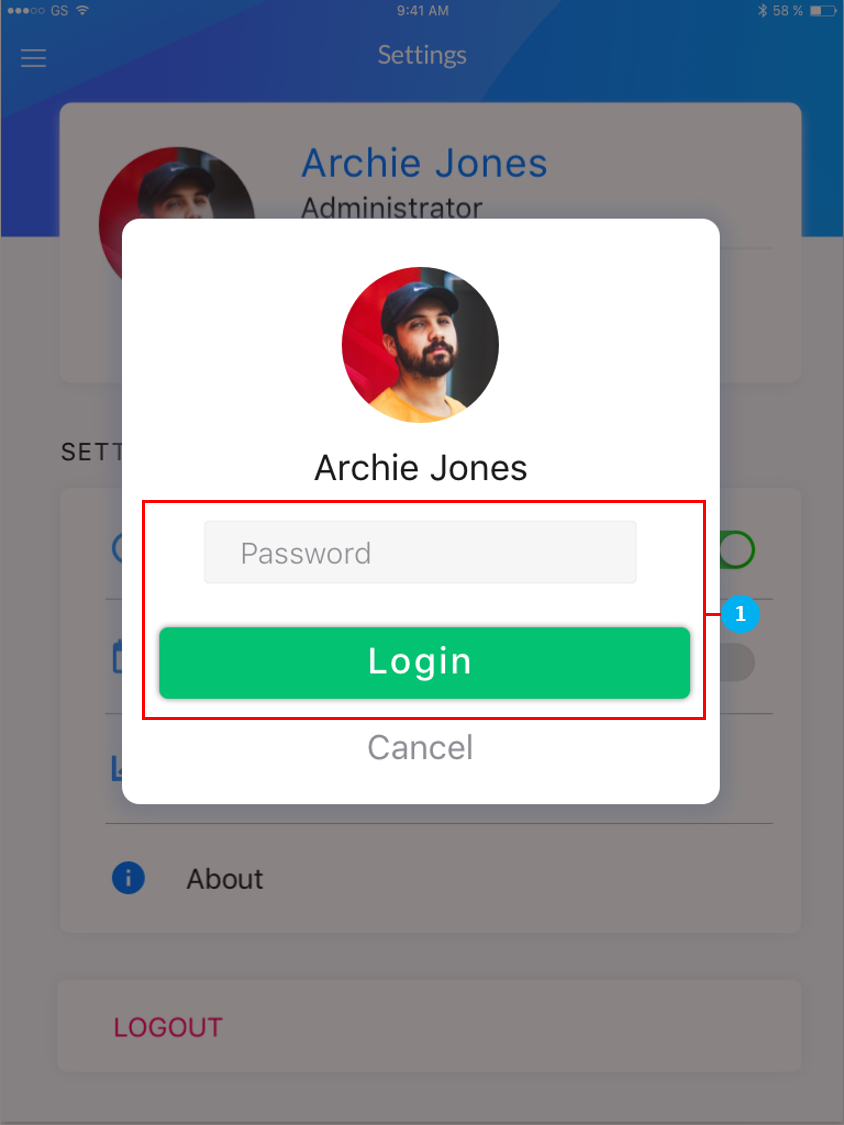
Settings
- In order to make any changes to the Settings, enter your admin password and tap on Login.
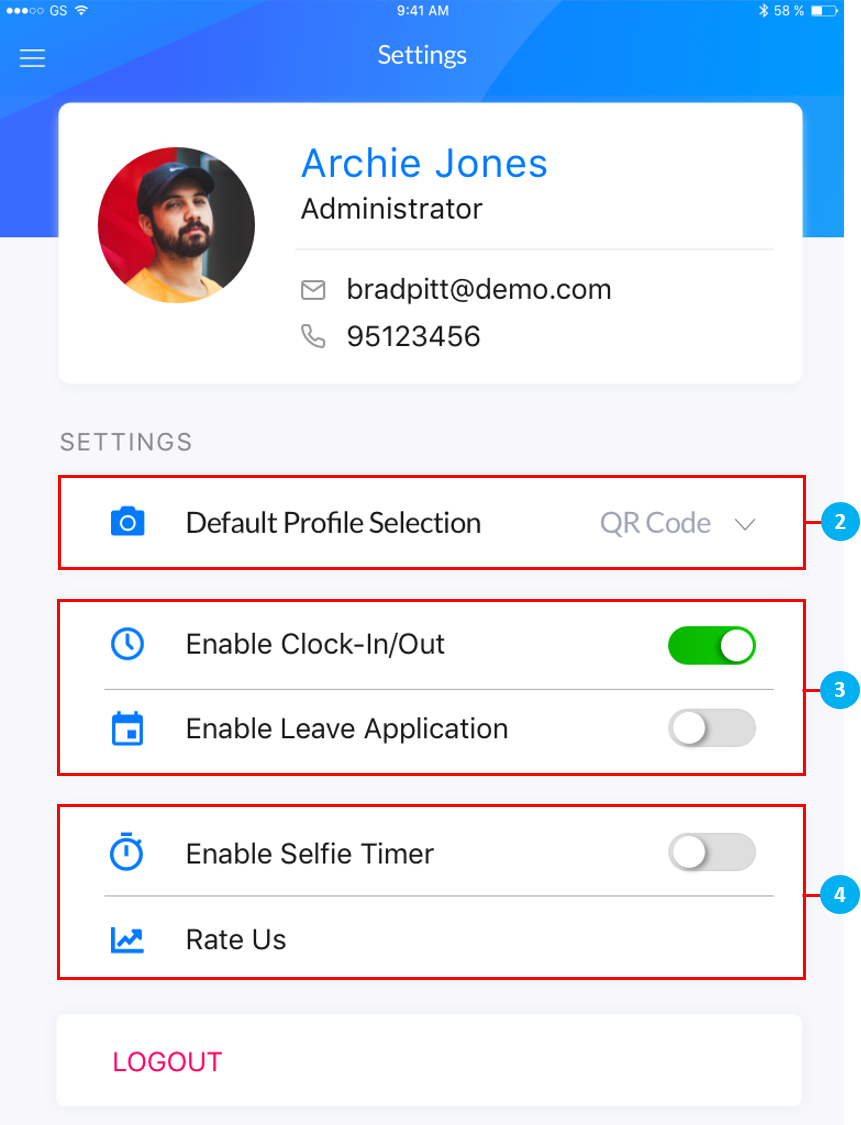
- The Default Profile Selection is QR Code on the homepage of Herd+. Tap on the dropdown menu to switch to view where you can view all the profiles of the employees working in this location.
- Use the toggle switches to select which function(s) to enable in Herd+. You are able to enable either Clock-In/Out or Enable Leave Application, or both, but you will not be able to switch off both options.
- By default, Herd+ will take a photo instantly when you Clock-In/Out. Turn on the Enable Selfie Timer toggle switch to have a 3 second countdown timer before your selfie is taken.
Add Profile
- Tap here to add a new profile for a new employee. This is used for new joiners who’s profiles have not yet been created and added in Herd Web.
- Type in the new employee’s name, then tap on Add.
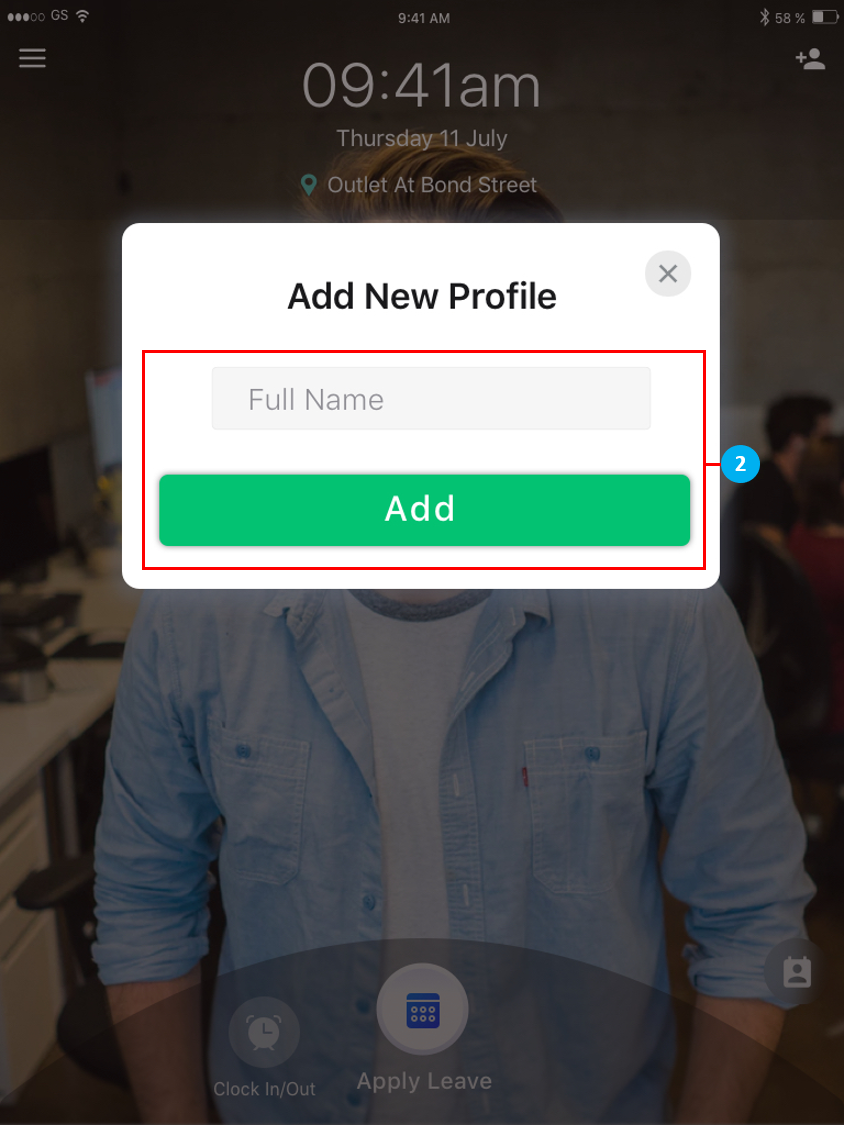
- The new profile has been added, and this employee can now clock in for work.

Clock In / Out
- To clock in / out, select the Clock In button and scan your QR code within the square in the
middle of the screen on the Herd+ homepage.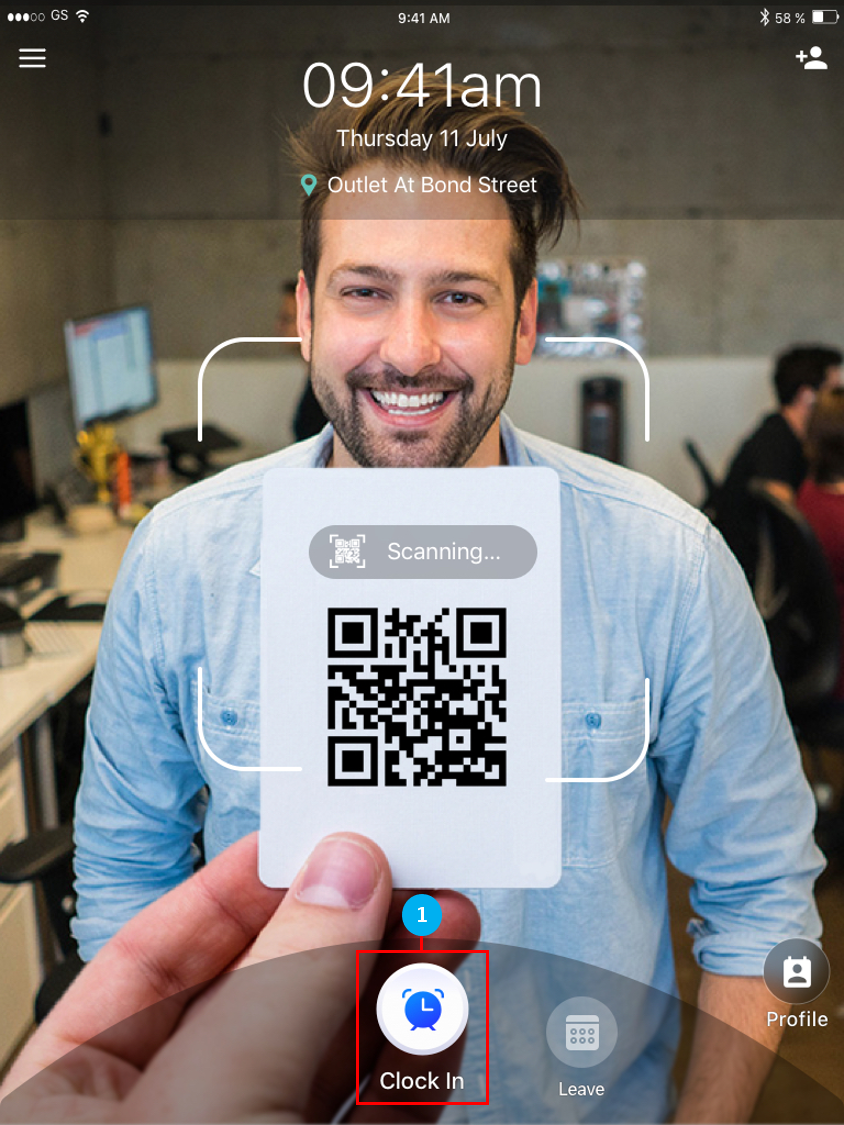
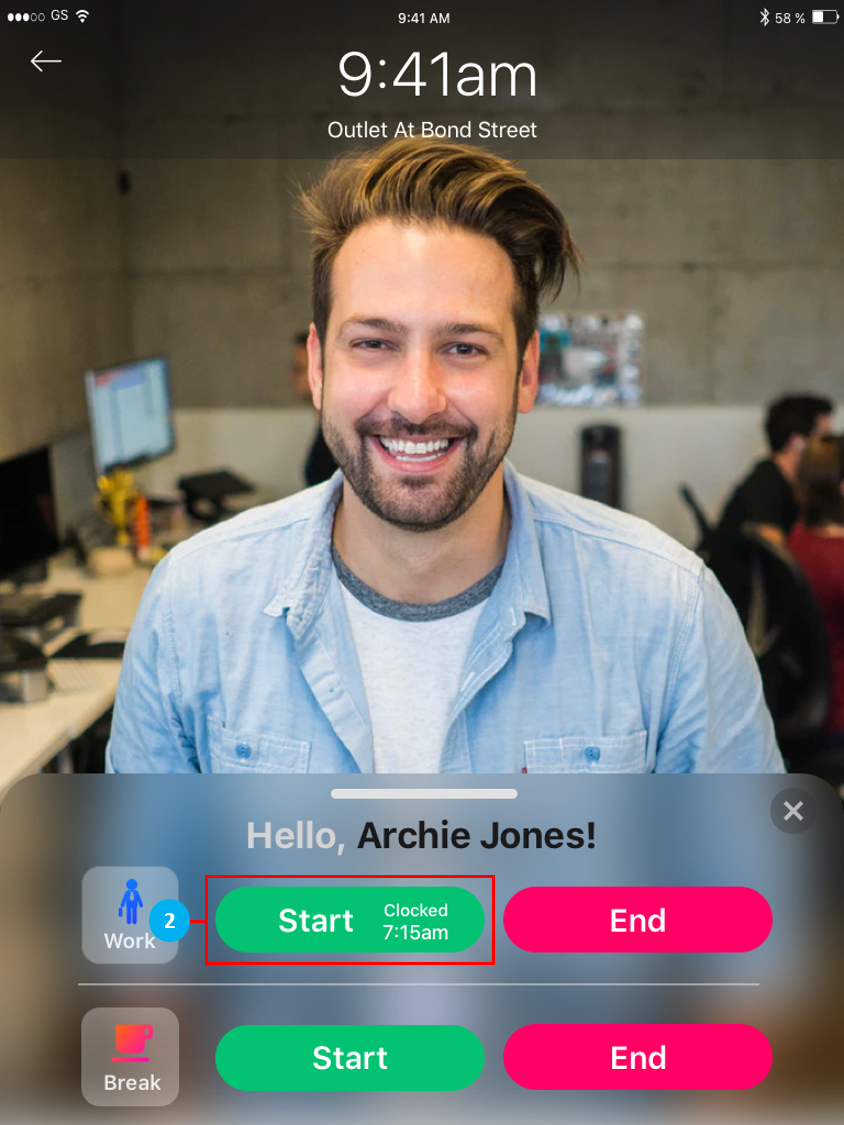
- Once the QR code has been scanned. Tap on Start, and your selfie clock in will be taken. (*Note: With the Selfie Timer disabled in the Settings page, the clock in selfie will be taken instantly when you tap on Start or End to clock in or out. If it is enabled, there will be a 3 second countdown timer before your selfie is taken to clock in / out.)
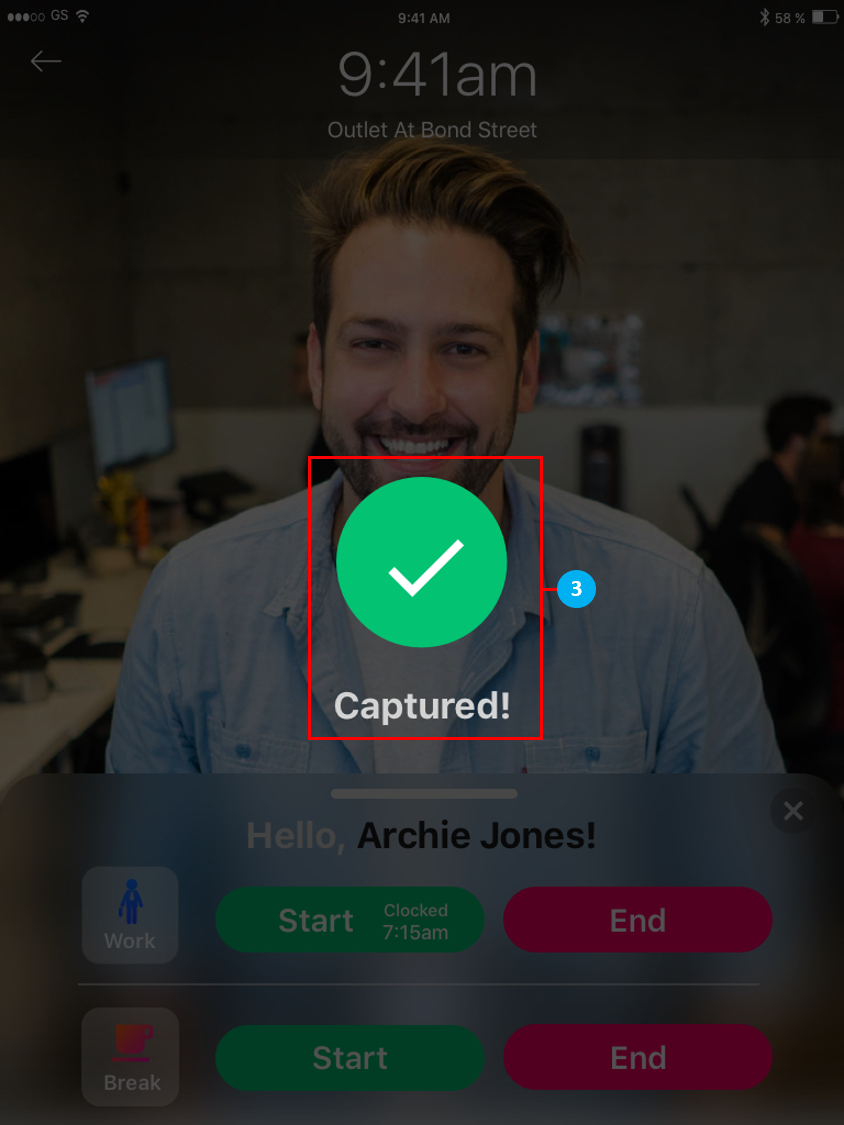
- Once your selfie has been taken successfully, you’ll see the Captured! confirmation message.
Apply Leave
- To apply for leave, select the Apply Leave button and scan your QR code within the square in the
middle of the screen on the Herd+ homepage.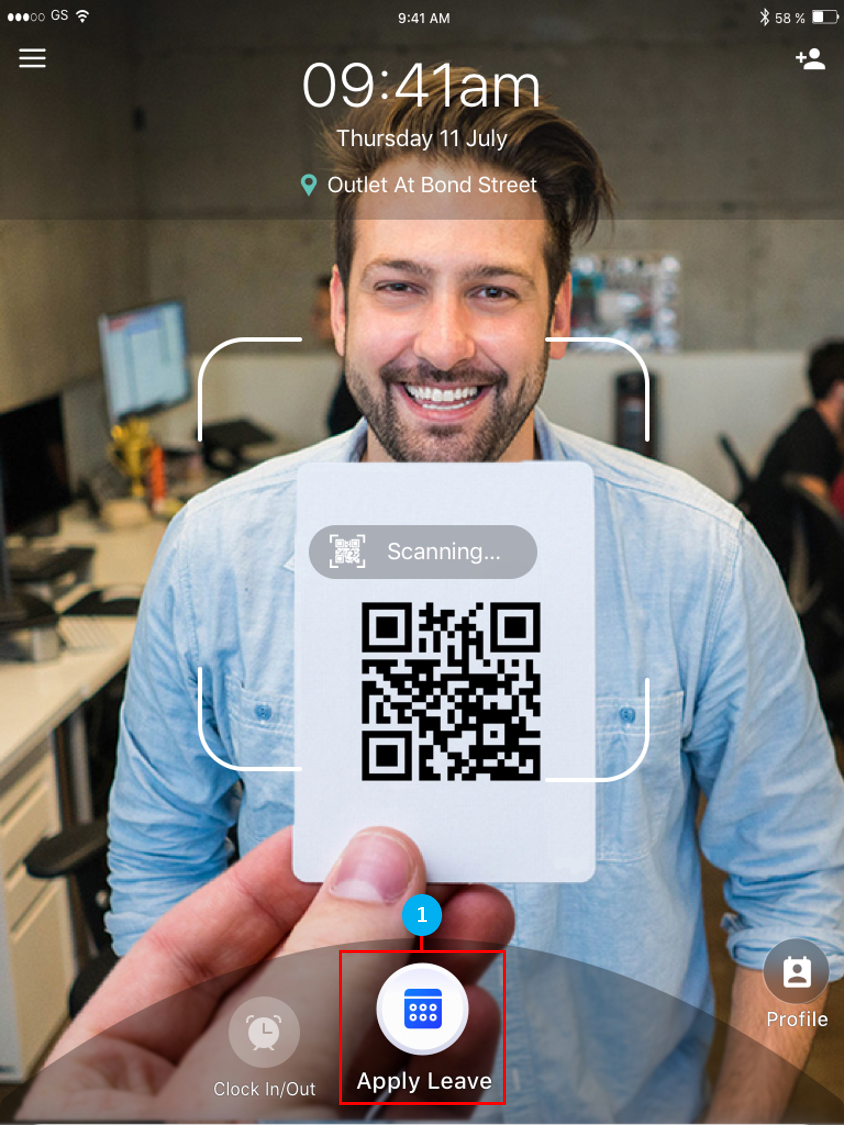
- Select your Leave Type from the list.
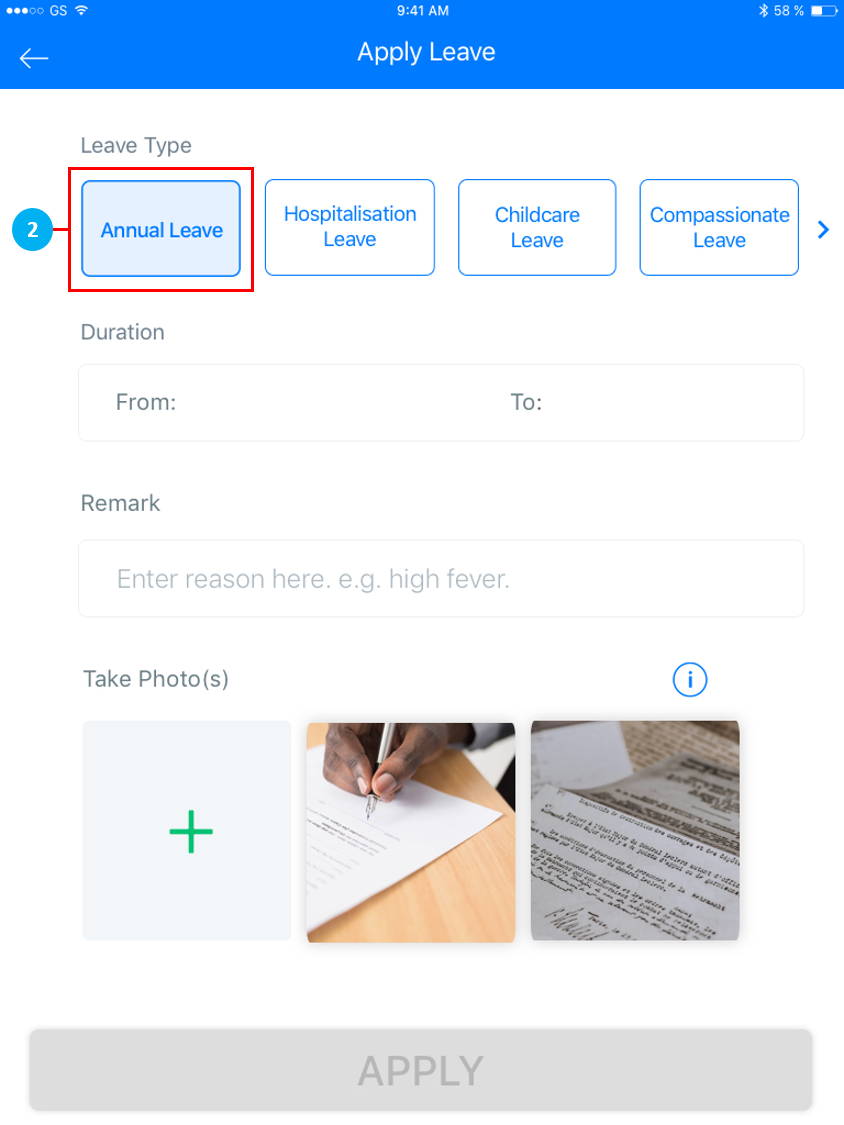
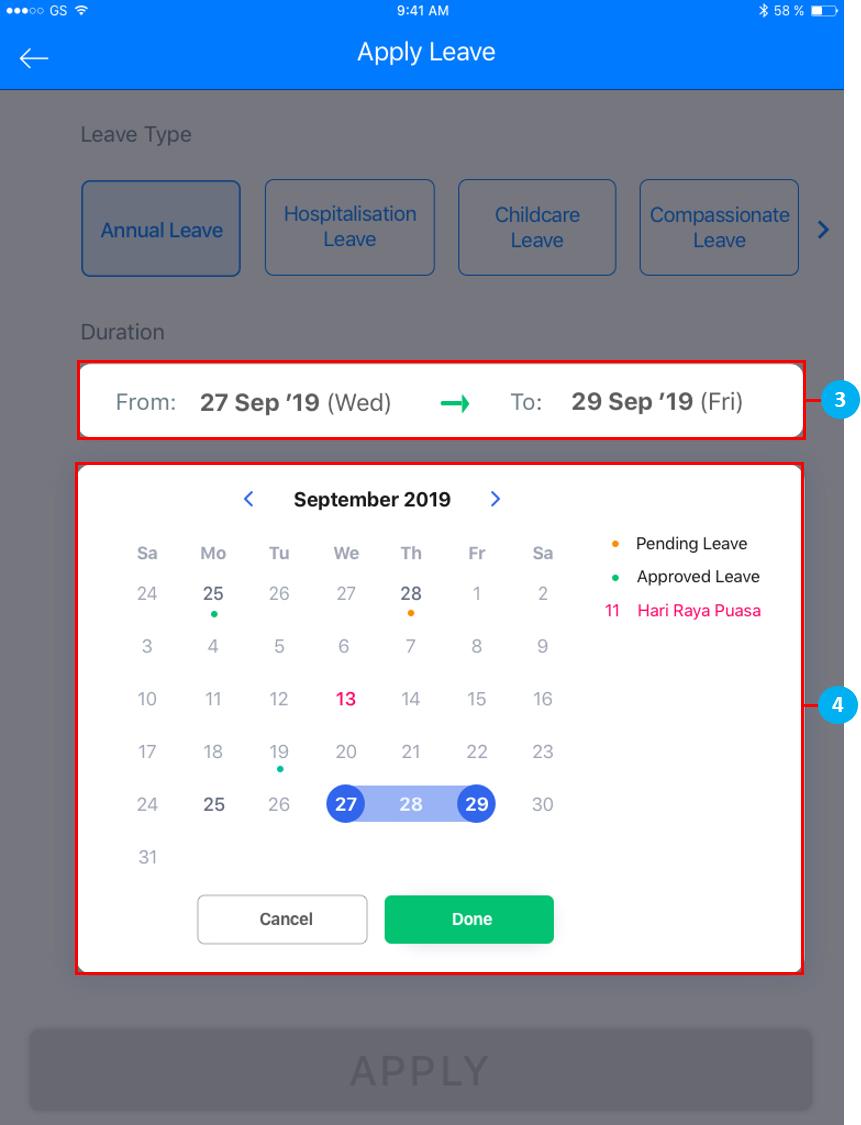
- Select the dates for your leave application from the Duration field.
- Tap on the start date of the leave application, then tap on the end date.
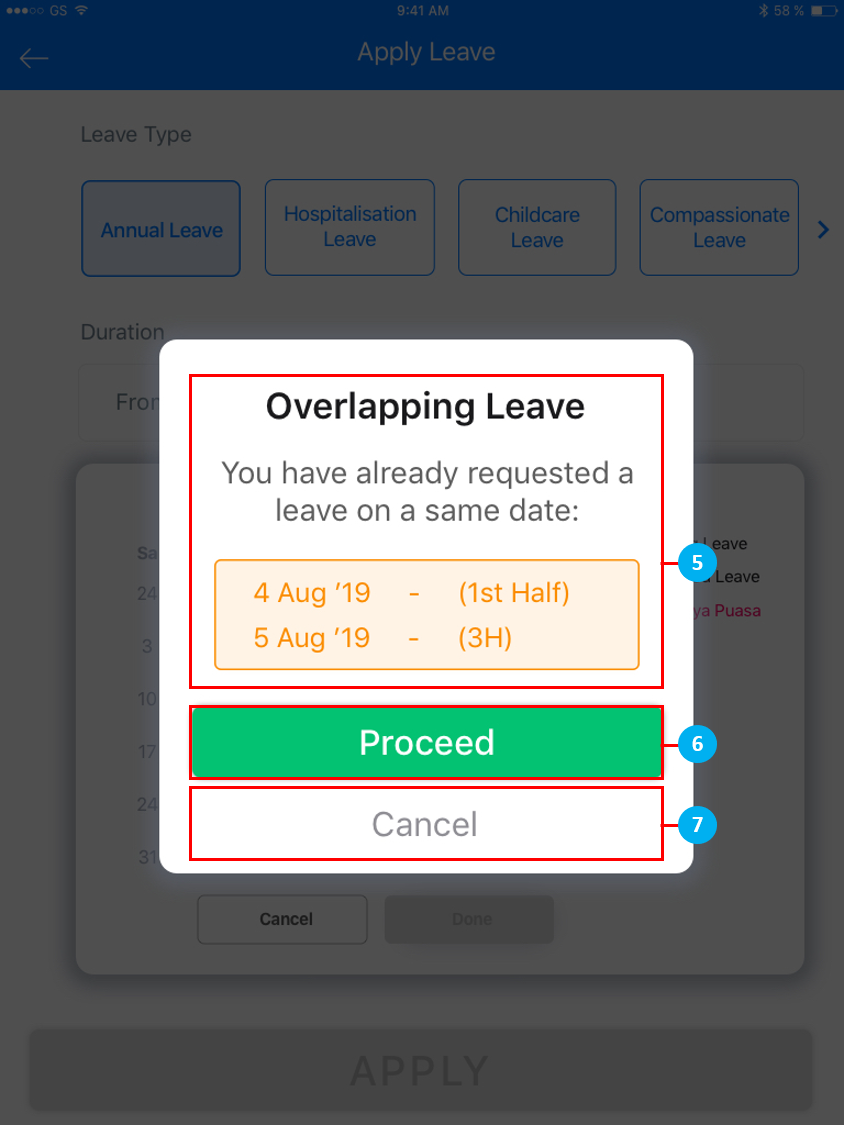
- If your new leave application overlaps with an existing approved leave, you will get the
following message. (*Note: This only occurs when there is an existing approved hourly or half day leave only, where your new application will apply to the balance hours or half day of that same day.) - Tap on Proceed to confirm the leave application.
- Tap on Cancel to return to the date selection page.
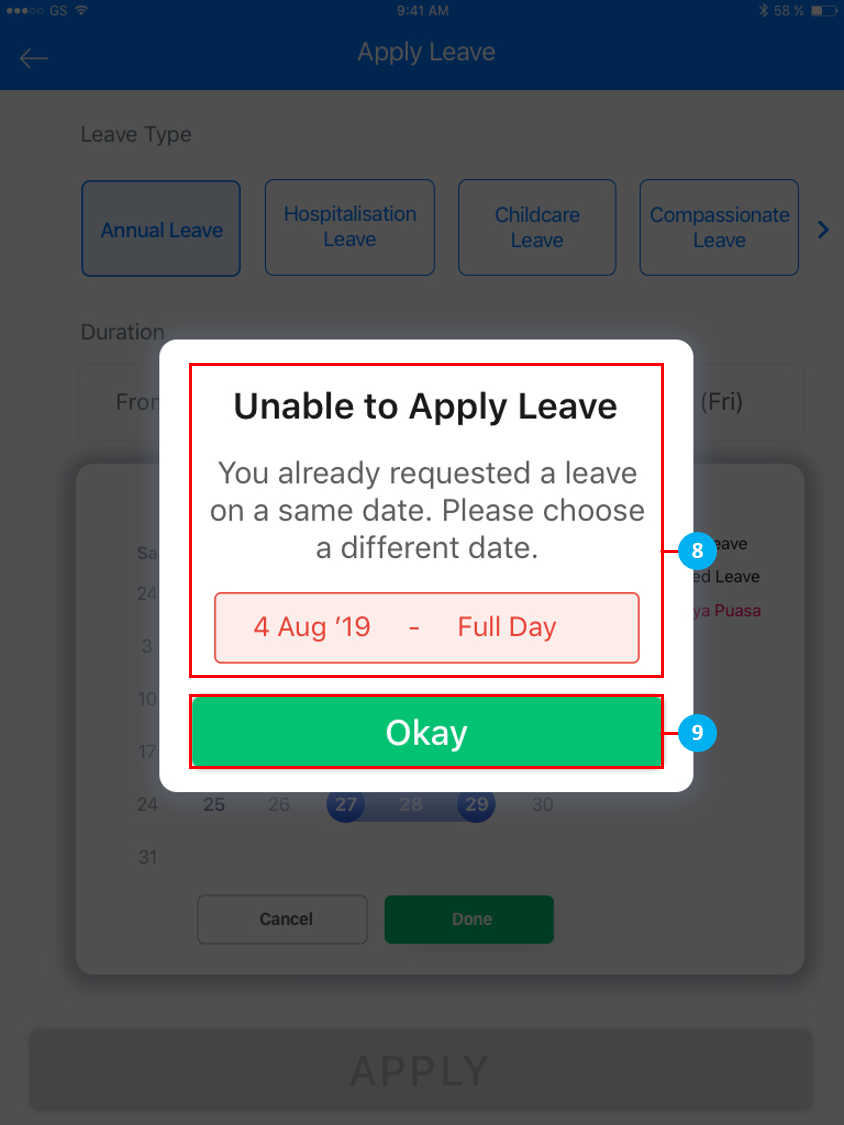
- If your new leave application falls on the same day as an existing full day approved leave, you will get the following message.
- Tap on Okay to return to the date selection page.
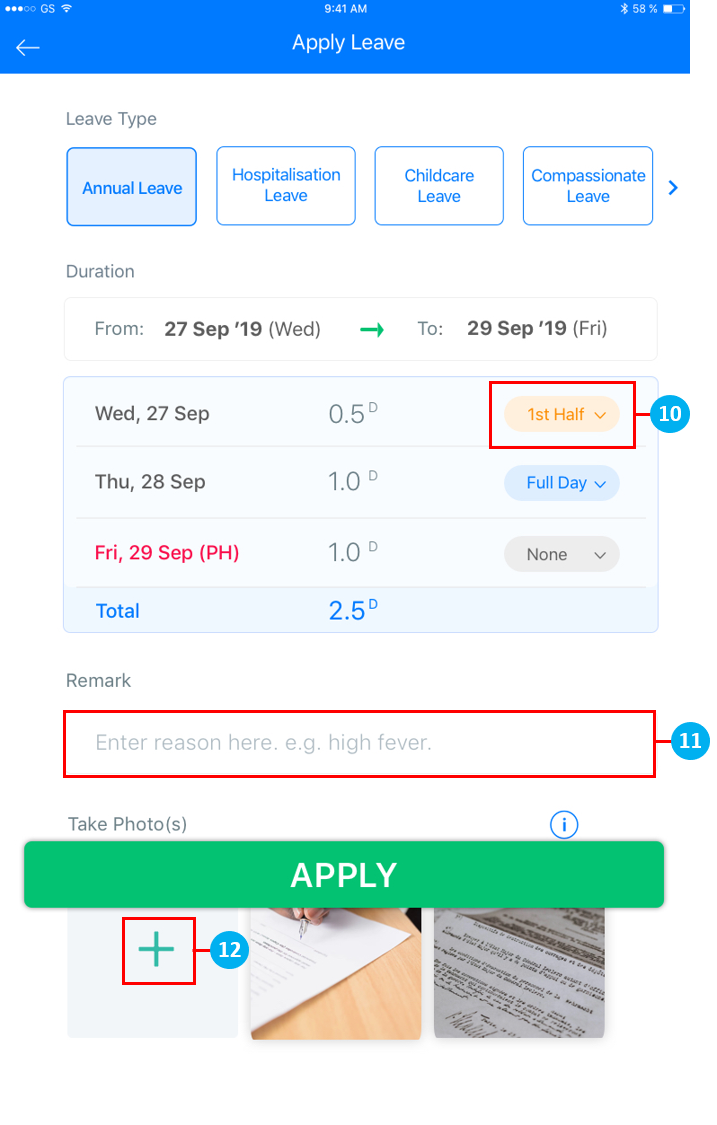
- Select 1st Half / 2nd Half / Full Day / None from the drop down list.
- Type in remarks if required.
- You are able to attach photos by tapping on the ‘+’ sign. Use the camera on the device to take a photo of your document. Once done, tap APPLY.
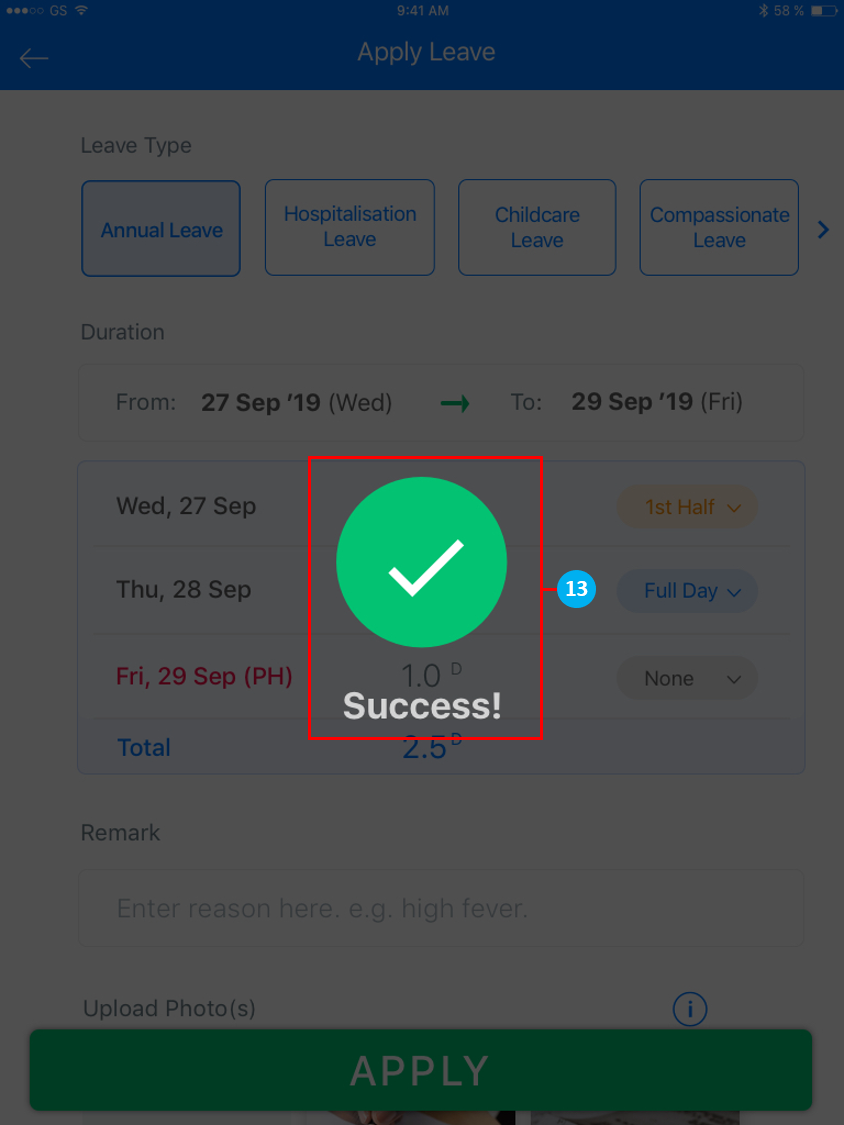
- Once your leave has been applied successfully, you’ll see the Success! confirmation message.
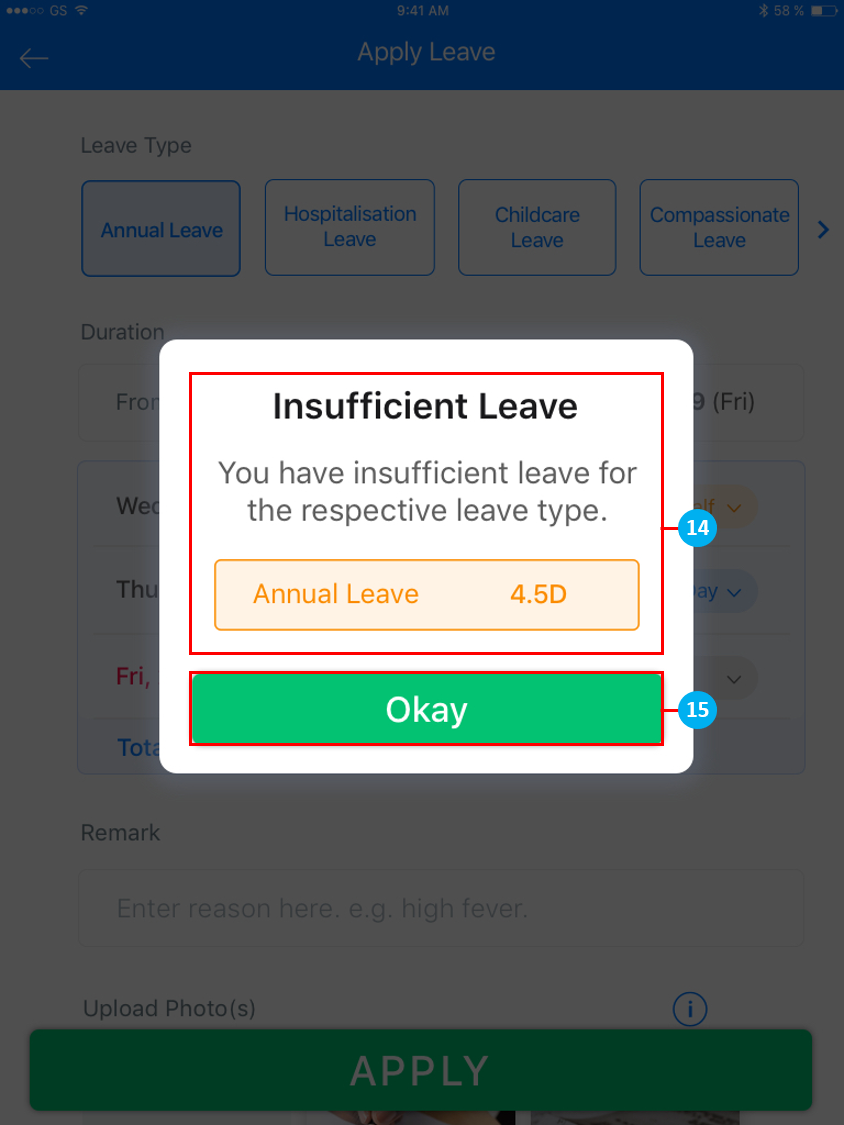
- If your applied leave exceeds your leave balance, you will get the following message and your leave balance will be displayed.
- Tap on Okay to return to the date selection page.
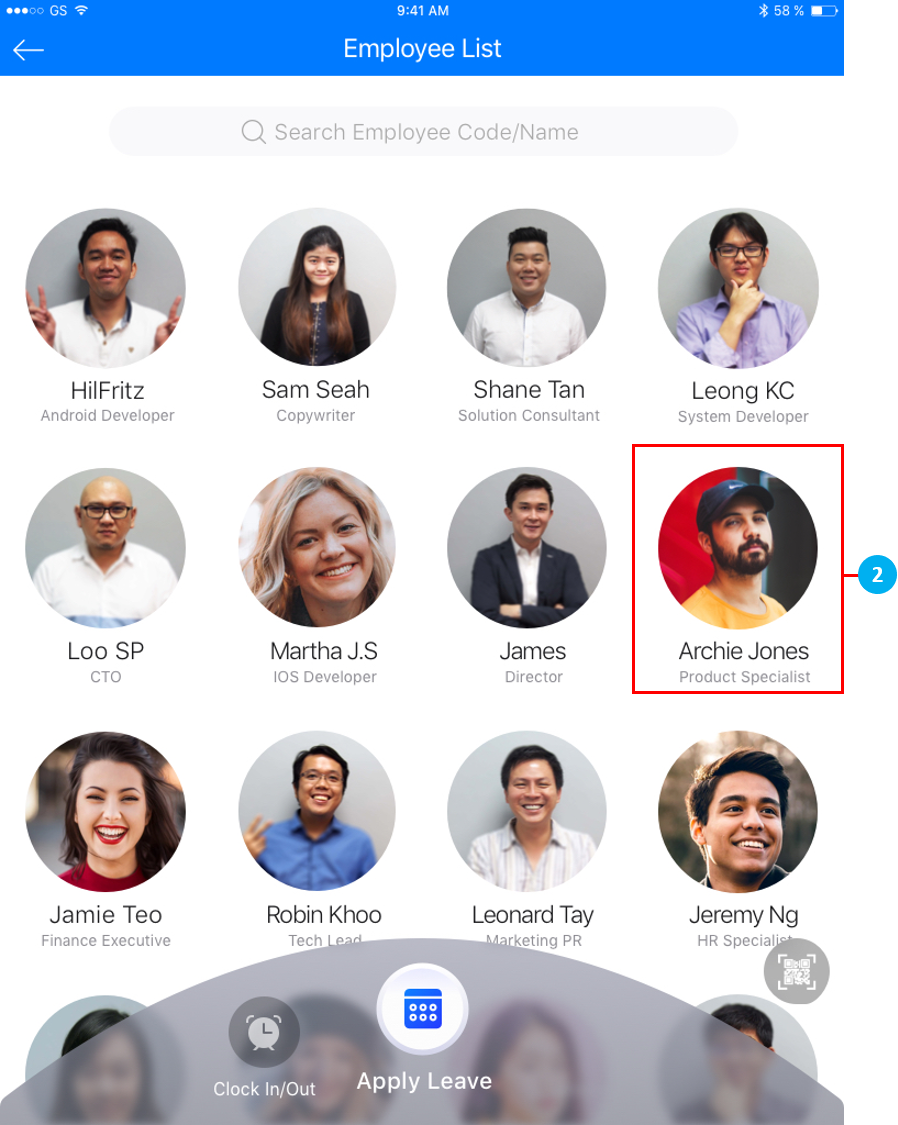
Employee List
- Tap on the Profile / User List on the extreme right of the screen to access the Employee List. To return to the Herd+ homepage, tap on the same button again.
- You can access your profile in the Employee List to take attendance or for leave application.