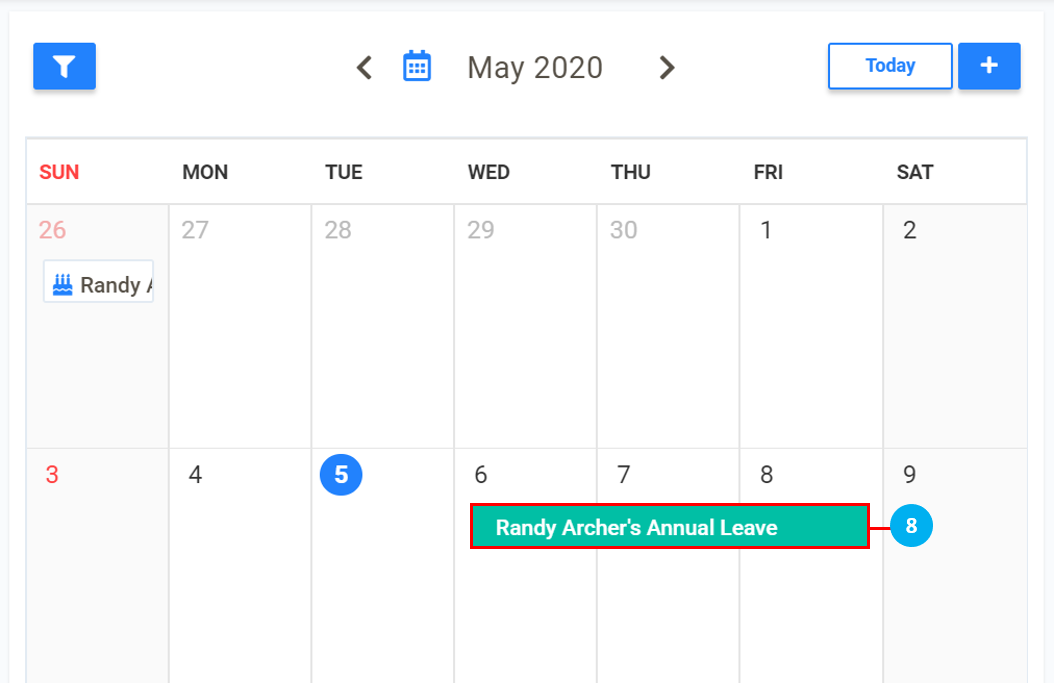
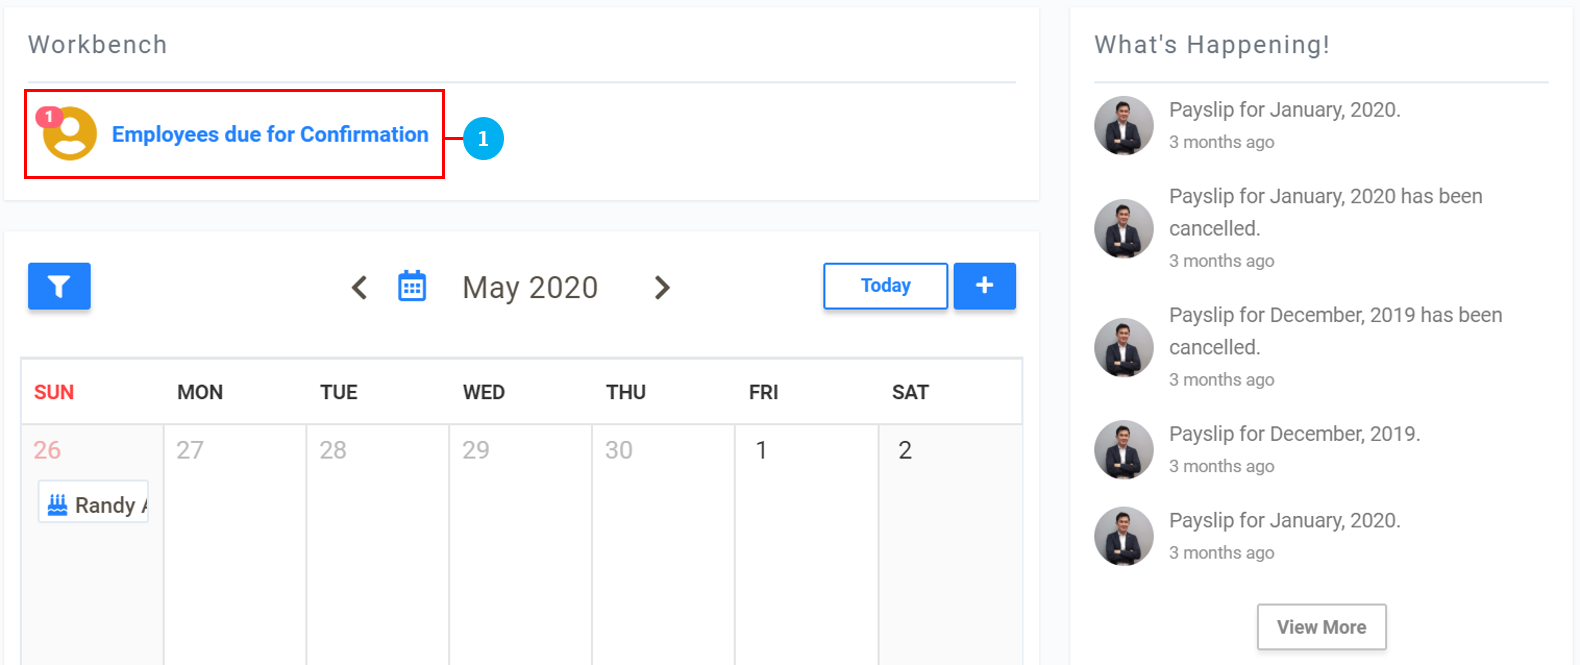
Click on the icon to view the filter options for the Leave Calendar display.
Click on the < and > to scroll to different months.
Click on "Today" to return to the current month.
Click on the icon to make Leave Applications.
Click to view a brief description of the event for that date.
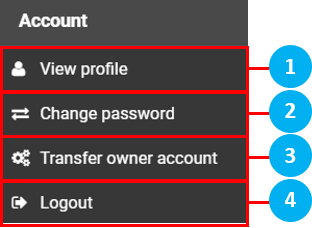
Account Sub Menu
Click to view Employee's profile. No changes to the profile can be made here
Click to change the password of your account
Click to transfer the owner account to another Employee
Click to Logout
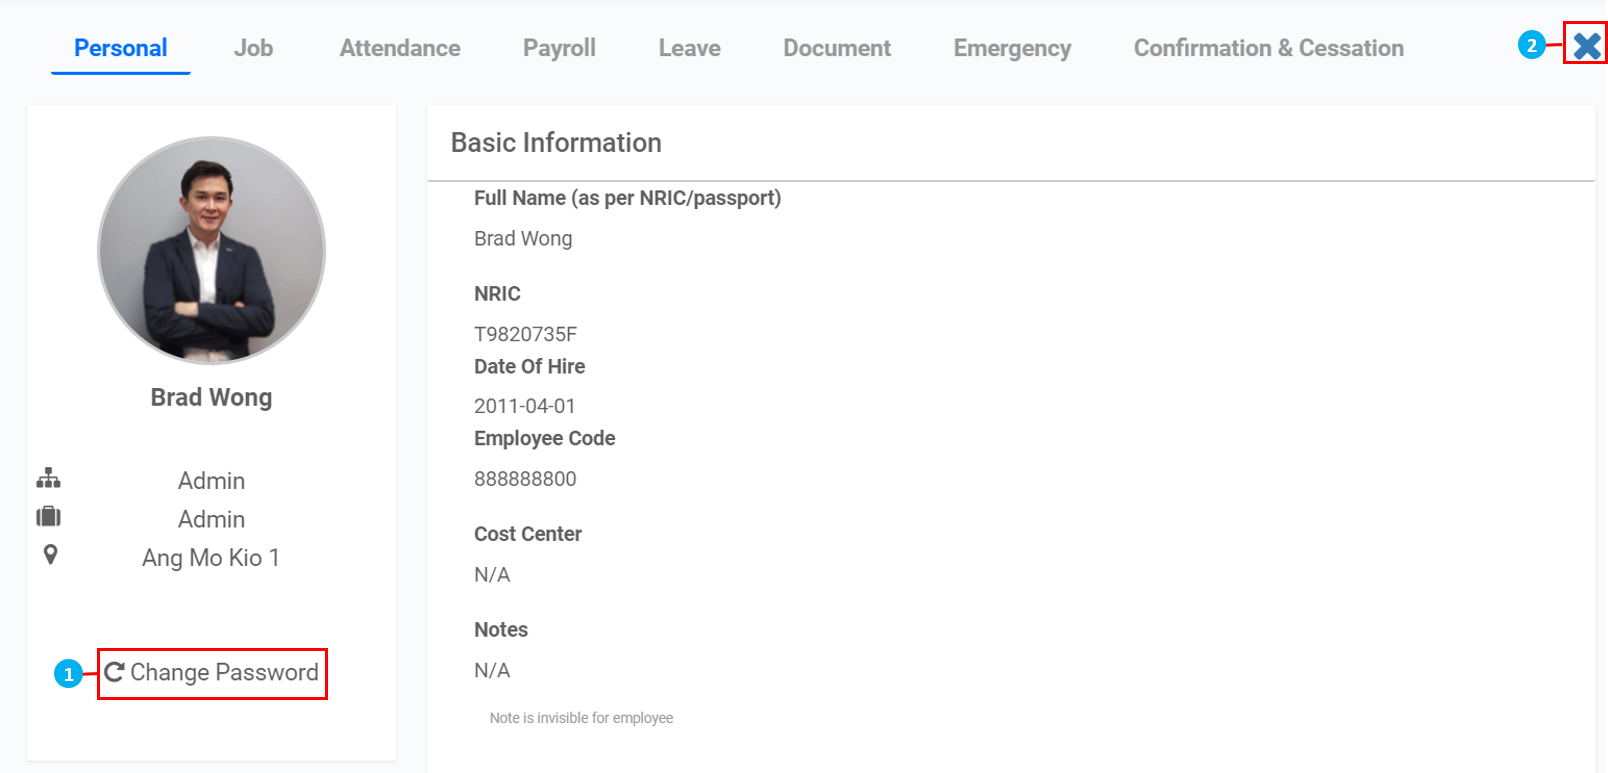
View Profile
Click to change the password of your account
Click to return to the main page
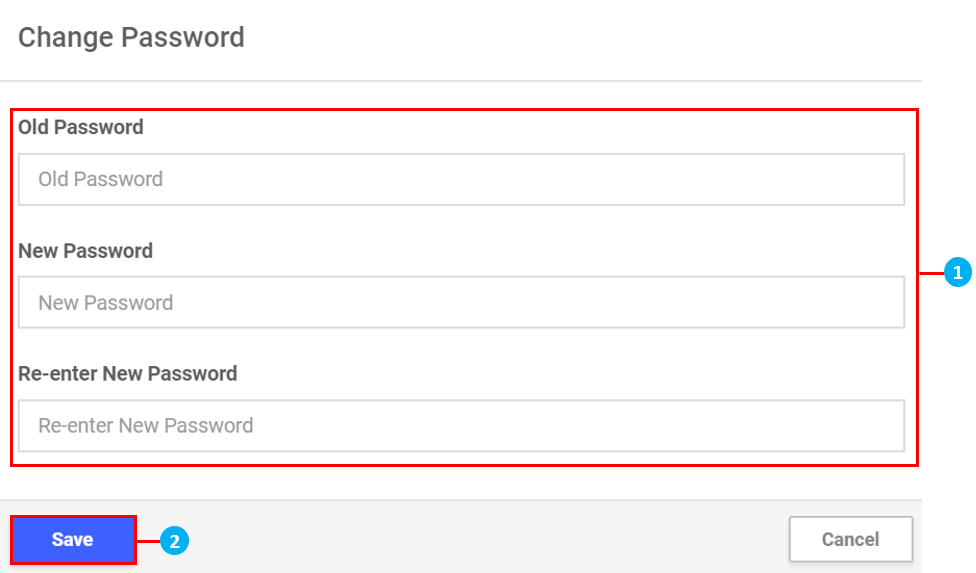
Change Password
Enter your old password, then your new password
Click Save
Transfer Owner Account
Search for Employee to transfer the owner account too and enter your password to confirm
Click Save
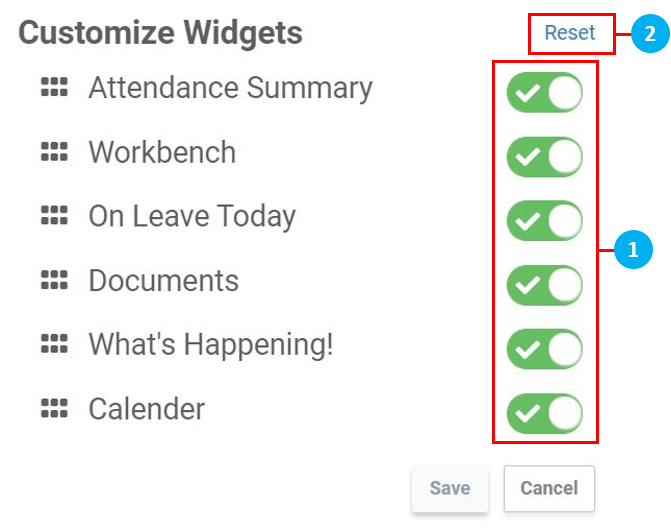
Add / Remove Widgets
Click on the toggle switches to add / removes widgets.
Click on "Reset" to reset the widget configuration to the default setup. Once done, click Save.
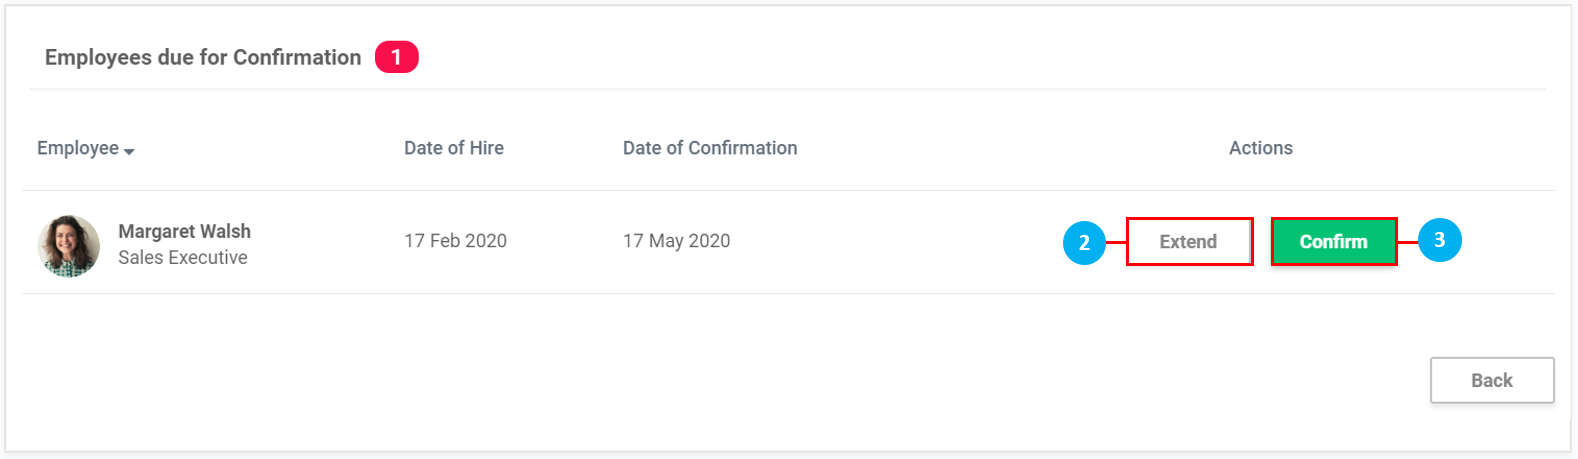
Employees due for Confirmation
Click on Employees due for Confirmation.
Click on Extend to extend Employee's probation period.
Click on Confirm to set an Employee's confirmation date.
Extend
Key in the number of days / weeks / months to extend the Probation period by.
Select days / weeks / months from the drop down list.
Click on the icon to check / select the Date of Confirmation.
Once done, click Extend, or Cancel to return to the previous page.
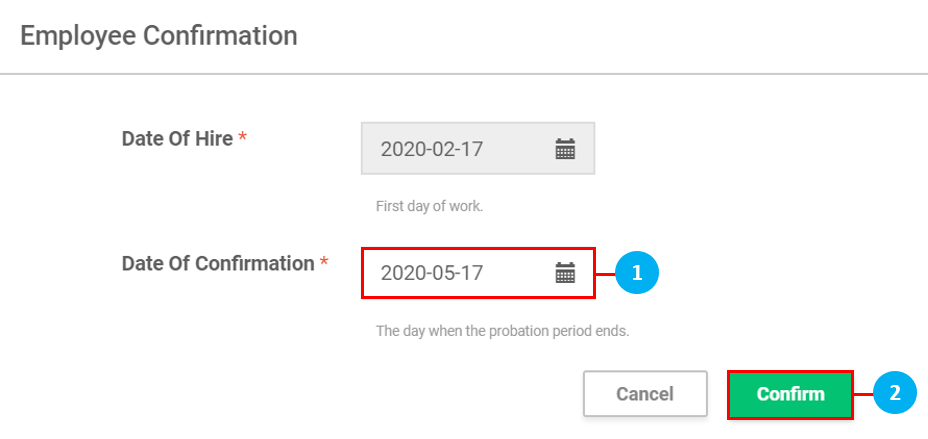
Confirm
Click on the icon to check / select the Date of Confirmation.
Once done, click Confirm, or Cancel to return to the previous page.
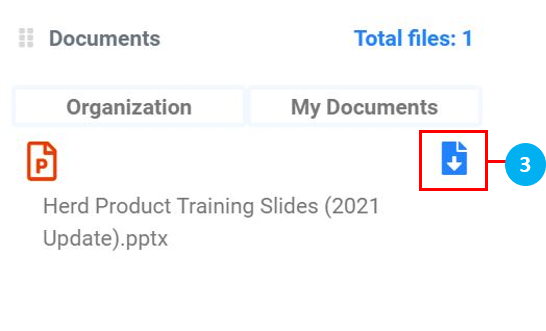
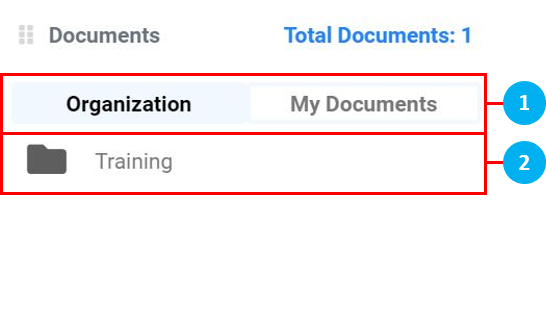
Organization / My Documents
Select the type of documents to access.
Click to open the folder to view the documents stored inside.
Click on the icon to download the document to your computer.
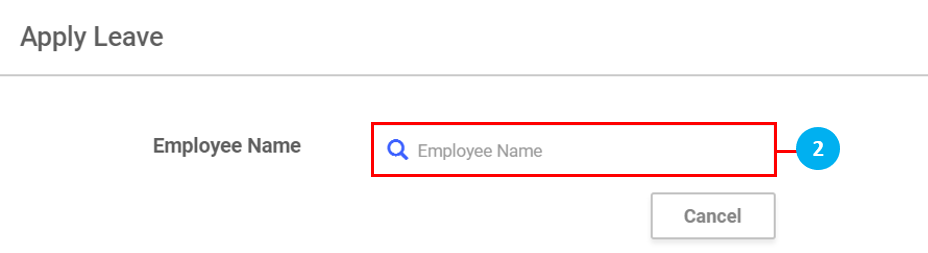
Leave Applications
Click on the icon to make Leave Applications.
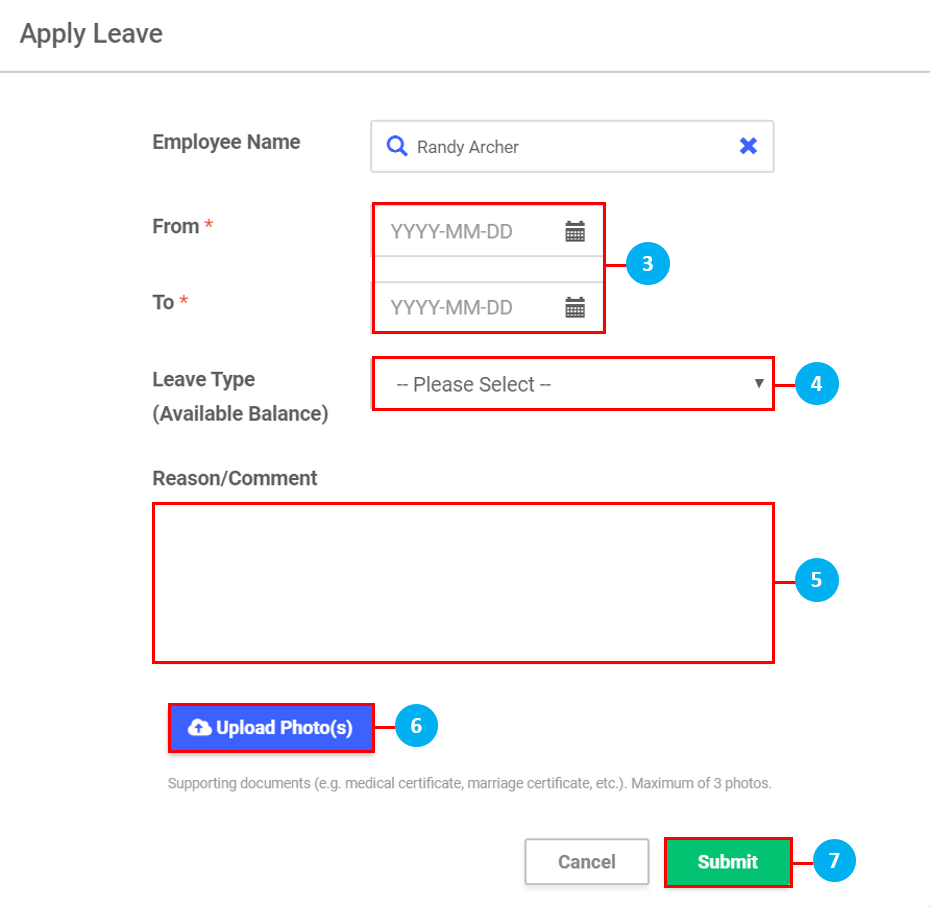
Key in the first 3 letters of the Employee's name in the search bar, and select it by clicking on it.
Click on the icons to select the dates.
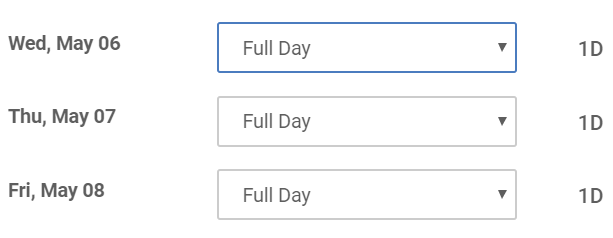
Select the Leave Type from the drop down list. Once done, a pop up box will appear to select if the leave will be taken as a "Full Day" / "1st Half" (morning) / "2nd Half" (afternoon) / "None" for each day. (*Note: Selecting "None" will remove that day from the leave application.)
Key in a Reason / Comment, if required.
Click to Upload Photo(s), if required.
Once done, click Submit.
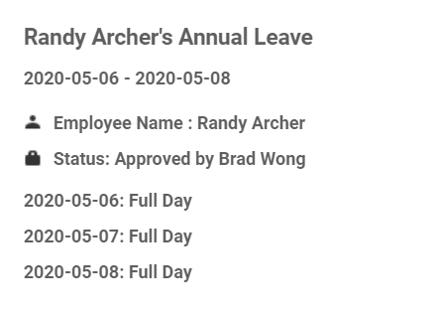
The leave application will appear on the Leave Calendar.
Click on the leave application to view the details as shown below.
 icon to minimize the left sidebar menu.
 icon to access the User Guide.
 icon to view notifications.
 icon to Add / Remove Widgets.
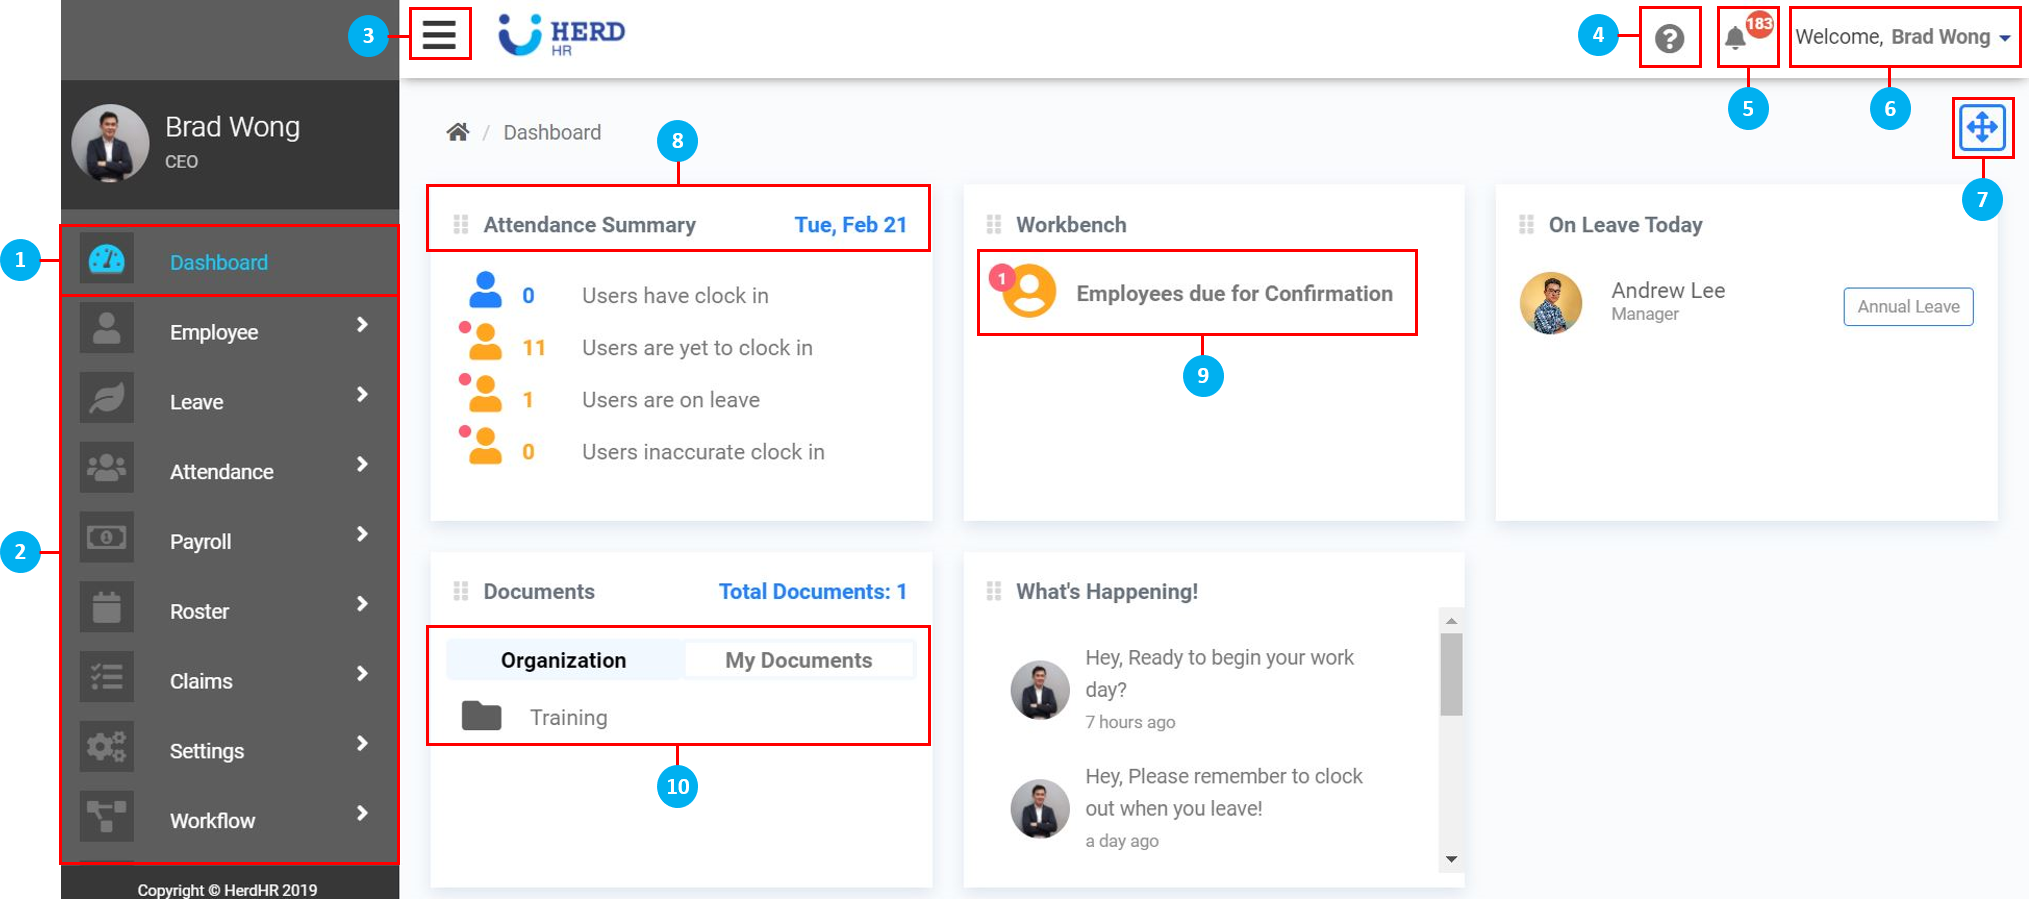
 icon to view the filter options for the Leave Calendar display.
 icon to make Leave Applications.
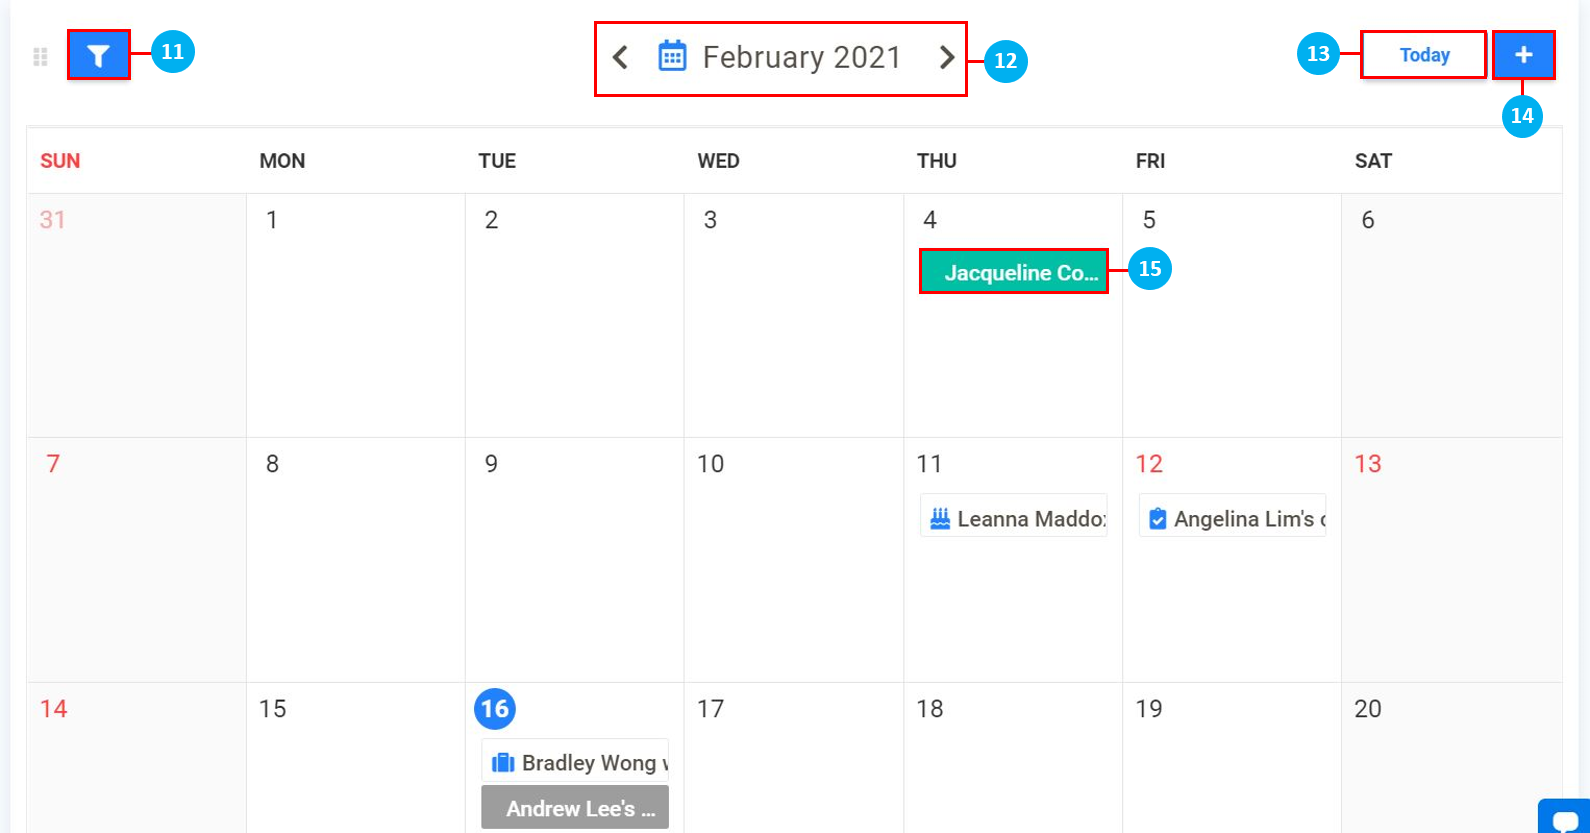

 icon to check / select the Date of Confirmation.
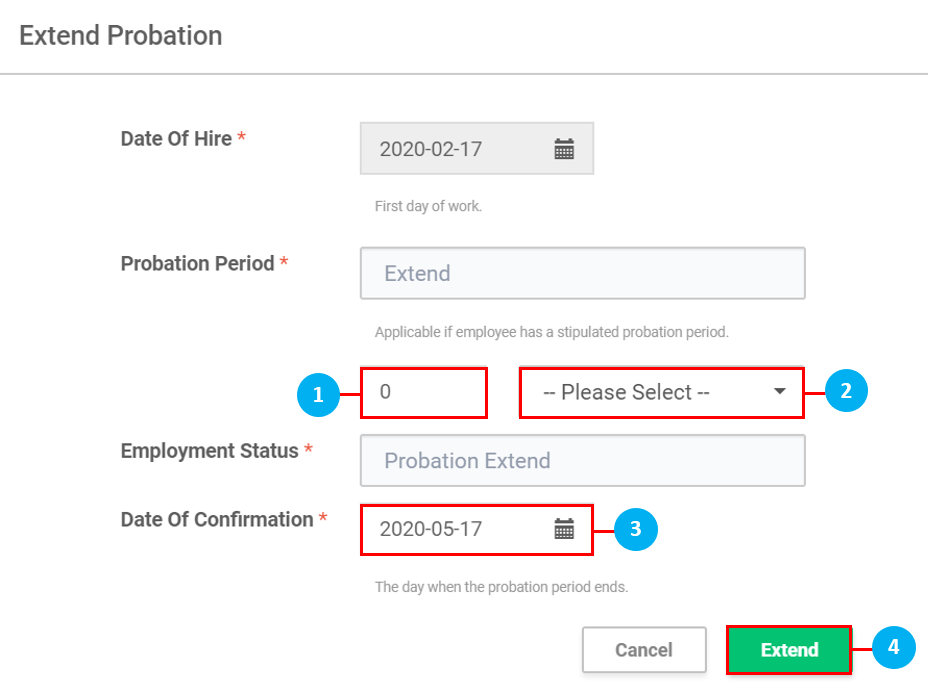
 icon to download the document to your computer.